

Note: This article refers to the Premier Legacy Templates, which may be outdated! If you’re using the Kajabi Pages Templates, please refer to the updated guide here.
Note: Adding Google Fonts to your site with the Premier Template requires access to the Code Editor available with the Pro Plan. Learn more about our different plans at kajabi.com/pricing.
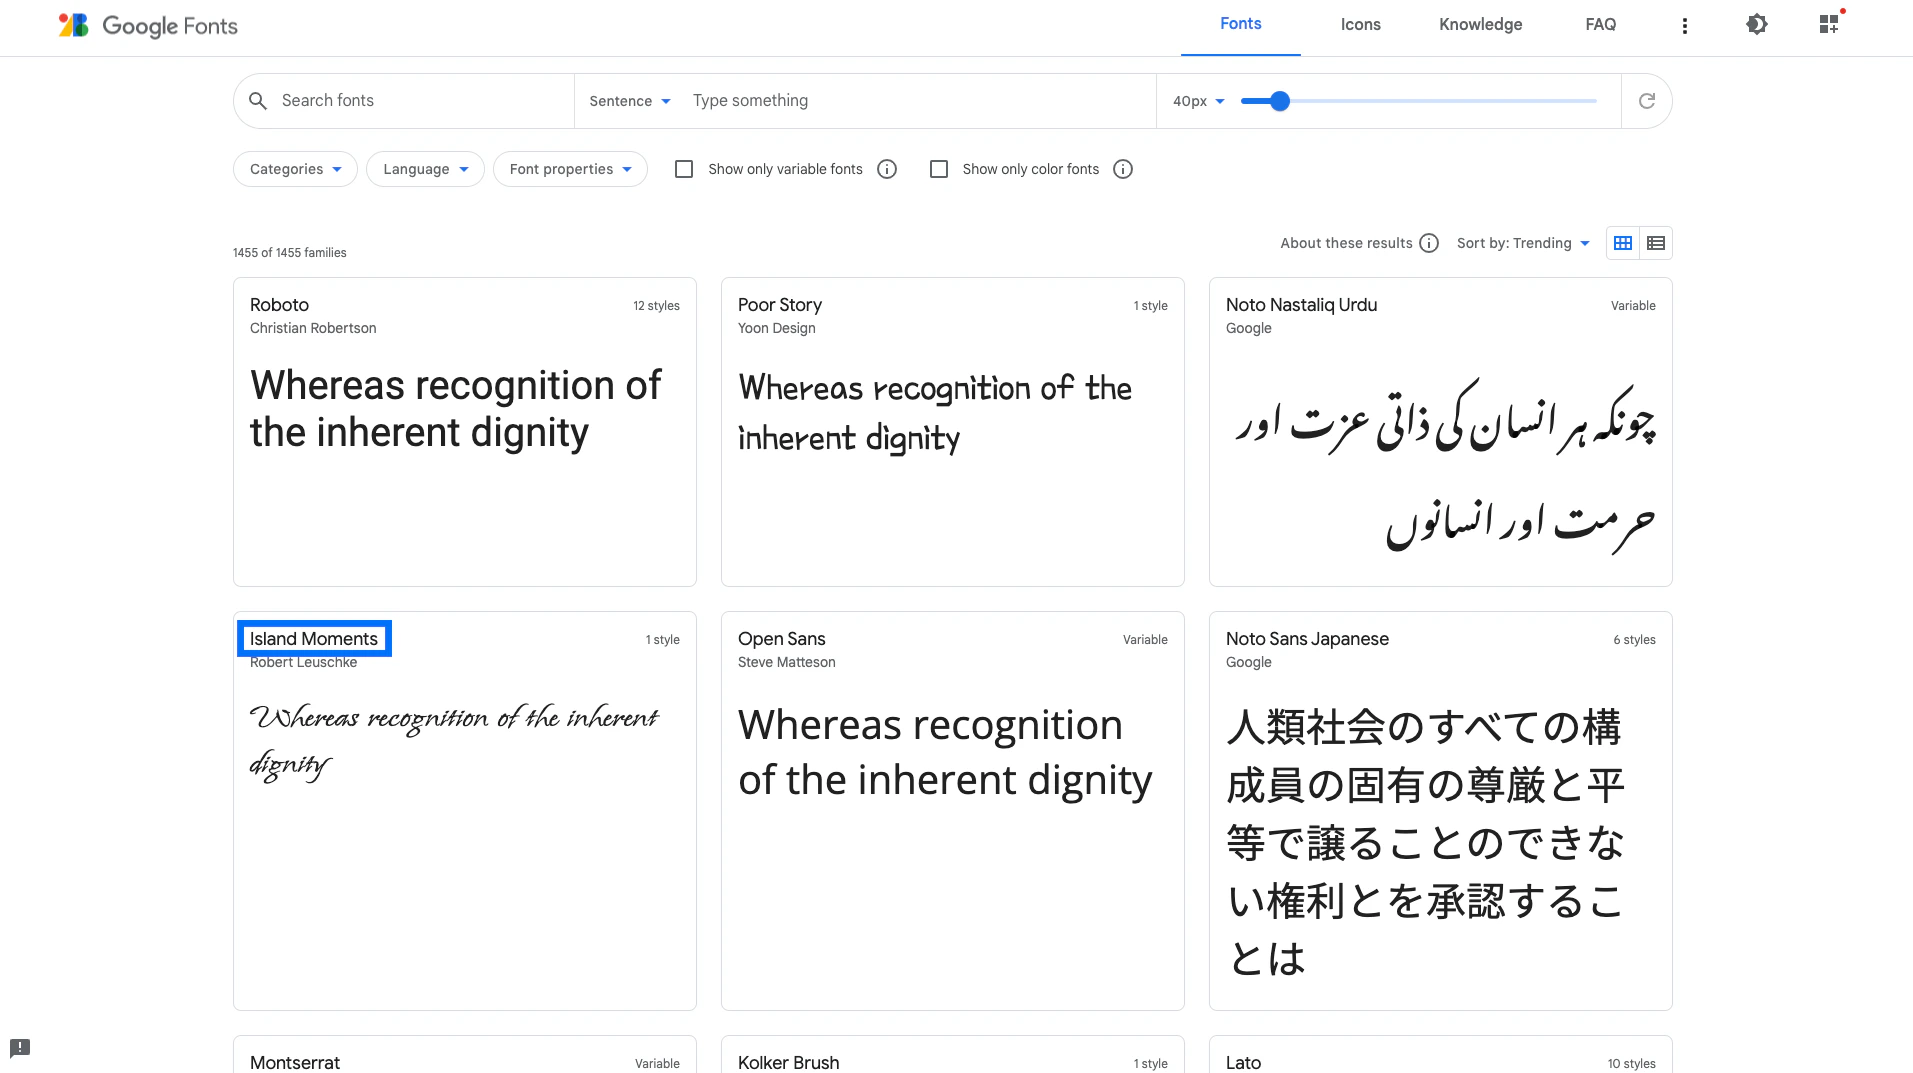
Step 1. Click here to choose a Google Font
- Find and copy the exact name of the Google Font you wish to use on your site. You’ll need it in just a moment. For example:
Step 2. Add your Google Font to your site code
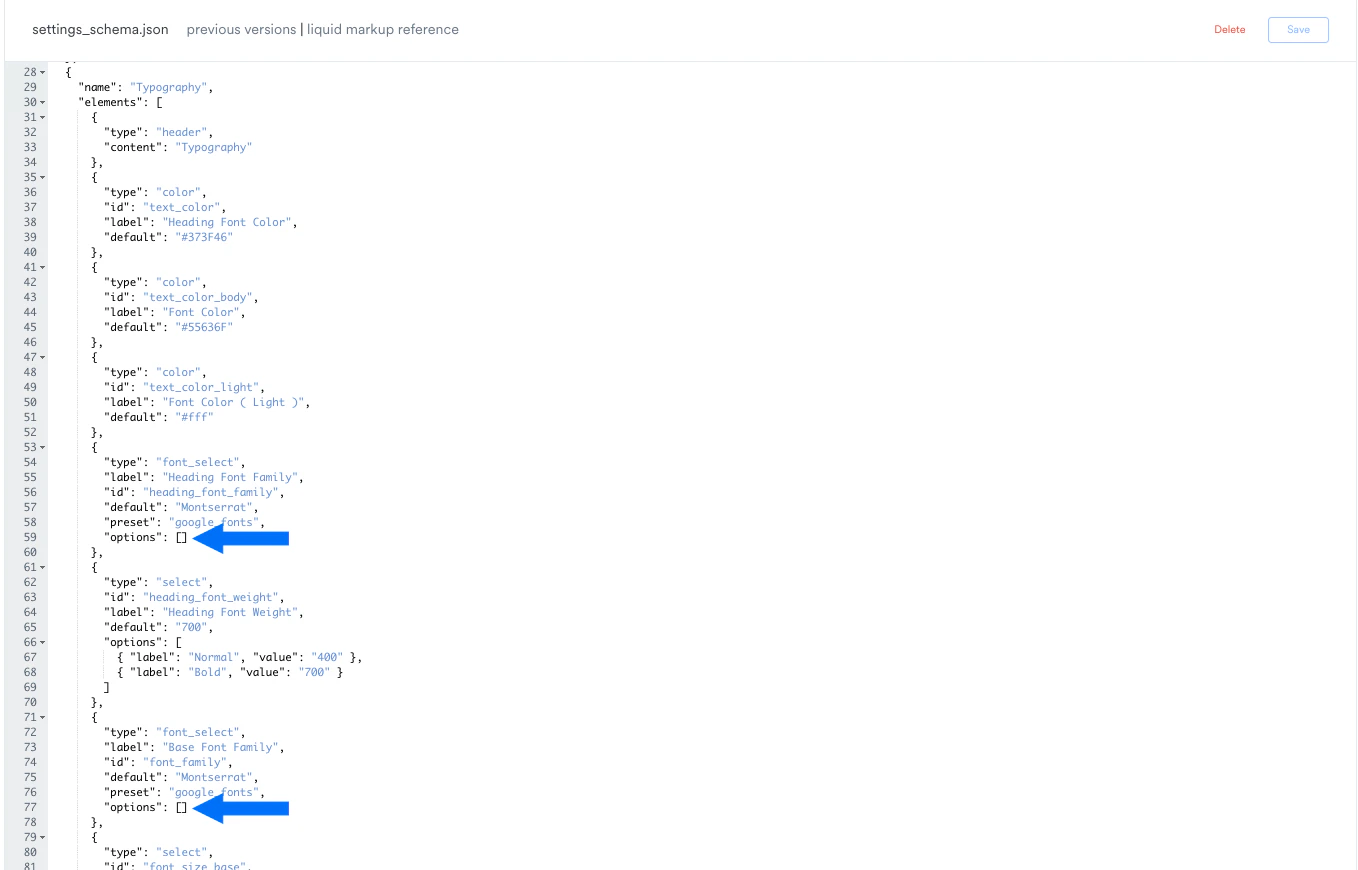
Navigate to your Kajabi account and open the Code Editor for the page where you wish to add your Google Font. Learn to access the Code Editor. In the Code Editor for your Page:- Open the
configfolder. - Open the
settings_schema.jsonfile. - Locate
"name": "Typography"near line 29:
Note: The line numbers may be different depending on your current settings.
- Find the square brackets to input “options” near lines 59 and 77:
- Next, place your cursor in between the square “options” brackets and add curly brackets containing the name of your font exactly as shown below, replacing Name of Google Font with the name of your chosen Google Font:
{"label": "Name of Google Font", "value": "Name of Google Font"}
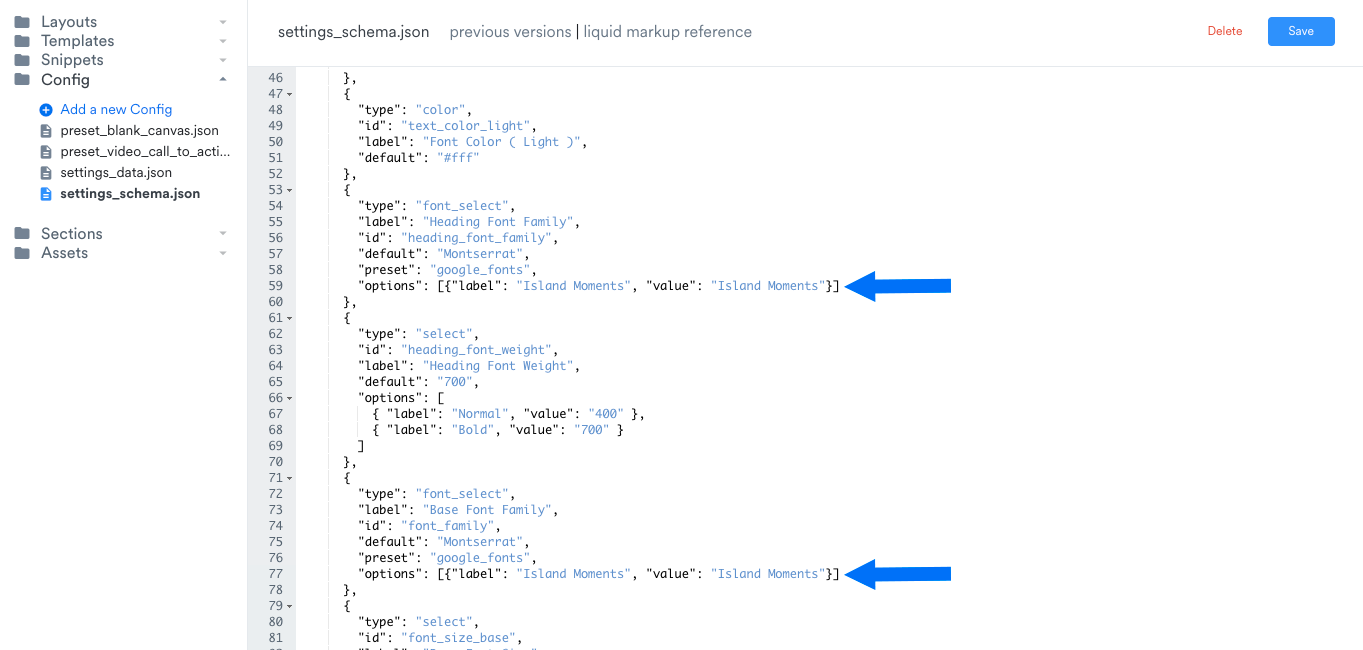
- Click Save, then click Customize:
Step 3. Select your Google Font in the Page Editor
- Click Settings in the left sidebar editor.
- Then, select Typography.
- Choose your Google Font from the Heading Font Family and/or Base Font Family dropdown menus (it will appear at the top of the list).
- Click Save to apply and keep your changes: