

Note: This article refers to the Premier Legacy Templates, which may be outdated. If you are using the Kajabi Pages Templates, please refer to the updated guide here.
Adding pricing options
- Open the Website tab from the Dashboard.
- Click Pages.
- Select the page you wish to customize or create a new page.
- Click Customize to open the template editor.
- Click + Add Section from the sidebar.
- Select Pricing Options.
- Click Add.
- Your newly created Section will generate at the bottom of the page.
- Click Save to keep your changes:
Customizing your pricing option section
Heading and subheading
Customize the message displayed above your Pricing Options.Section appearance
Configure your Section Appearance to change the Background and Text Color, select the Text Alignment, and change the Spacing of the Section.Add pricing option
Add more Pricing Option cards by scrolling to the bottom of the sidebar editor and selecting Add Pricing Option.Customizing your pricing options
Customizing each Pricing Option Block by editing the:- Title
- Price
- Frequency
- Text Content (typically the features included with the specific pricing option)
Most popular
Select your Most Popular Pricing Option to make it stand out to your customers: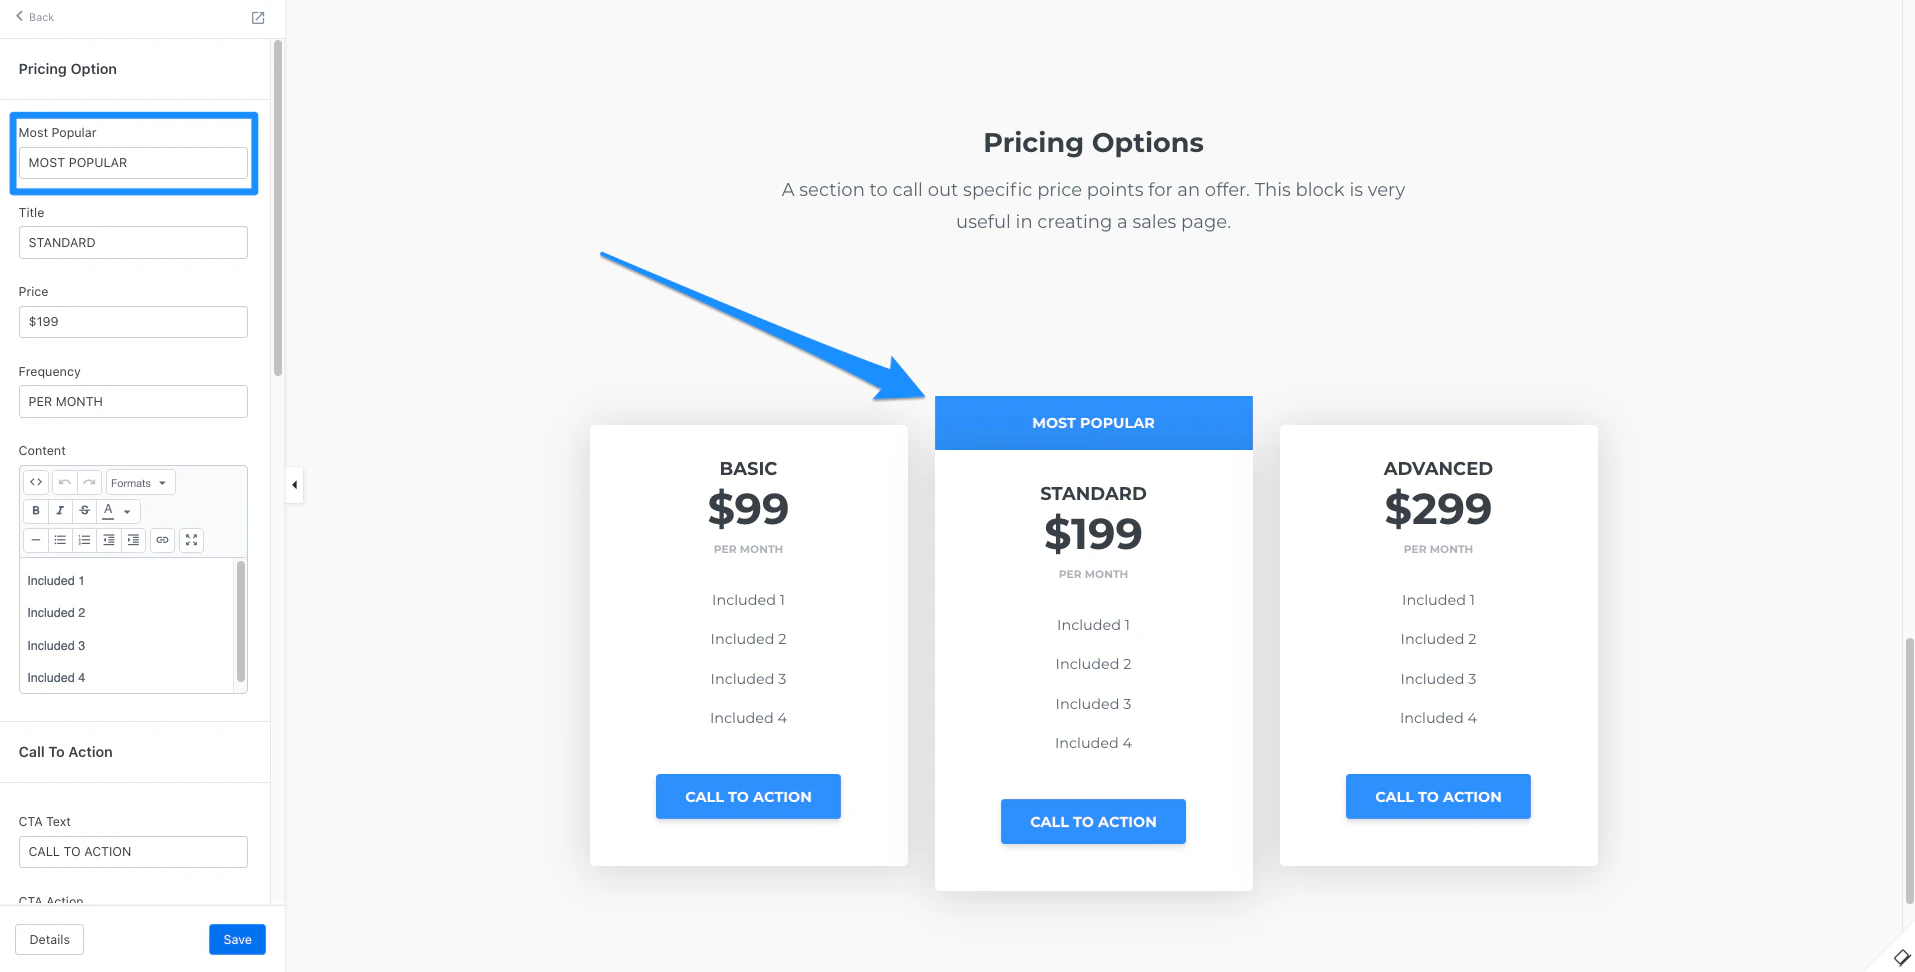
Call to action
Include a Call to Action button for each Pricing Option for your customers to:- Go to a Landing Page
- Go to a Checkout Page
- Download a File
- Go to a URL
- Open two step optin popup
- Go to a section on the page
Note: When using the Go to a URL action, be sure to enter a full URL (e.g., https://kajabi.com/).
- CTA Style
- CTA Size
- Button Width
- Button Color
- Button Text Color
Time reveal
The Time Reveal Settings reveal your Call to Action (CTA) button in the Feature Block a specified amount of time (Offset) after an Event occurs. To set up a Time Reveal for your CTA button in the Feature Block:- Select an Event
- Enter your Offset value
- Specify the Offset Time Period in seconds, minutes, hours, or days
Block appearance
Customize your overall Block appearance by selecting your colors:- Background Color
- Text Color
- Accent Color
- Popular Color