

Why am I being asked to provide data safety information?
Customers need to know how you’ll handle their personal data prior to downloading the app. All app providers are required to provide this information when submitting their app for publication.Complete the form to submit the data
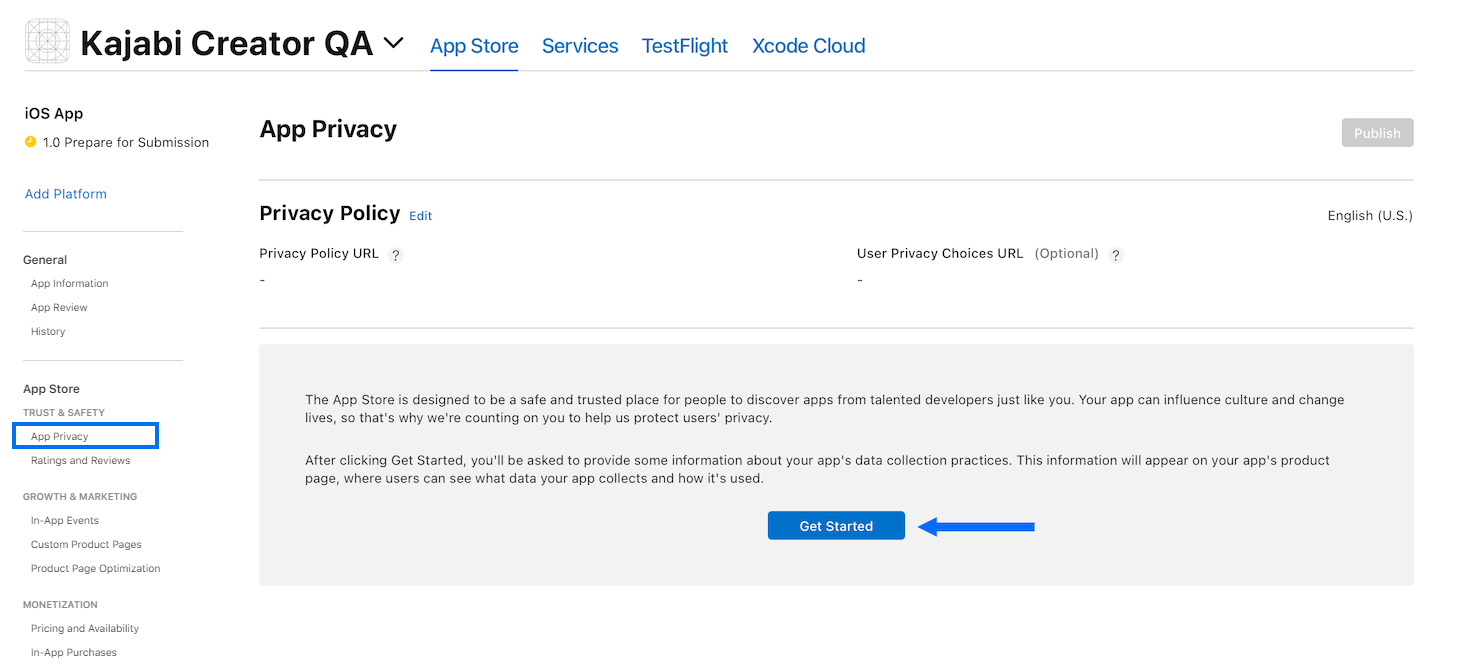
Enter the selections into the App Privacy information form in the App Store dashboard as directed in this guide. Any options not listed here can be left unchecked. To complete the App Privacy form:- Under Trust & Safety in the left menu, click App Privacy.
Note:
If you’re not already logged into App Store Connect, first login and select the Branded App icon to get to the App Privacy menu.
- Then, click Get Started:
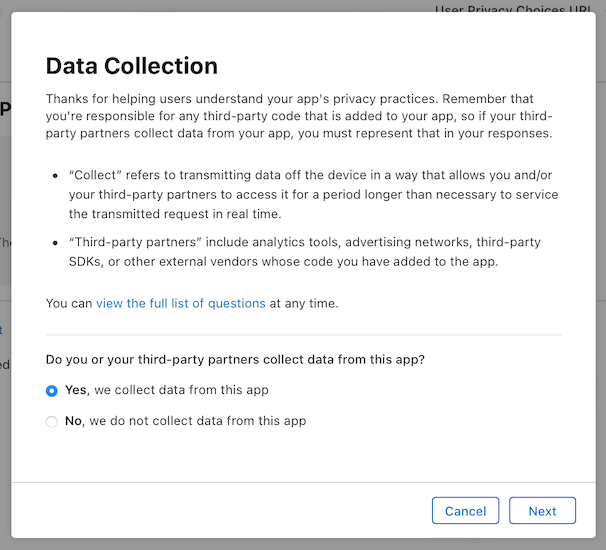
- Select Yes, we collect data from this app
- Click Next:
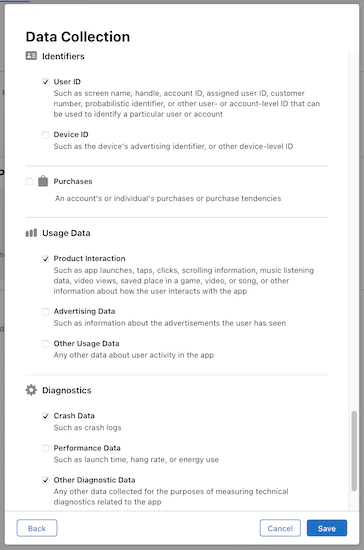
Contact Info
Check the checkbox next to:- Email Address:
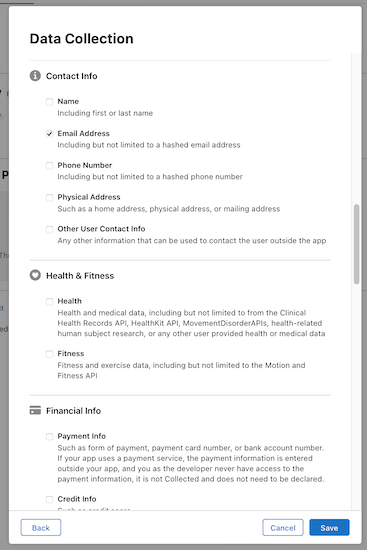
Identifiers
Check the checkbox next to:- User ID
Usage Data
Check the checkbox next to:- Product Interaction
Diagnostics
Check the checkboxes next to:- Crash Data
- Other Diagnostic Data
- Click Save:
- Click OK to close the notification popup. You’re already on the correct page.
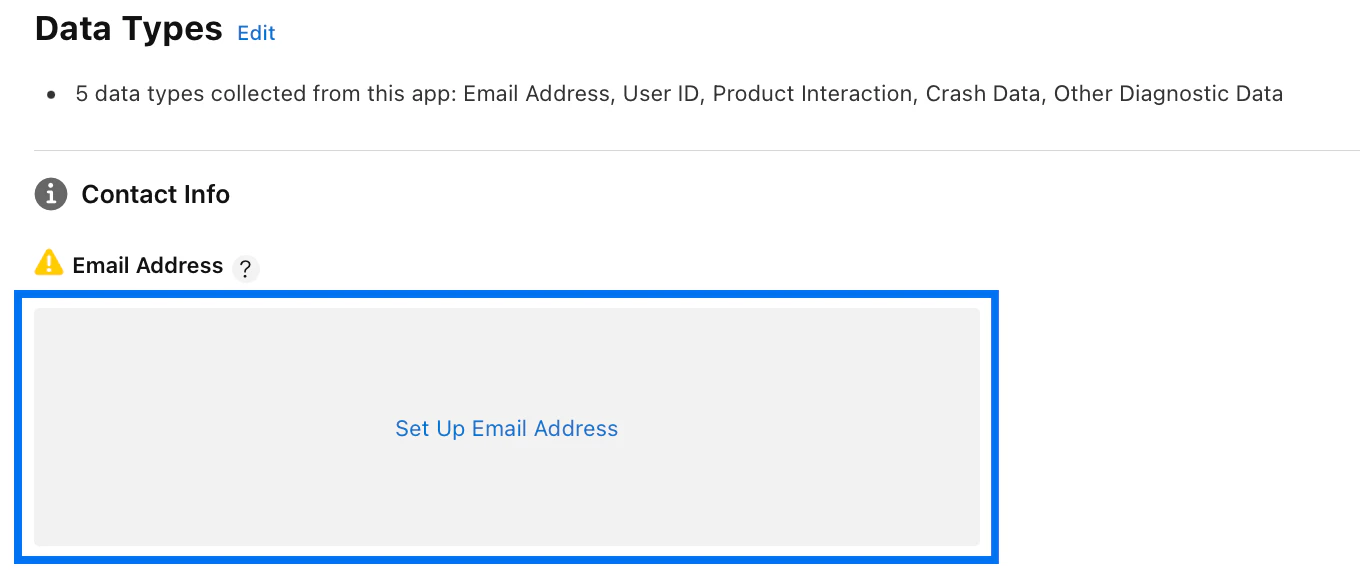
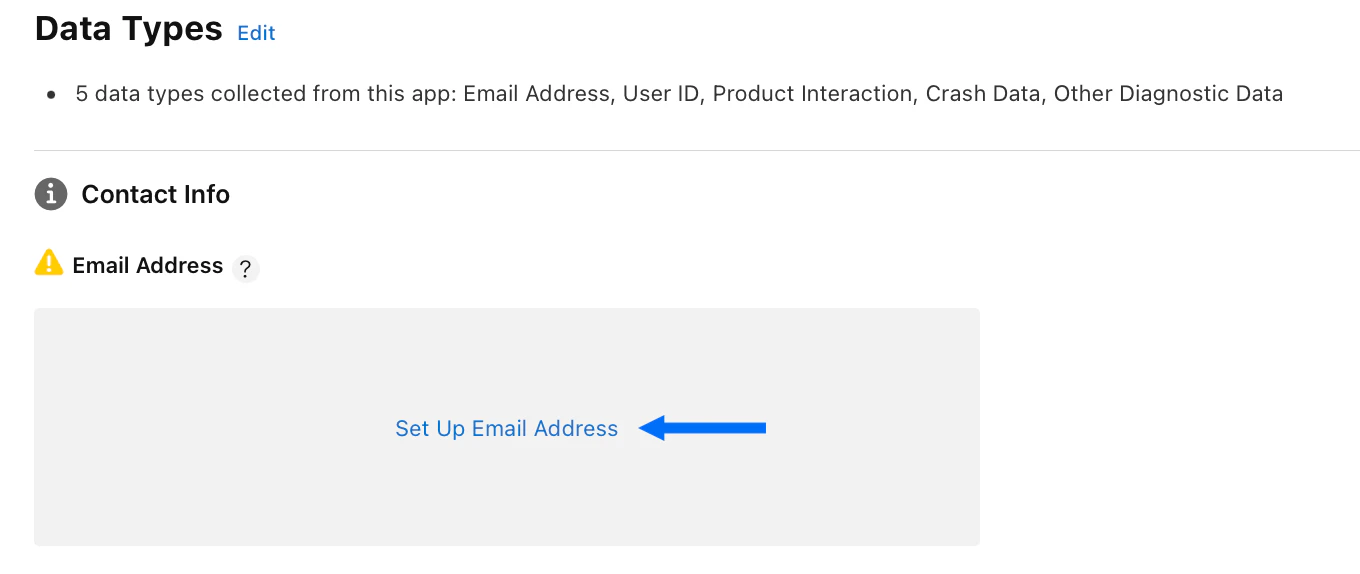
Contact Info
Email Address
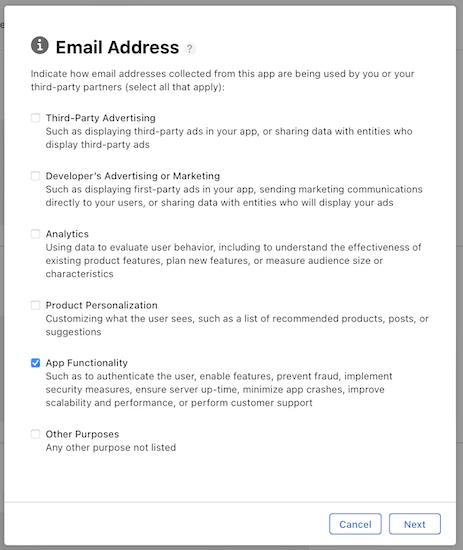
- Click Set Up Email Address:
- Check the checkbox next to App Functionality
- Click Next:
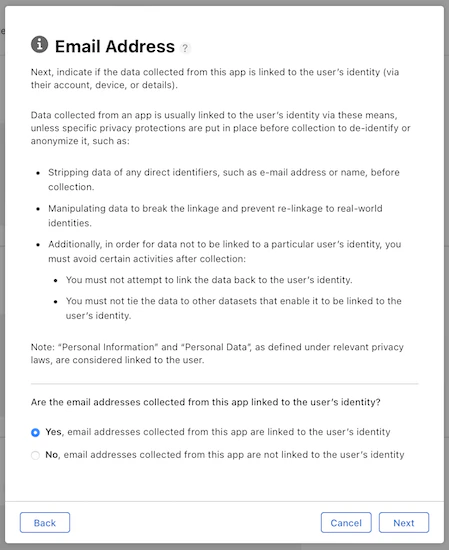
- Select Yes, email addresses collected from this app are linked to the user’s identity
- Click Next:
- Review the information about Tracking and Third-Party Data and click Next
- Review the tracking examples and click Next
- Select No, we do not use email addresses for tracking purposes
- Click Save:

Identifiers
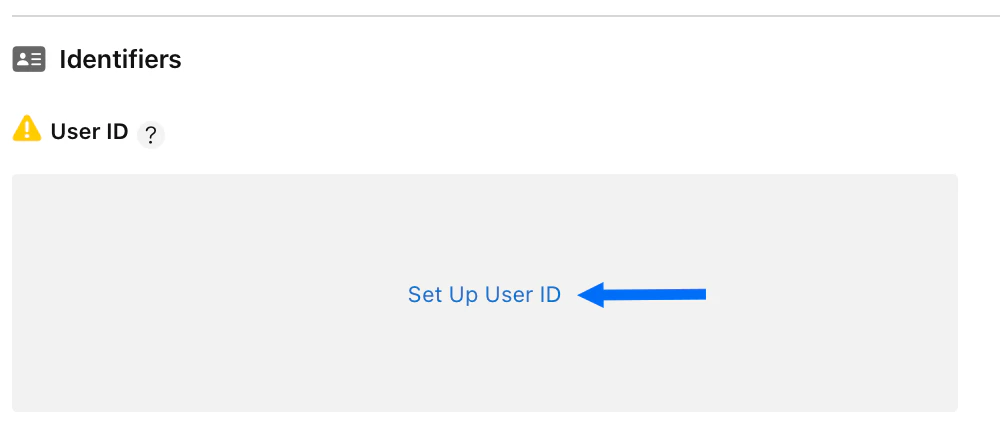
User ID
- Click Set Up User ID:
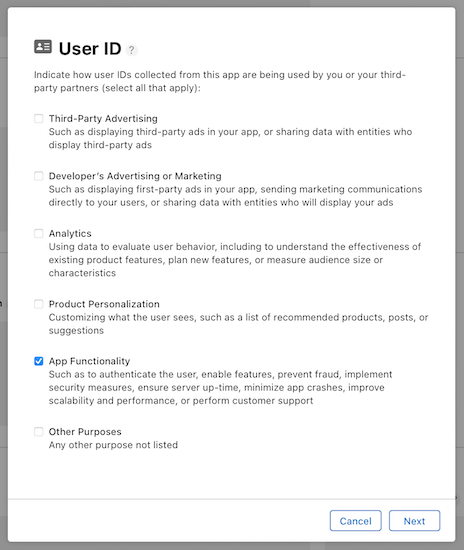
- Check the checkbox next to App Functionality
- Click Next:
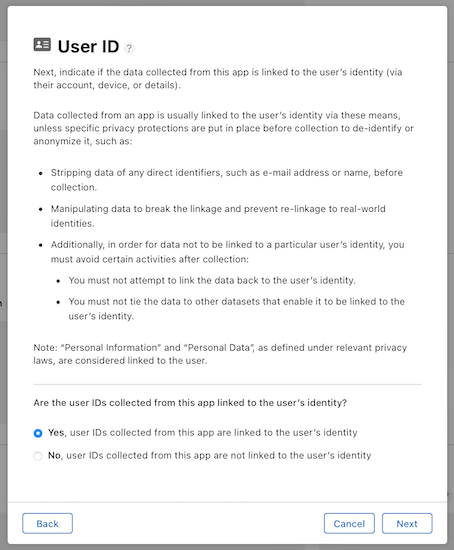
- Select Yes, user IDs collected from this app are linked to the user’s identity
- Click Next:
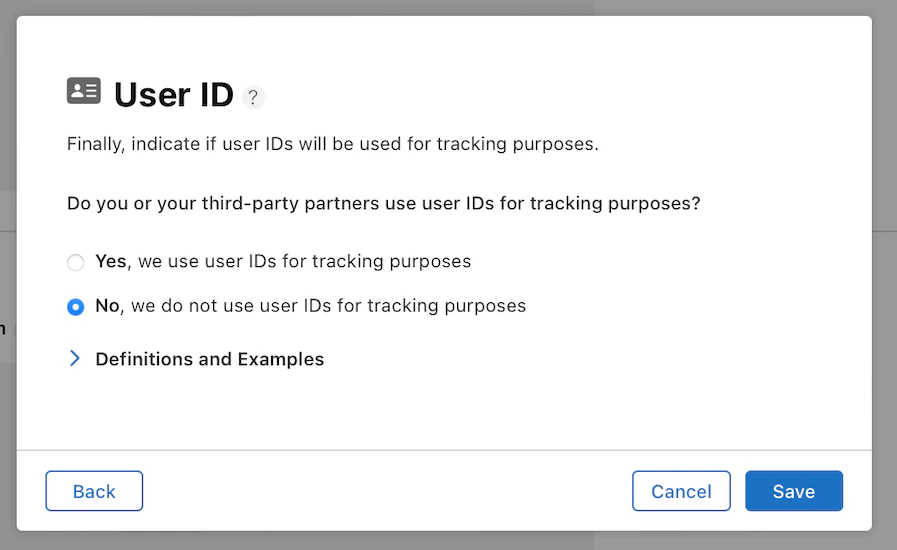
- Select No, we do not use user IDs for tracking purposes
- Click Save:
Usage Data
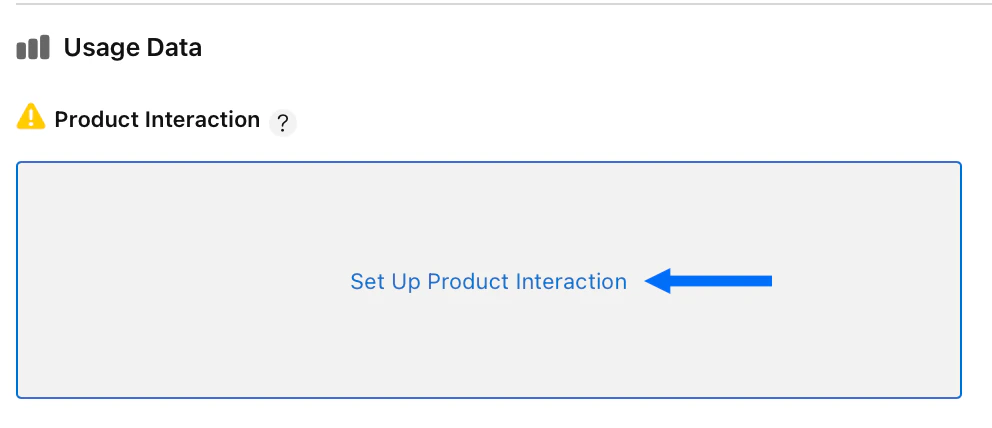
Product Interaction
- Click Set Up Product Interaction:
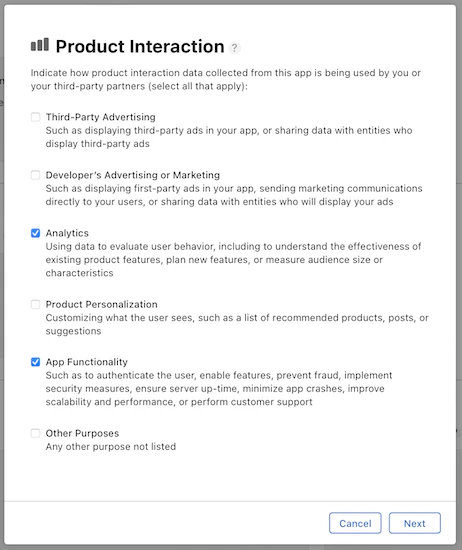
- Check the checkbox next to Analytics
- Check the checkbox next to App Functionality
- Click Next:
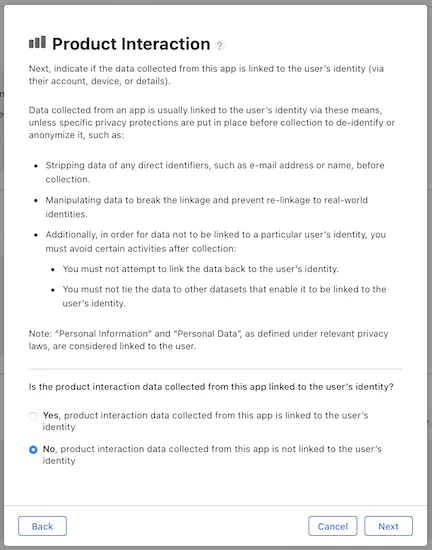
- Select No, product interaction data collected from this app is not linked to the user’s identity
- Click Next:
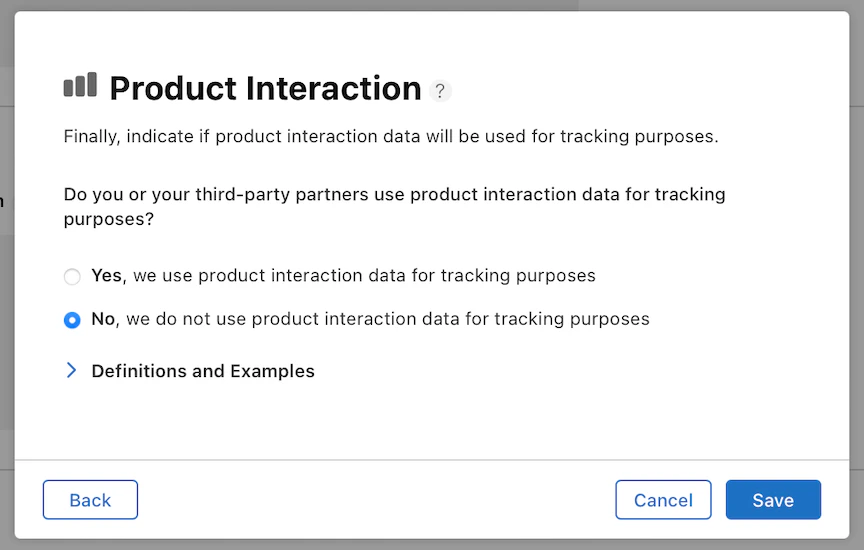
- Select No, we do not use product interaction data for tracking purposes
- Click Save:
Diagnostics
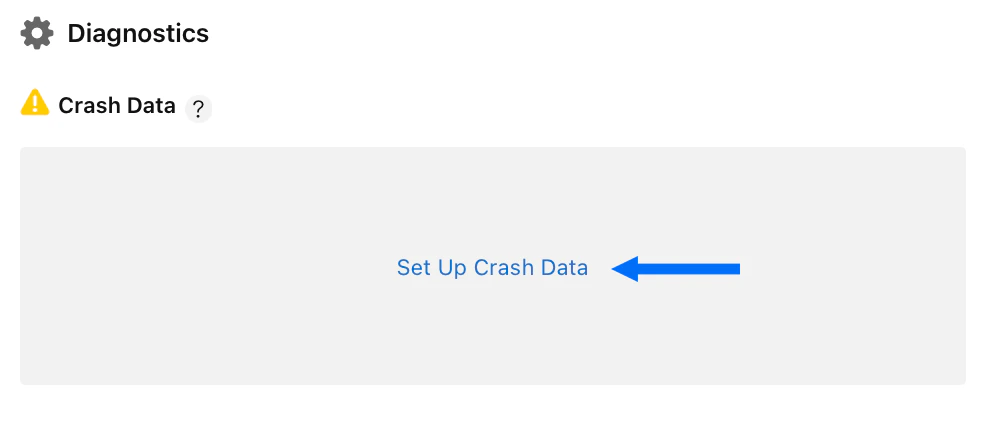
Crash Data
- Click Set Up Crash Data:
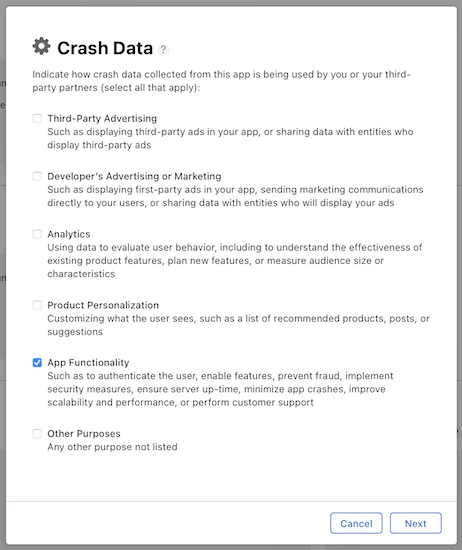
- Check the checkbox next to App Functionality
- Click Next:
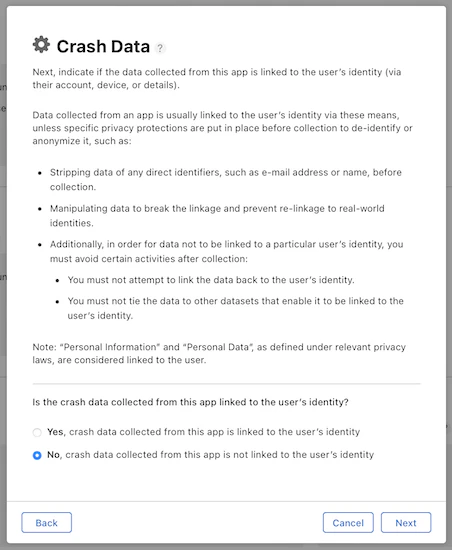
- Select No, crash data collected from this app is not linked to the user’s identity
- Click Next:
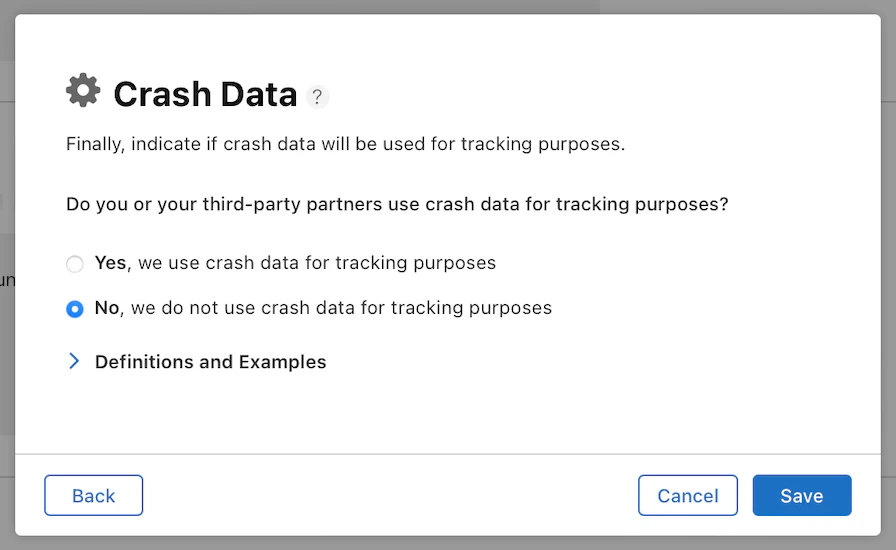
- Select No, we do not use crash data for tracking purposes
- Click Save:
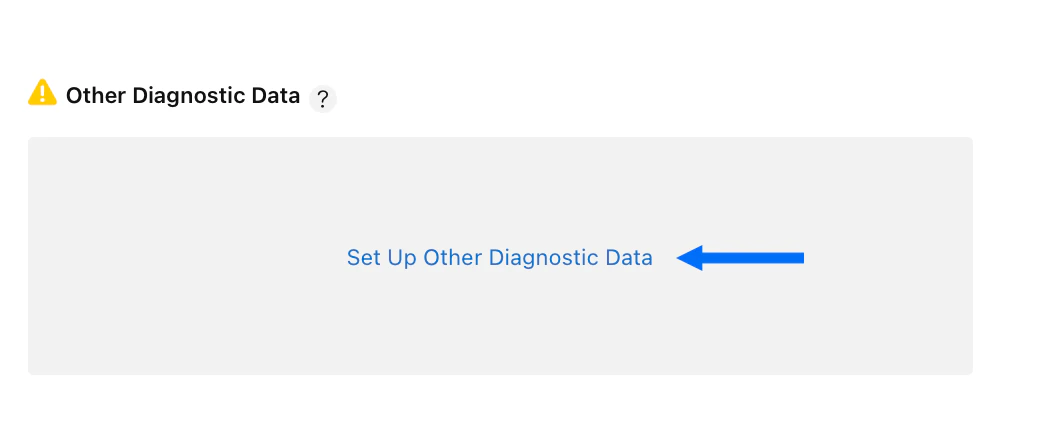
Other Diagnostic Data
- Click Set Up Other Diagnostic Data:
- Check the checkbox next to App Functionality
- Click Next:

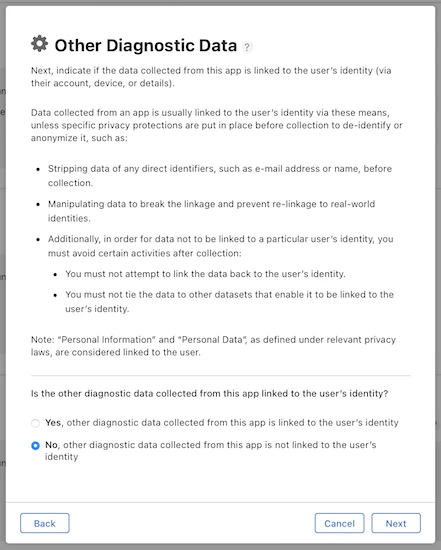
- Select No, other diagnostic data collected from this app is not linked to the user’s identity
- Click Next:
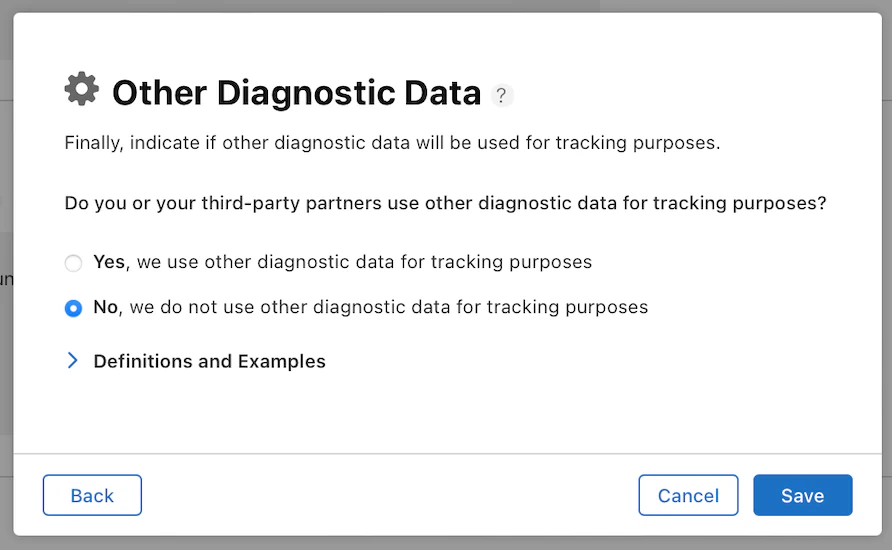
- Select No, we do not use other diagnostic data for tracking purposes
- Click Save:
- Scroll up to the top right corner of the page and click Publish to save the data privacy information
- Click Publish again in the popup modal to confirm