

What are Variants?
Variants are alternate versions of a custom app page that only display to members who match specific targeting conditions. The system evaluates each member’s profile and automatically shows them the most relevant variant. For example, you can create variants based on:- Products owned — Target members who have purchased specific products
- Offers purchased — Target based on specific offer purchases (owned or not owned)
- Tags — Use member tags for personalization
- Custom segments — Leverage pre-defined member segments from your contact management
Important:
Only custom screens can have variants. System screens (Home, Library, Community) cannot be used as parent screens for variants.
Create a Variant
- From the Mobile App Builder, go to the Screens tab.
- Open the custom page you want to create a variant for (variants are only available for custom screens).
- Click Select screen variant in the top-right corner.
- In the drop down menu, click + Add a variant:

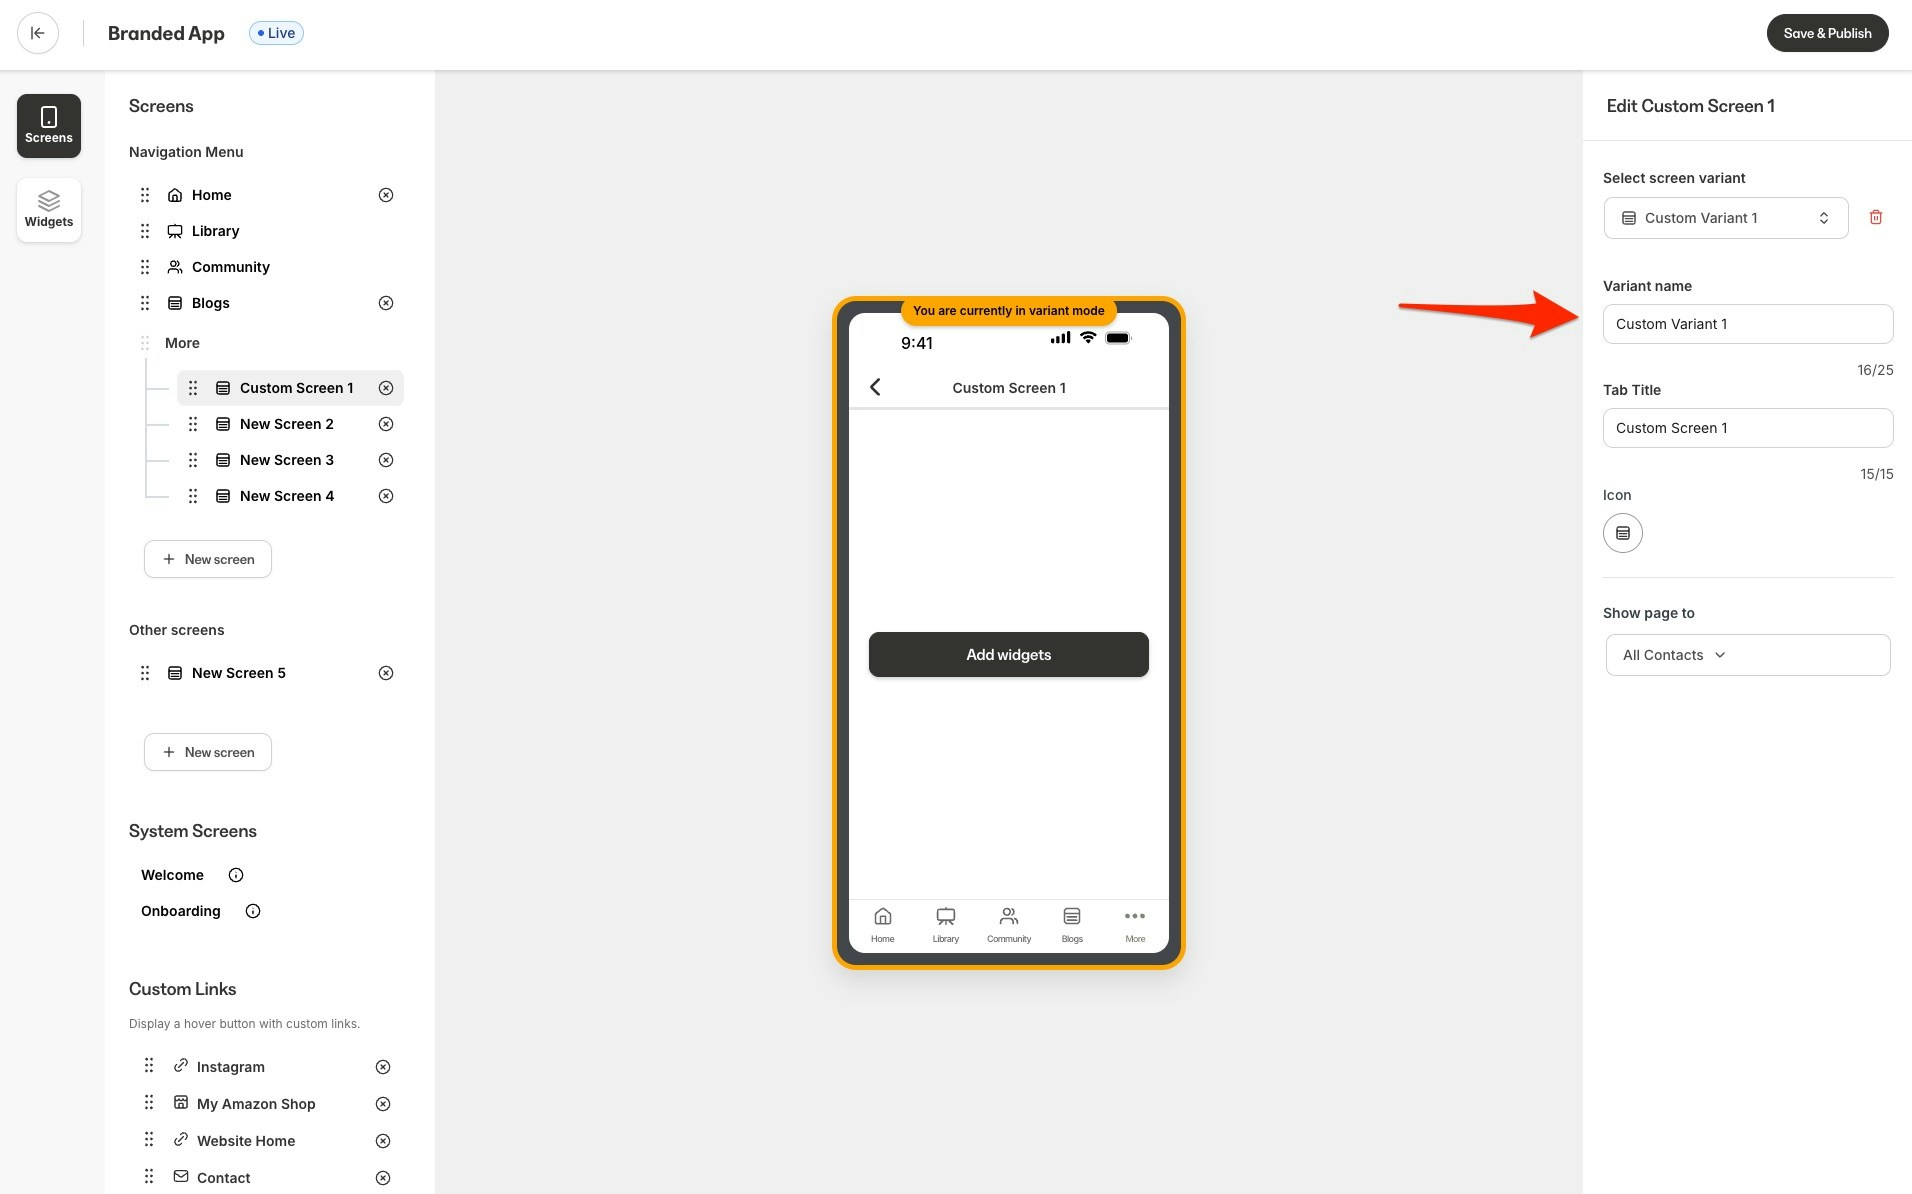
- Customize an Internal Title for your variant — this helps you manage multiple variants.
- The variant will be an exact widget copy of your original page that you can customize (screen name, icon, widgets can all be customized):
Note:
Each parent screen can have up to 20 variants by default.
Target a Variant to a segment
- While viewing your variant, select the drop down Show page to:
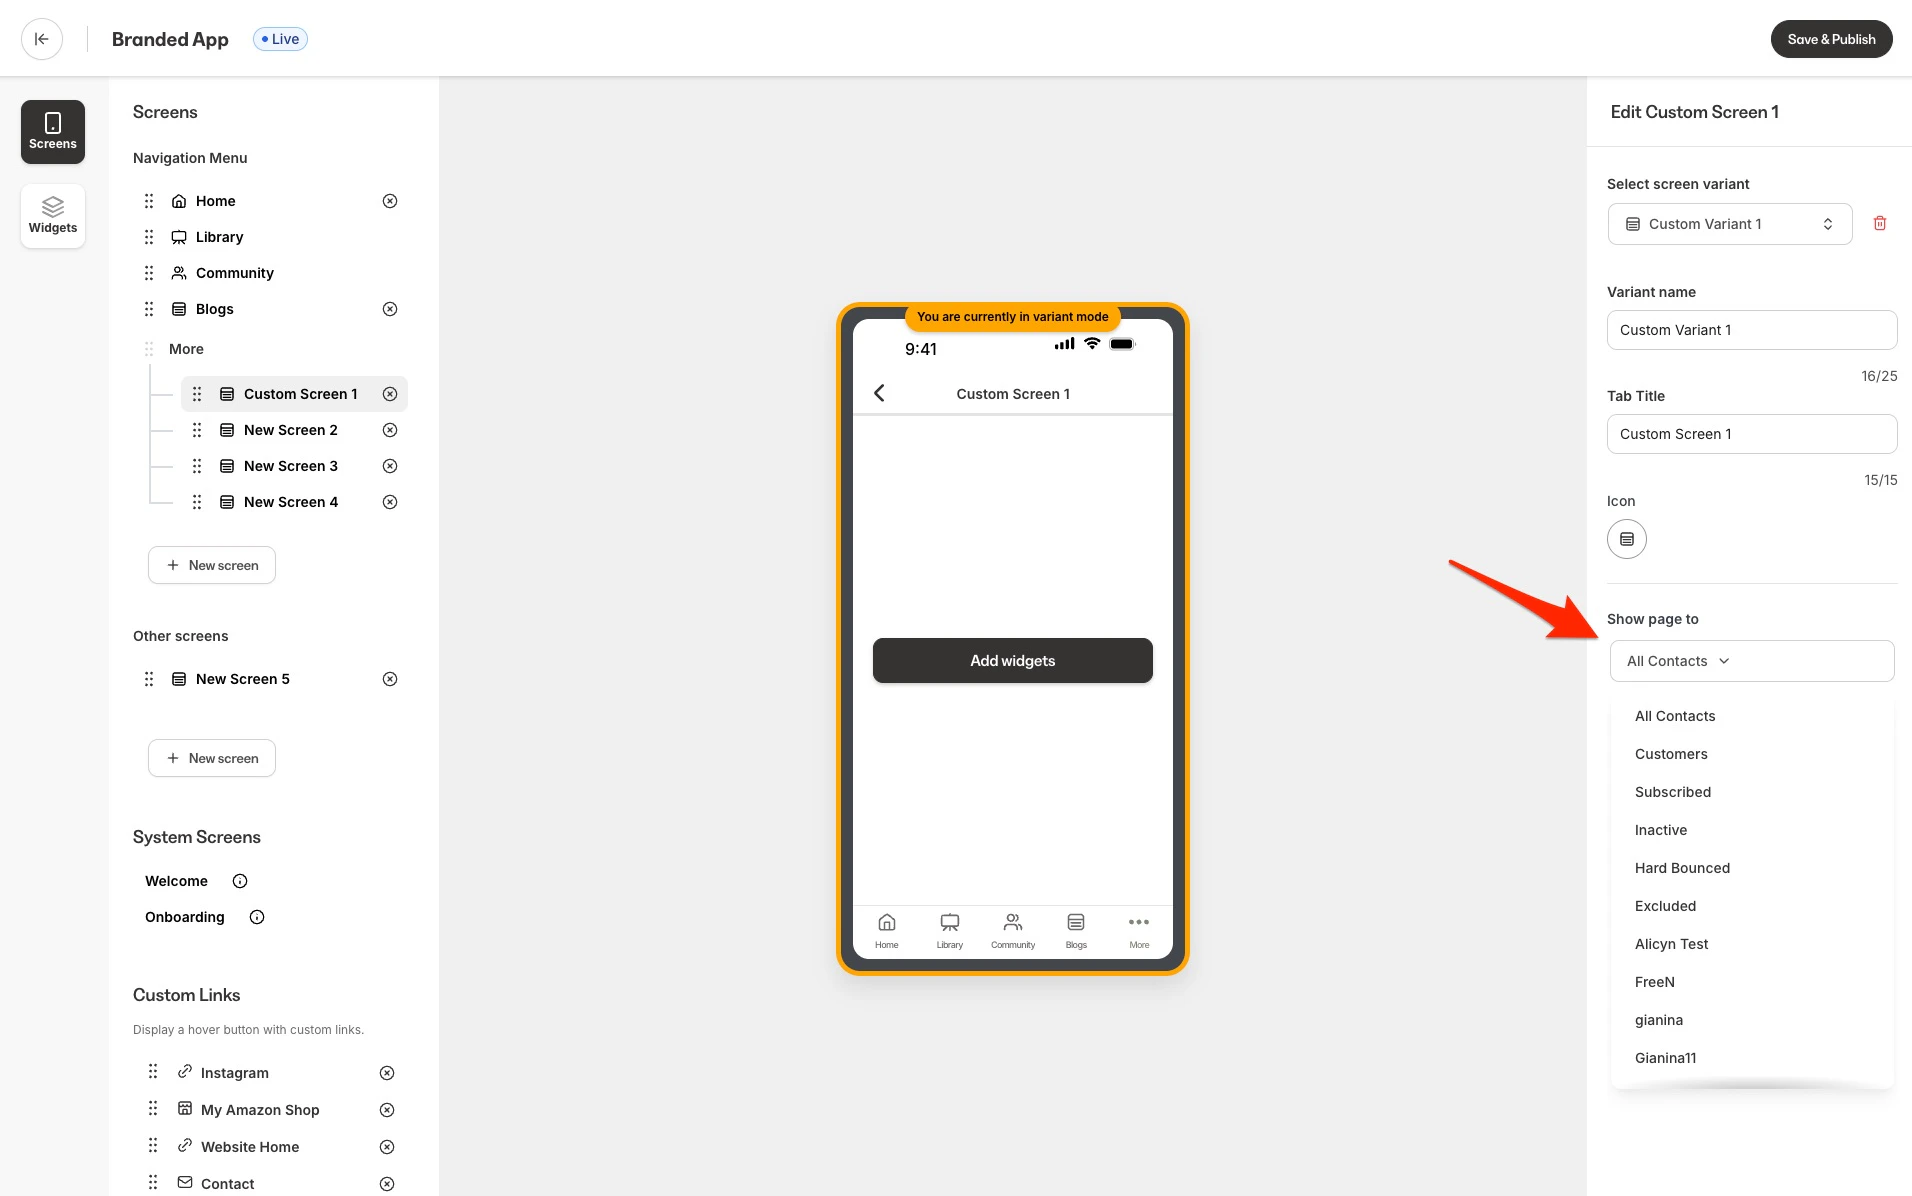
- Choose your targeting method:
- Products owned
- Offers purchased
- Tags
- Custom contact fields
- Email activity
- Marketing status and other attributes
- Existing Segment: Select from pre-configured contact segments
- Configure your targeting conditions.
- Click Save and Publish.
When a member views the page, the system:
- Evaluates each variant’s targeting conditions against the member’s profile
- Returns the first matching variant in order
- Falls back to the default page if no variants match
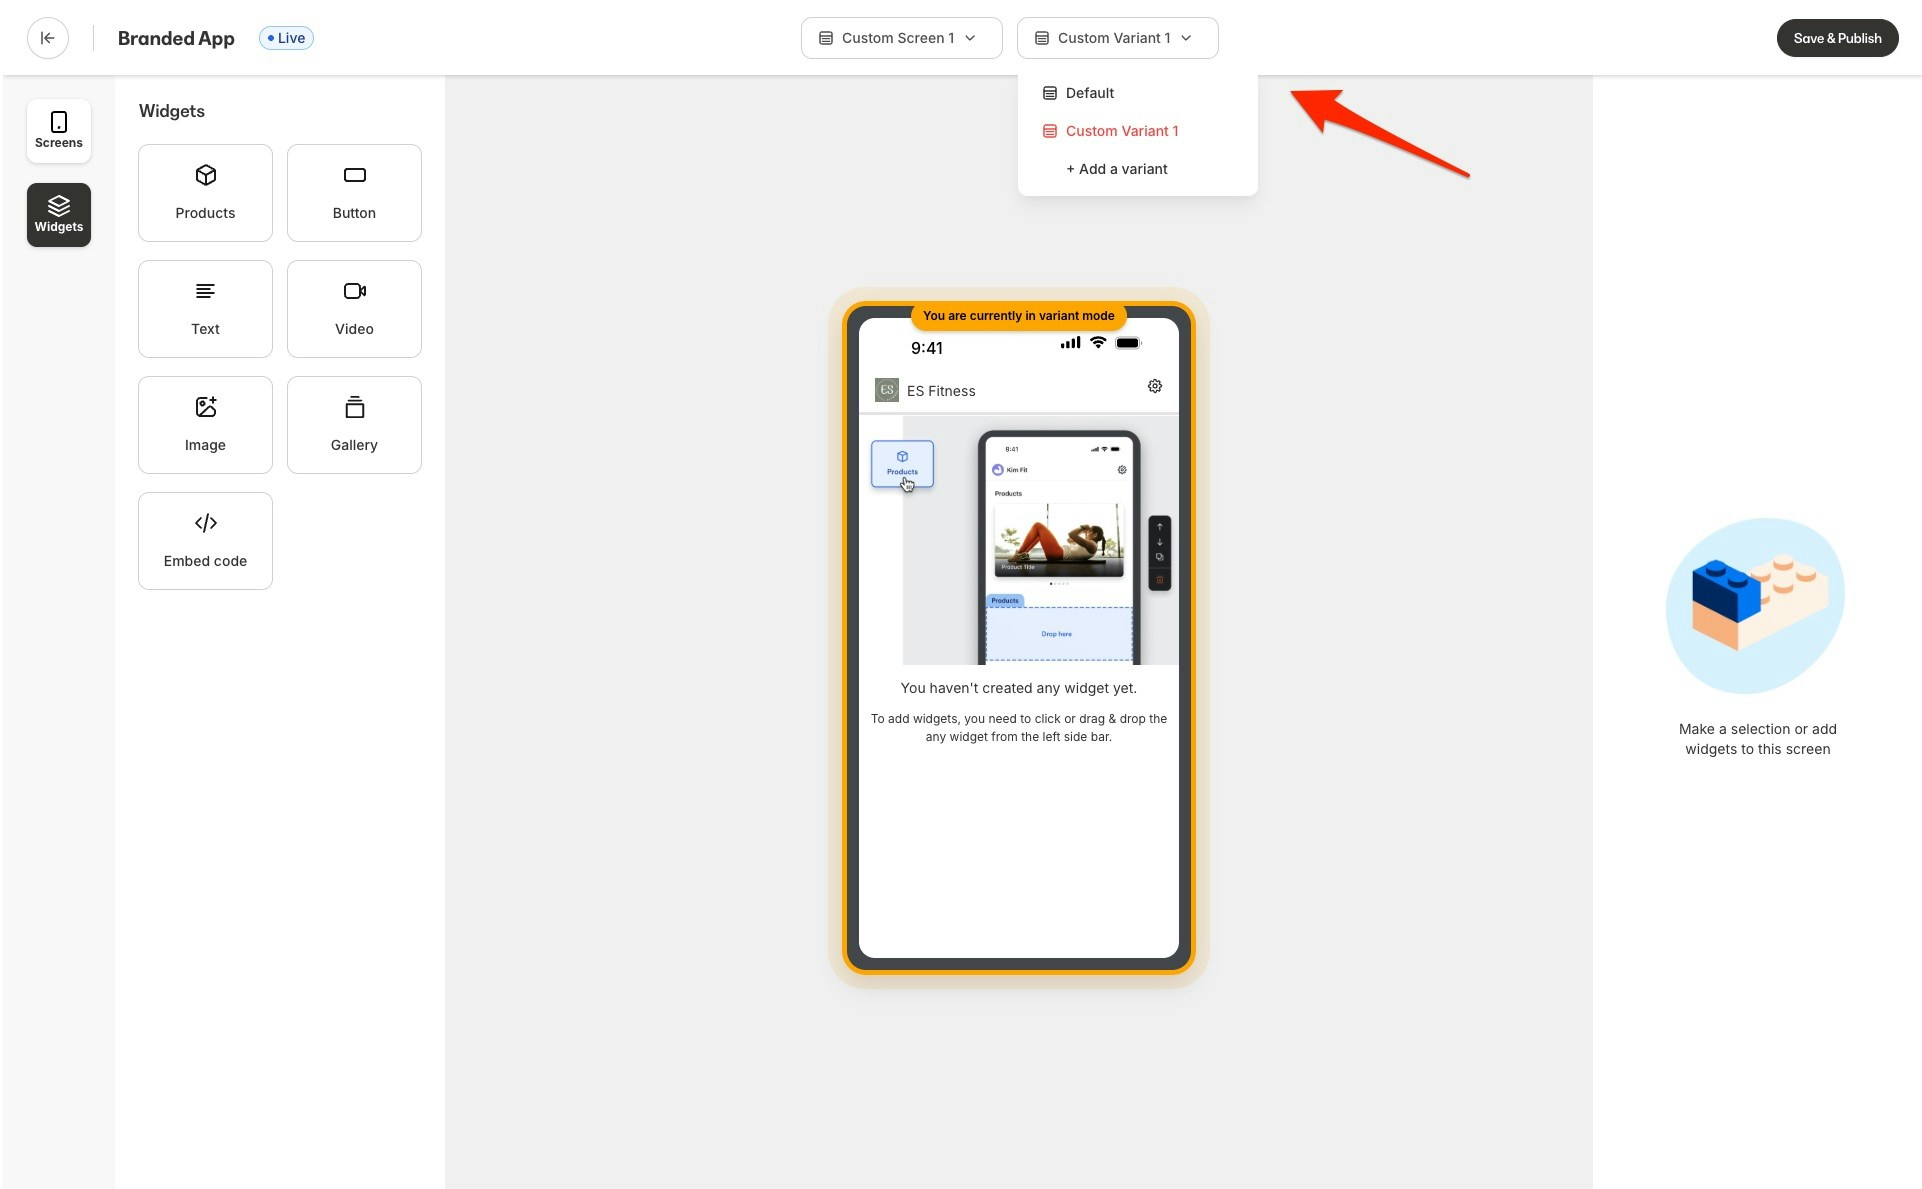
Edit Variant content
- After creating your variant, click on the Widgets tab, then use the second drop down menu to select your variant:
- Customize the layout, widgets, text, images, and other content as needed.
- Your edits will only apply to this variant, not the original page or other variants.
- Click Save and Publish when you’re ready.
- Use the variant dropdown at the top of the editor to switch between different variants.
 Content Independence: Each variant maintains its own widget configuration and content, completely independent of the parent screen and other variants.
Current limitations
- Custom screens only — Variants can only be created for custom screens, not system screens
- No nested variants — Variants cannot have their own variants
- Maximum variants — The default limit of 20 variants is per parent screen
- Order dependency — Variant matching follows the order in which they appear in the list
Best practices
- Clear naming — Use descriptive internal titles to manage multiple variants
- Specific targeting — Create focused targeting conditions to avoid overlapping matches
- Test thoroughly — Verify variant targeting with different member profiles
- Fallback content — Ensure the default page provides a good experience for unmatched members