Add another role
- Make sure that you are logged in with your Organization Administrator account
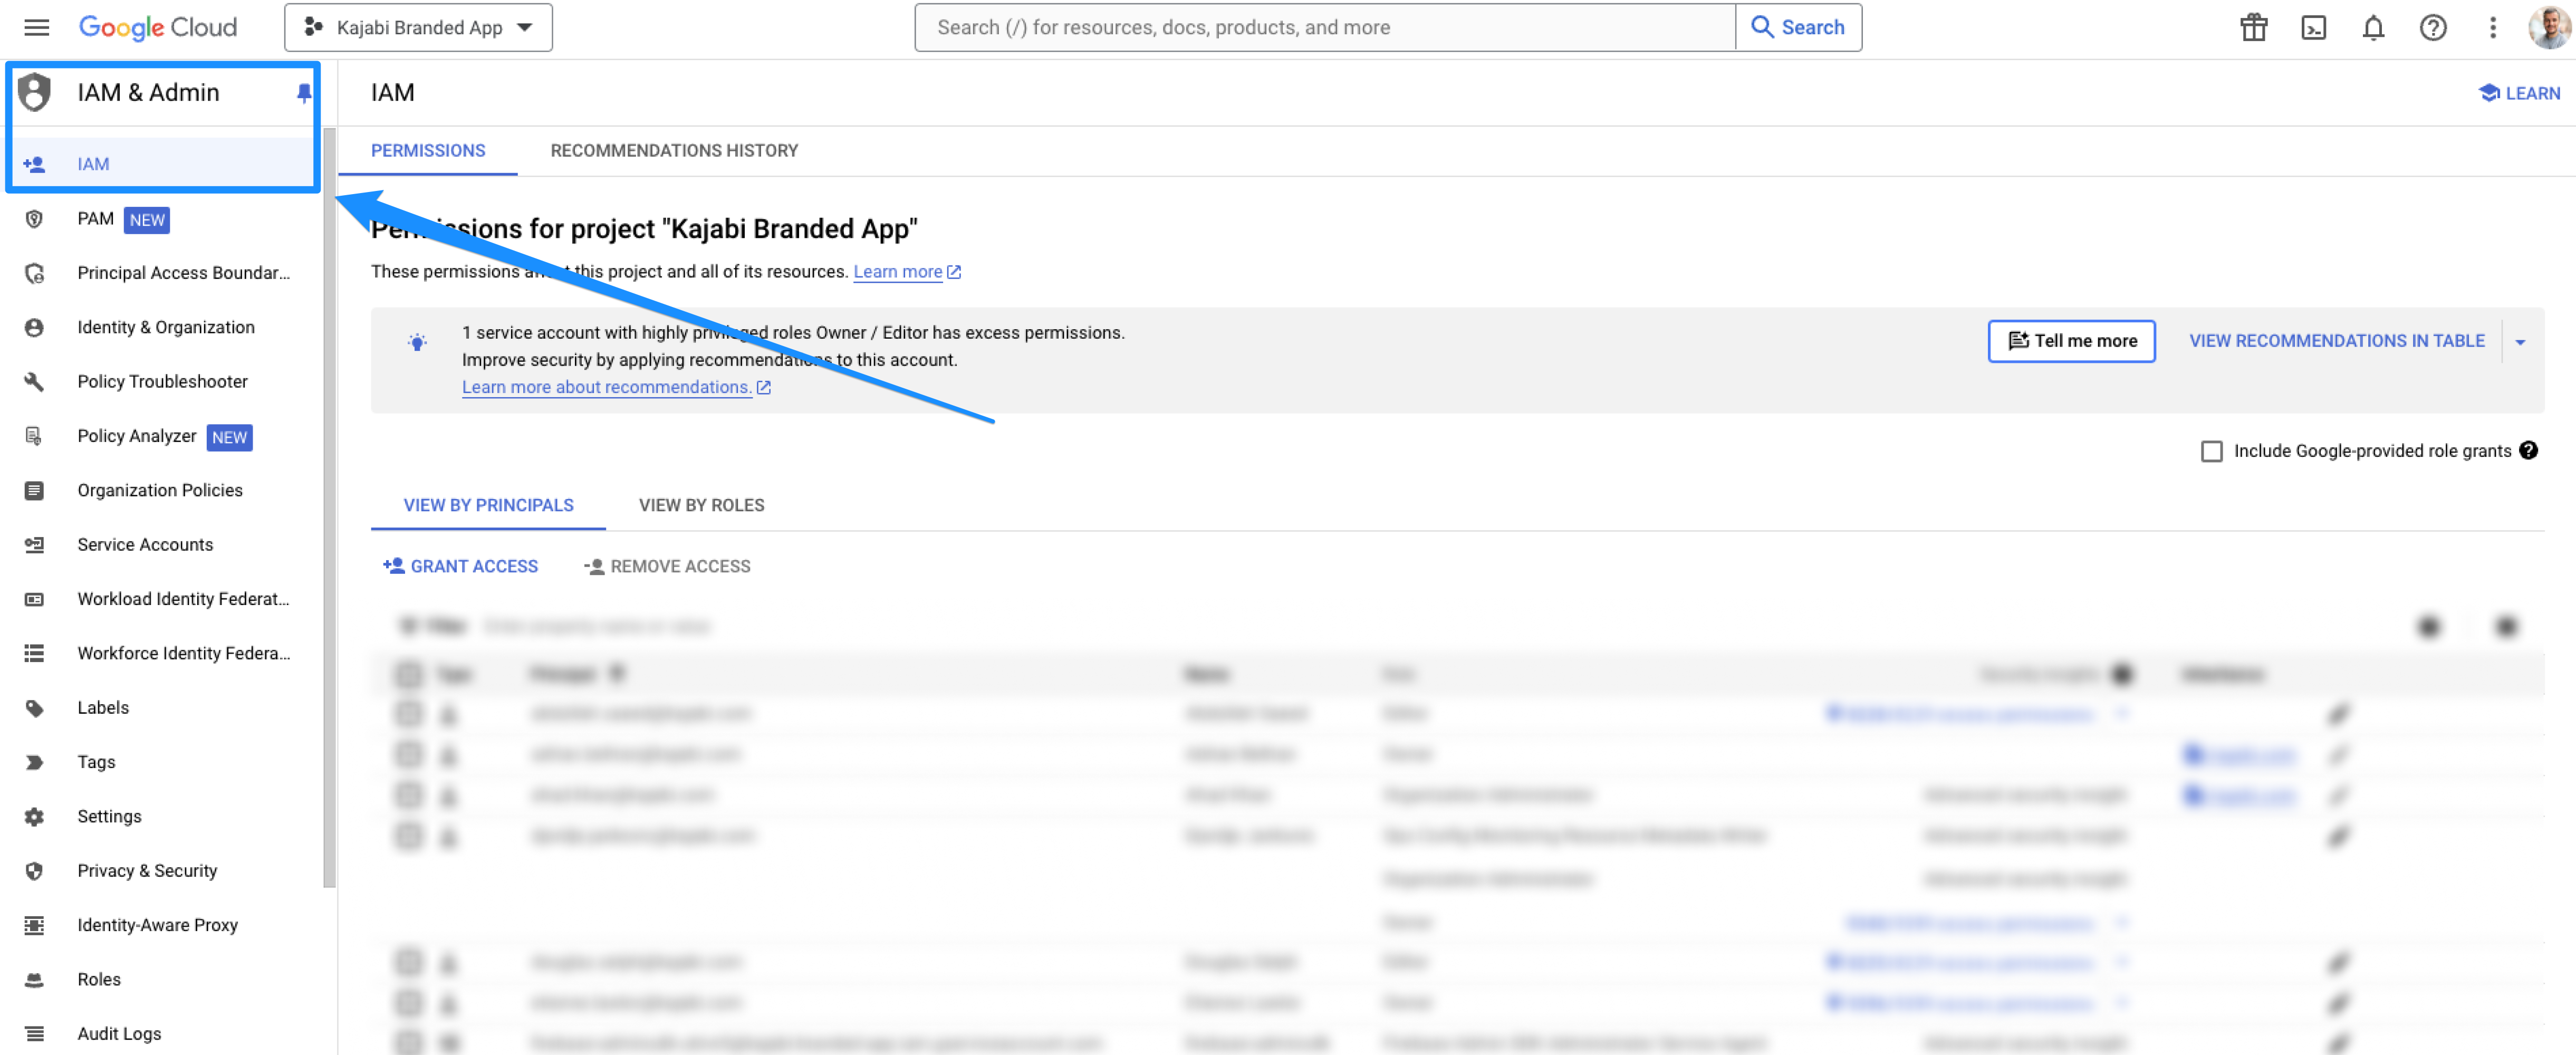
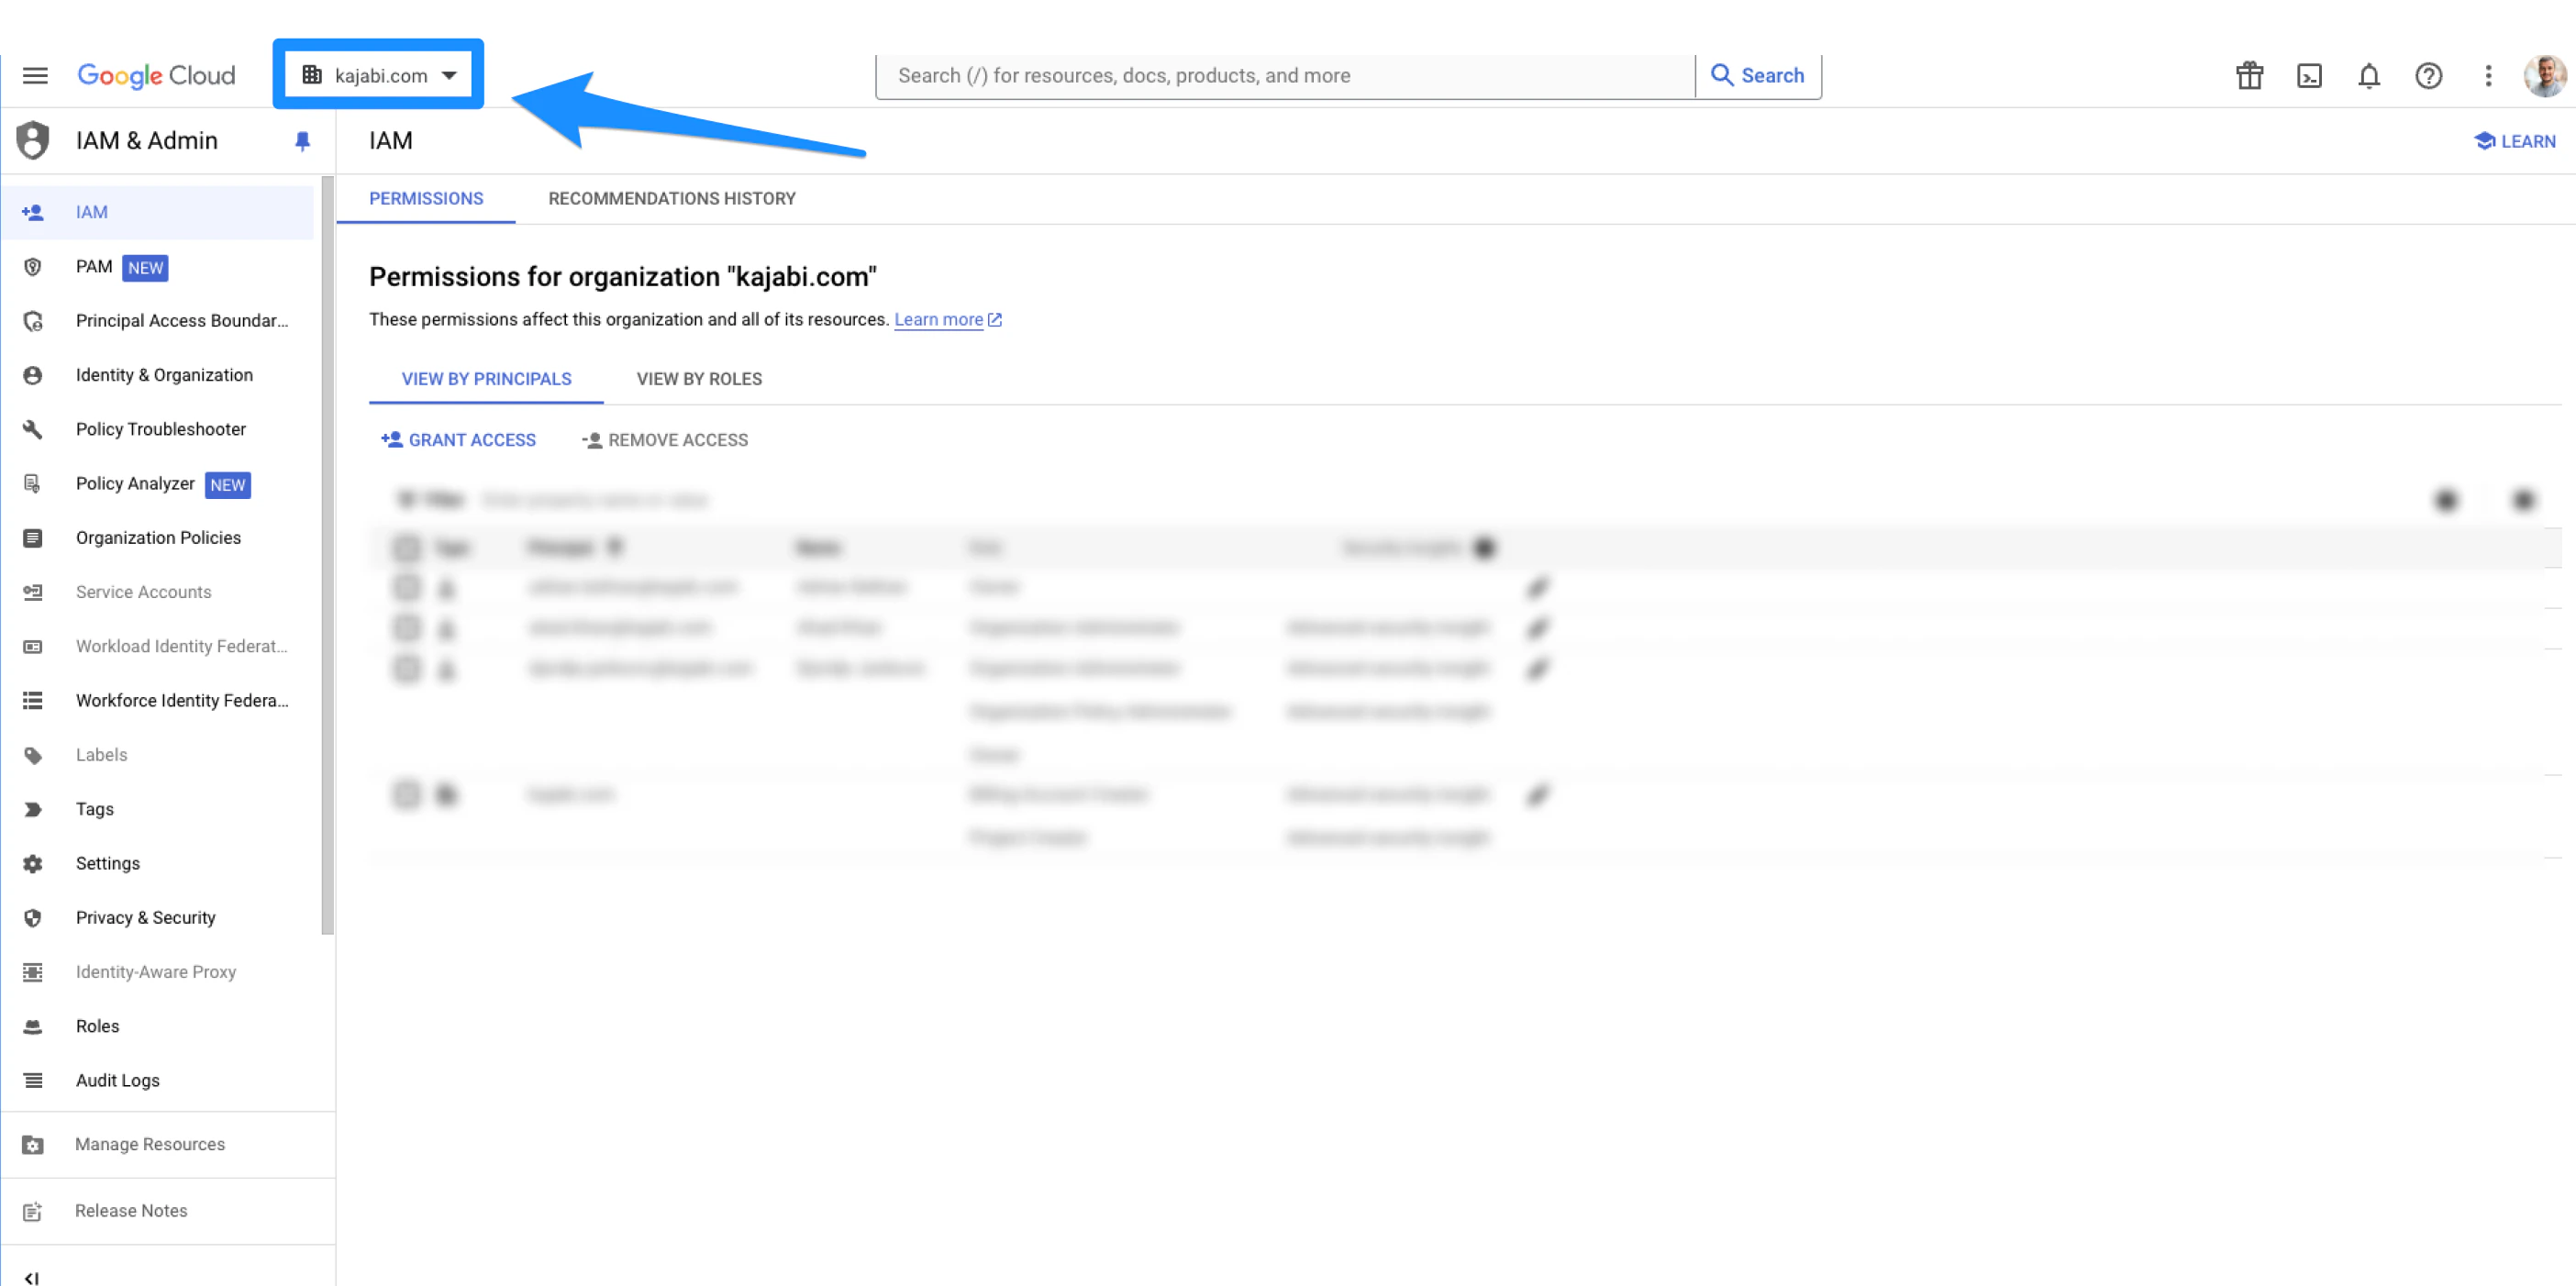
- Open the IAM tab in the left menu:
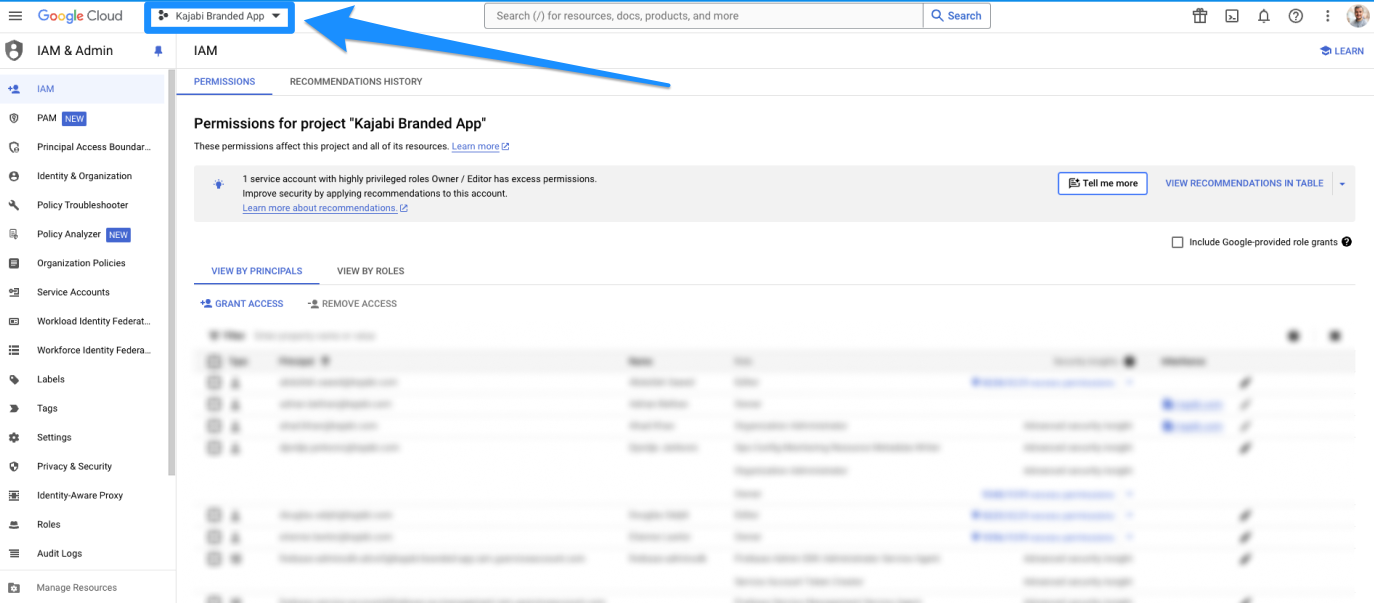
- Open the dropdown menu in the top-left corner:
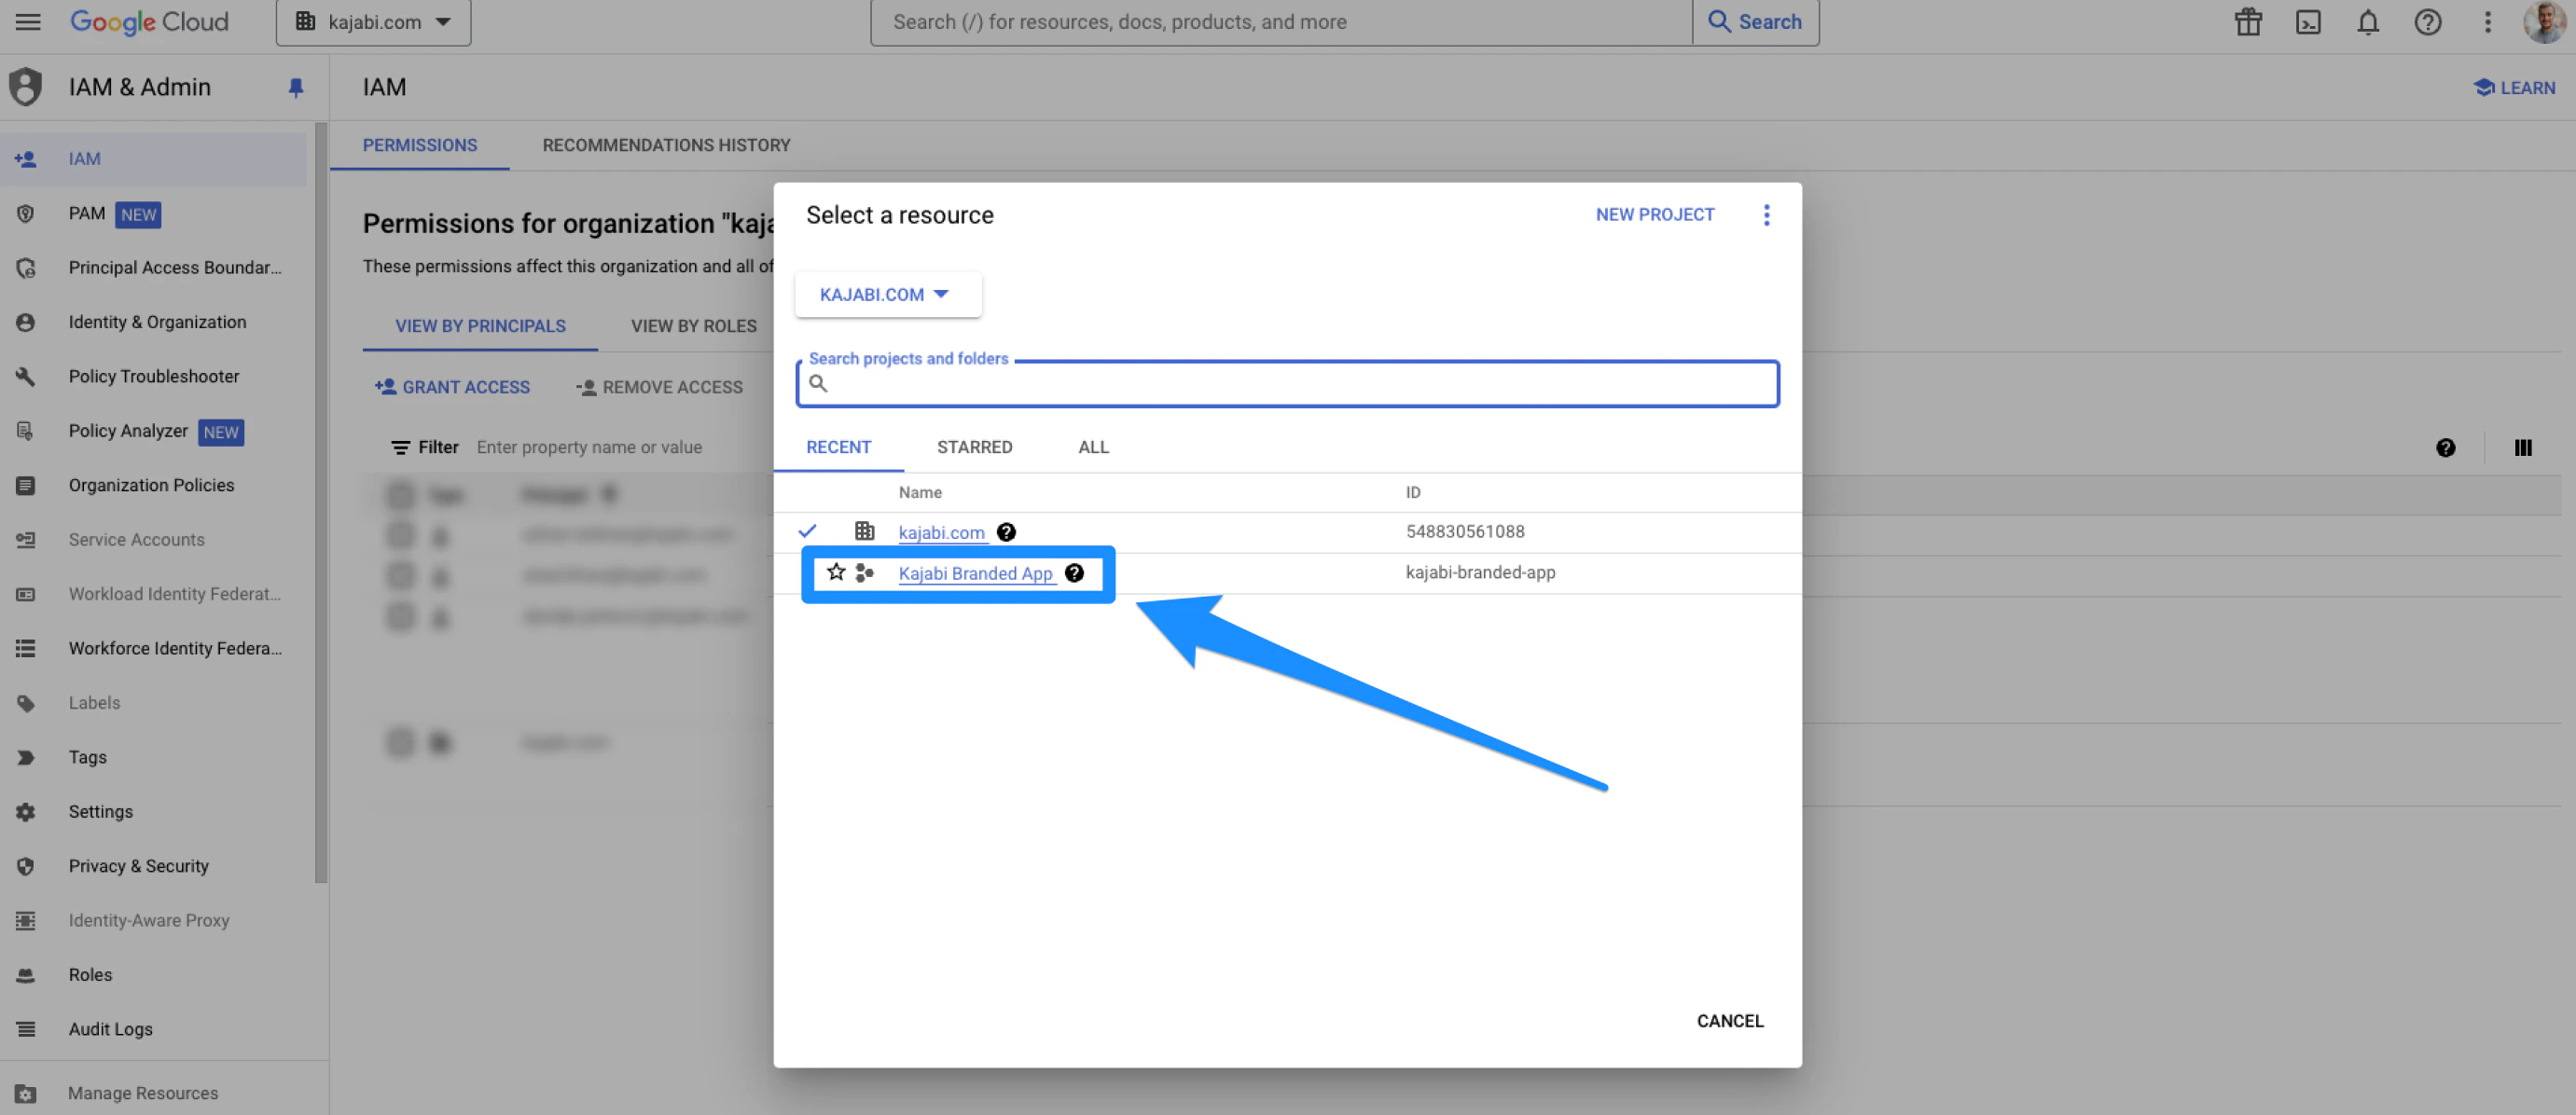
- Select the organization (the organization will have a building icon next to it):
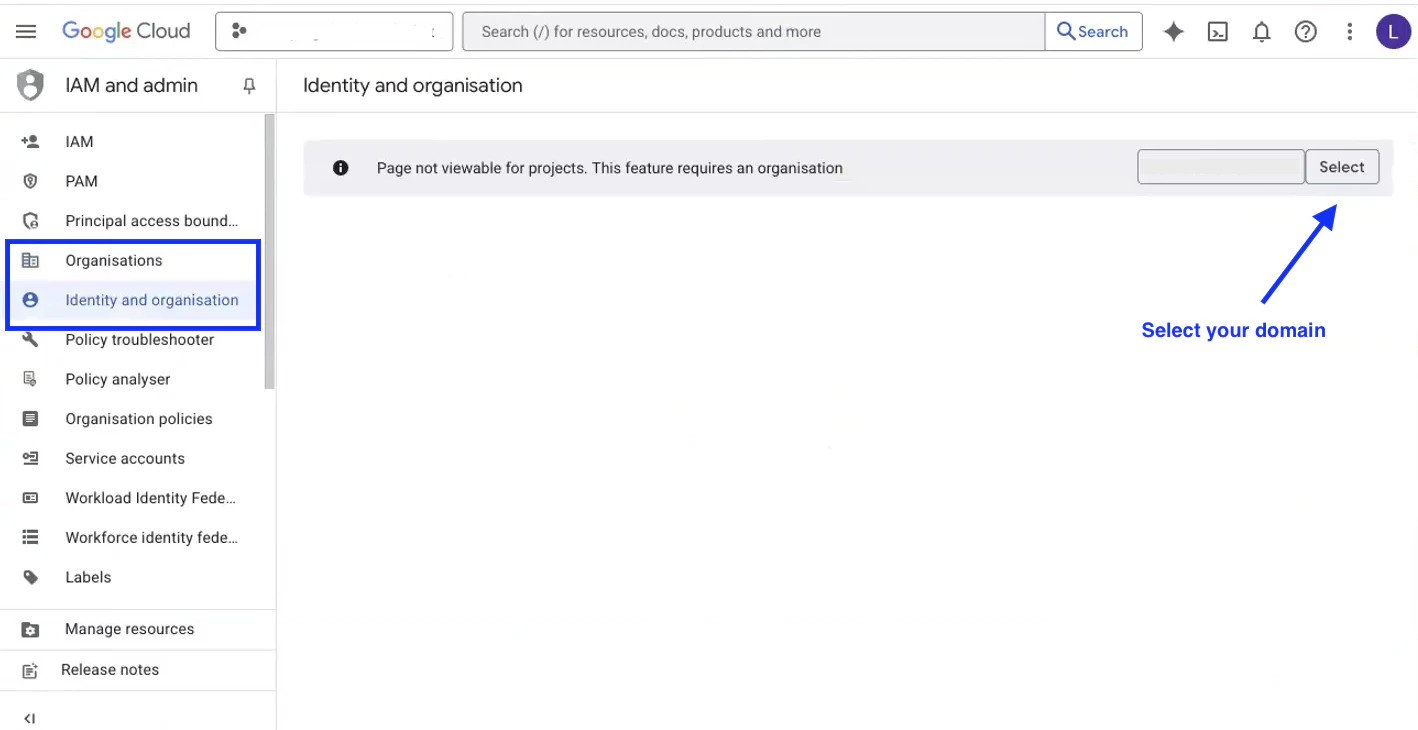
- If the organization does not show up to be selected, then you must add it first:
- Click Cancel
- Open the Organizations tab OR the Identity & Organization tab (Google can display this step in either) from the left sidebar
- Click Select next to the organization domain to add it to the project:
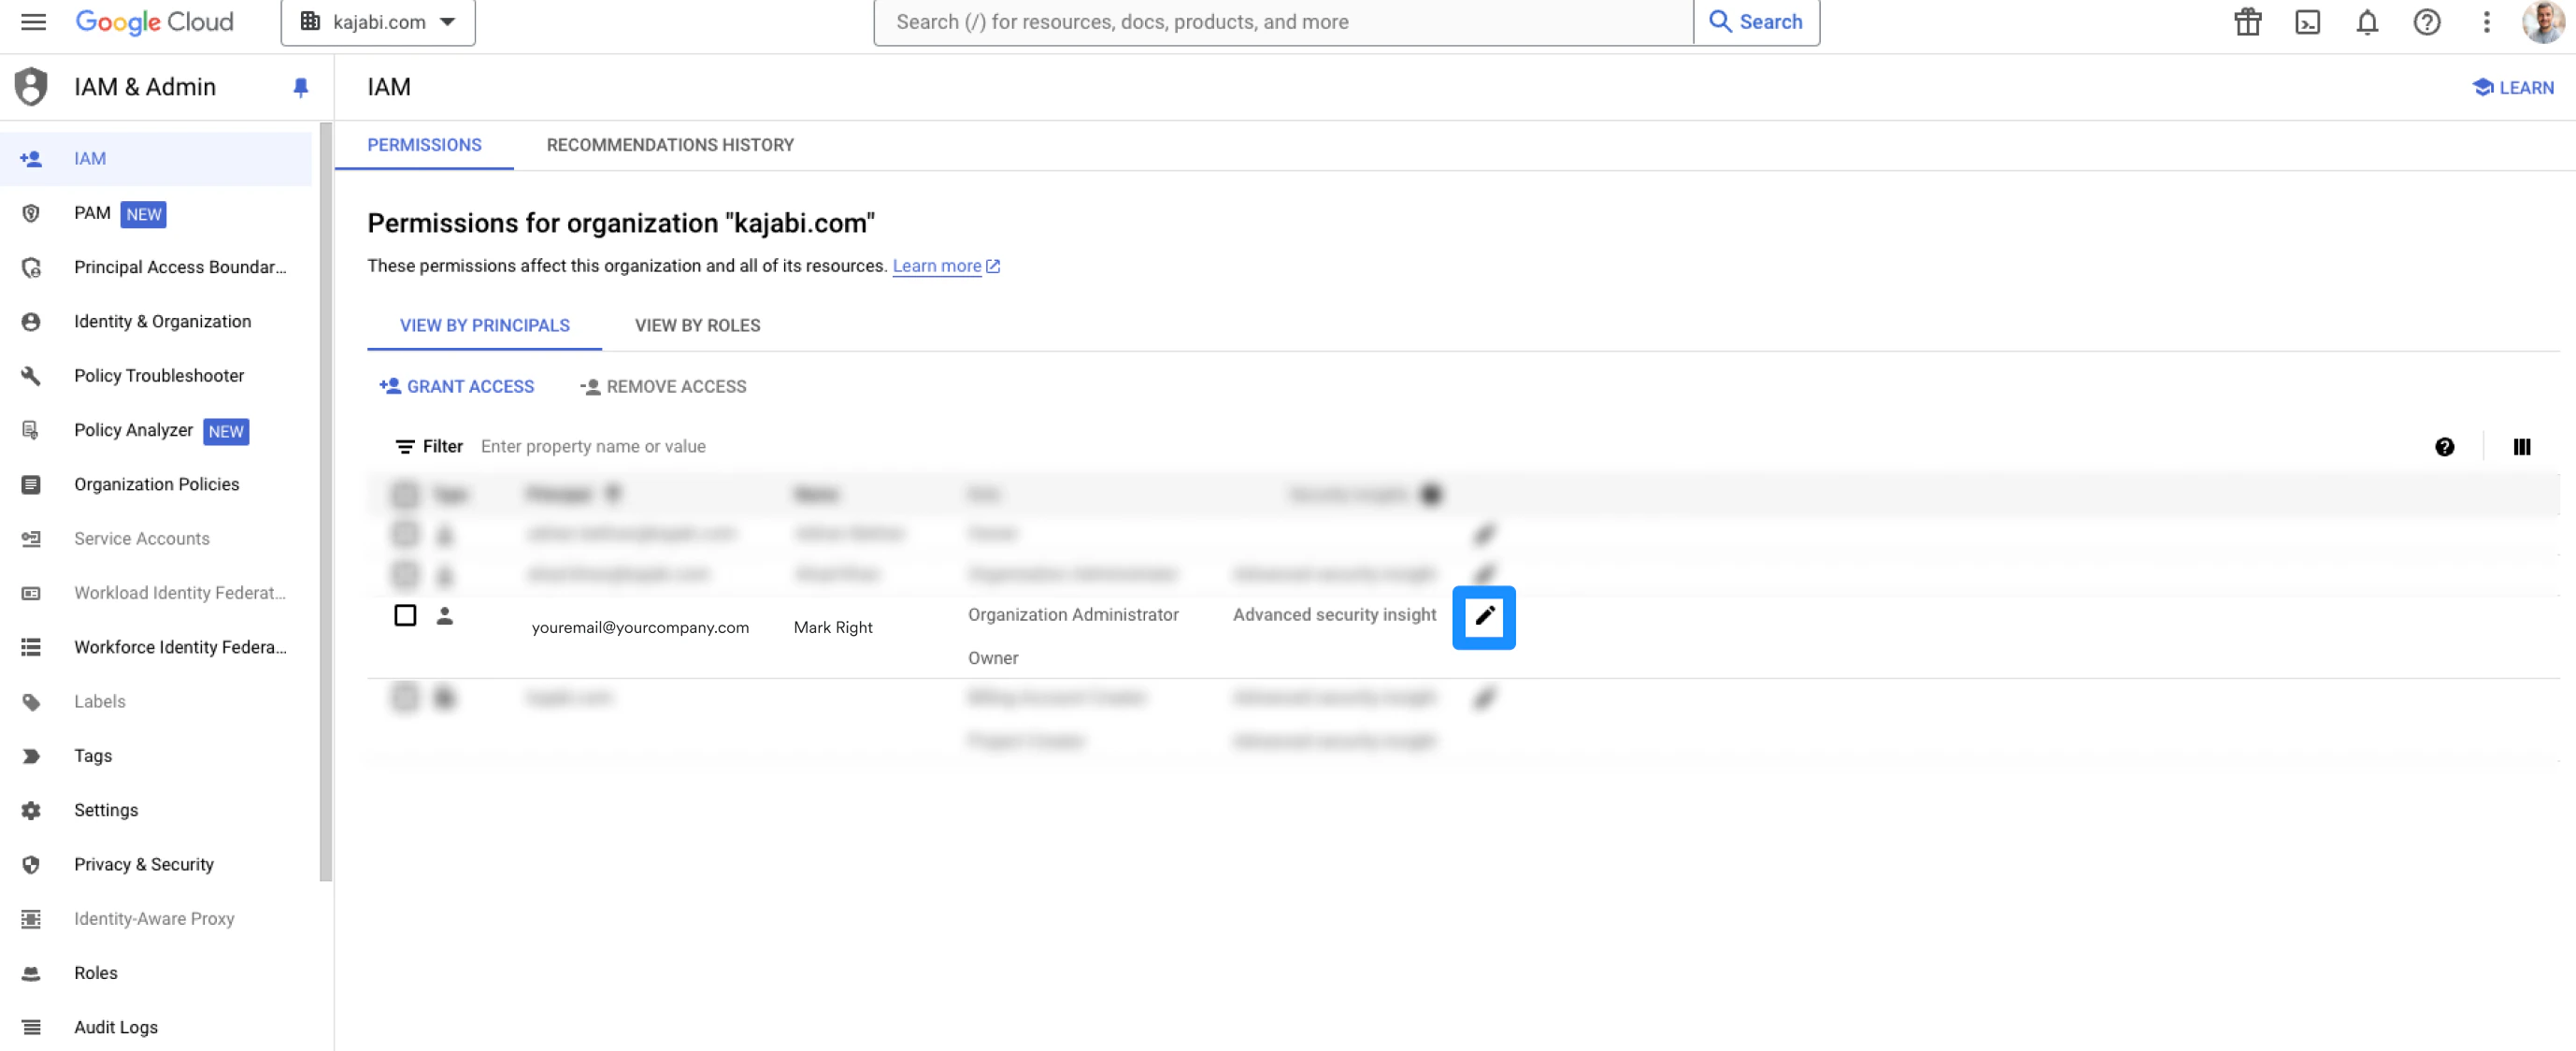
- Be sure the organization is now selected in the dropdown and that you are in the IAM tab located in the left menu
- Then, click the pencil icon next to the email account:
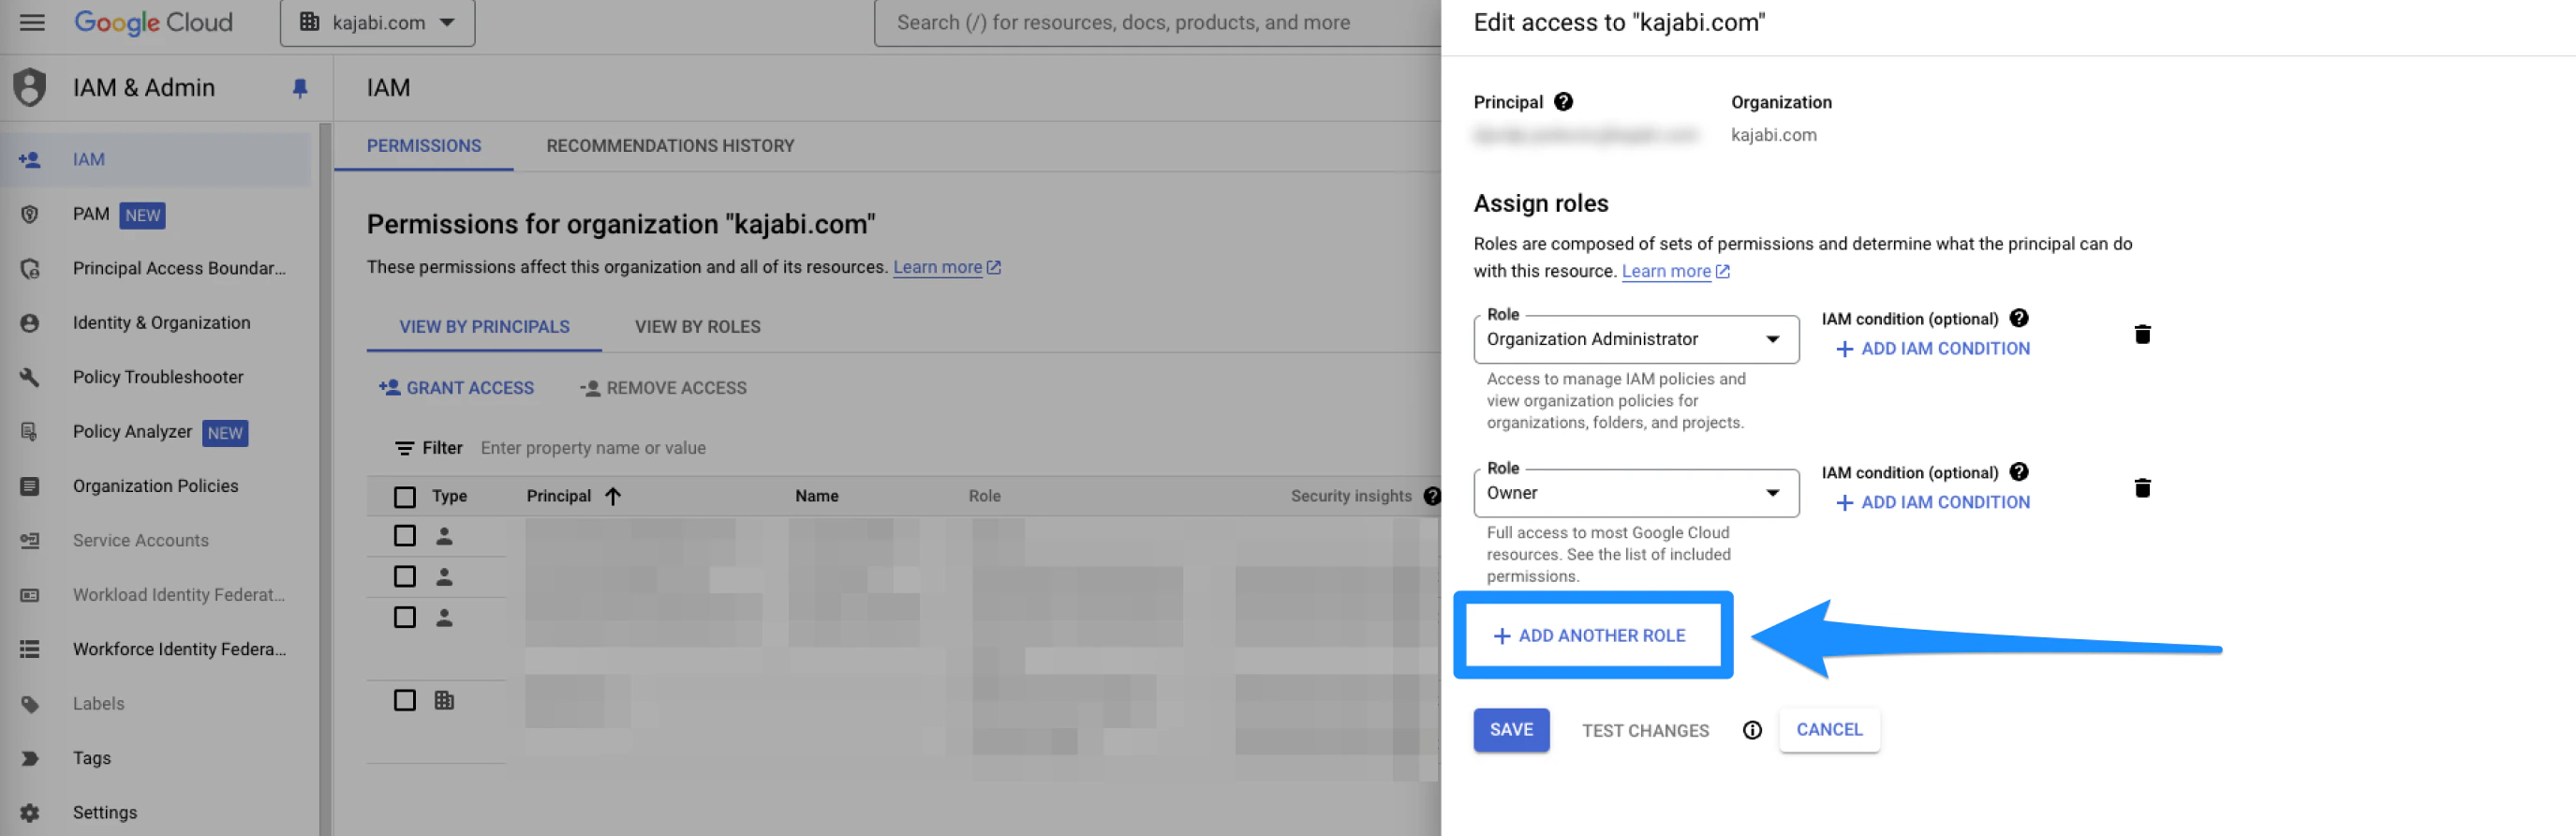
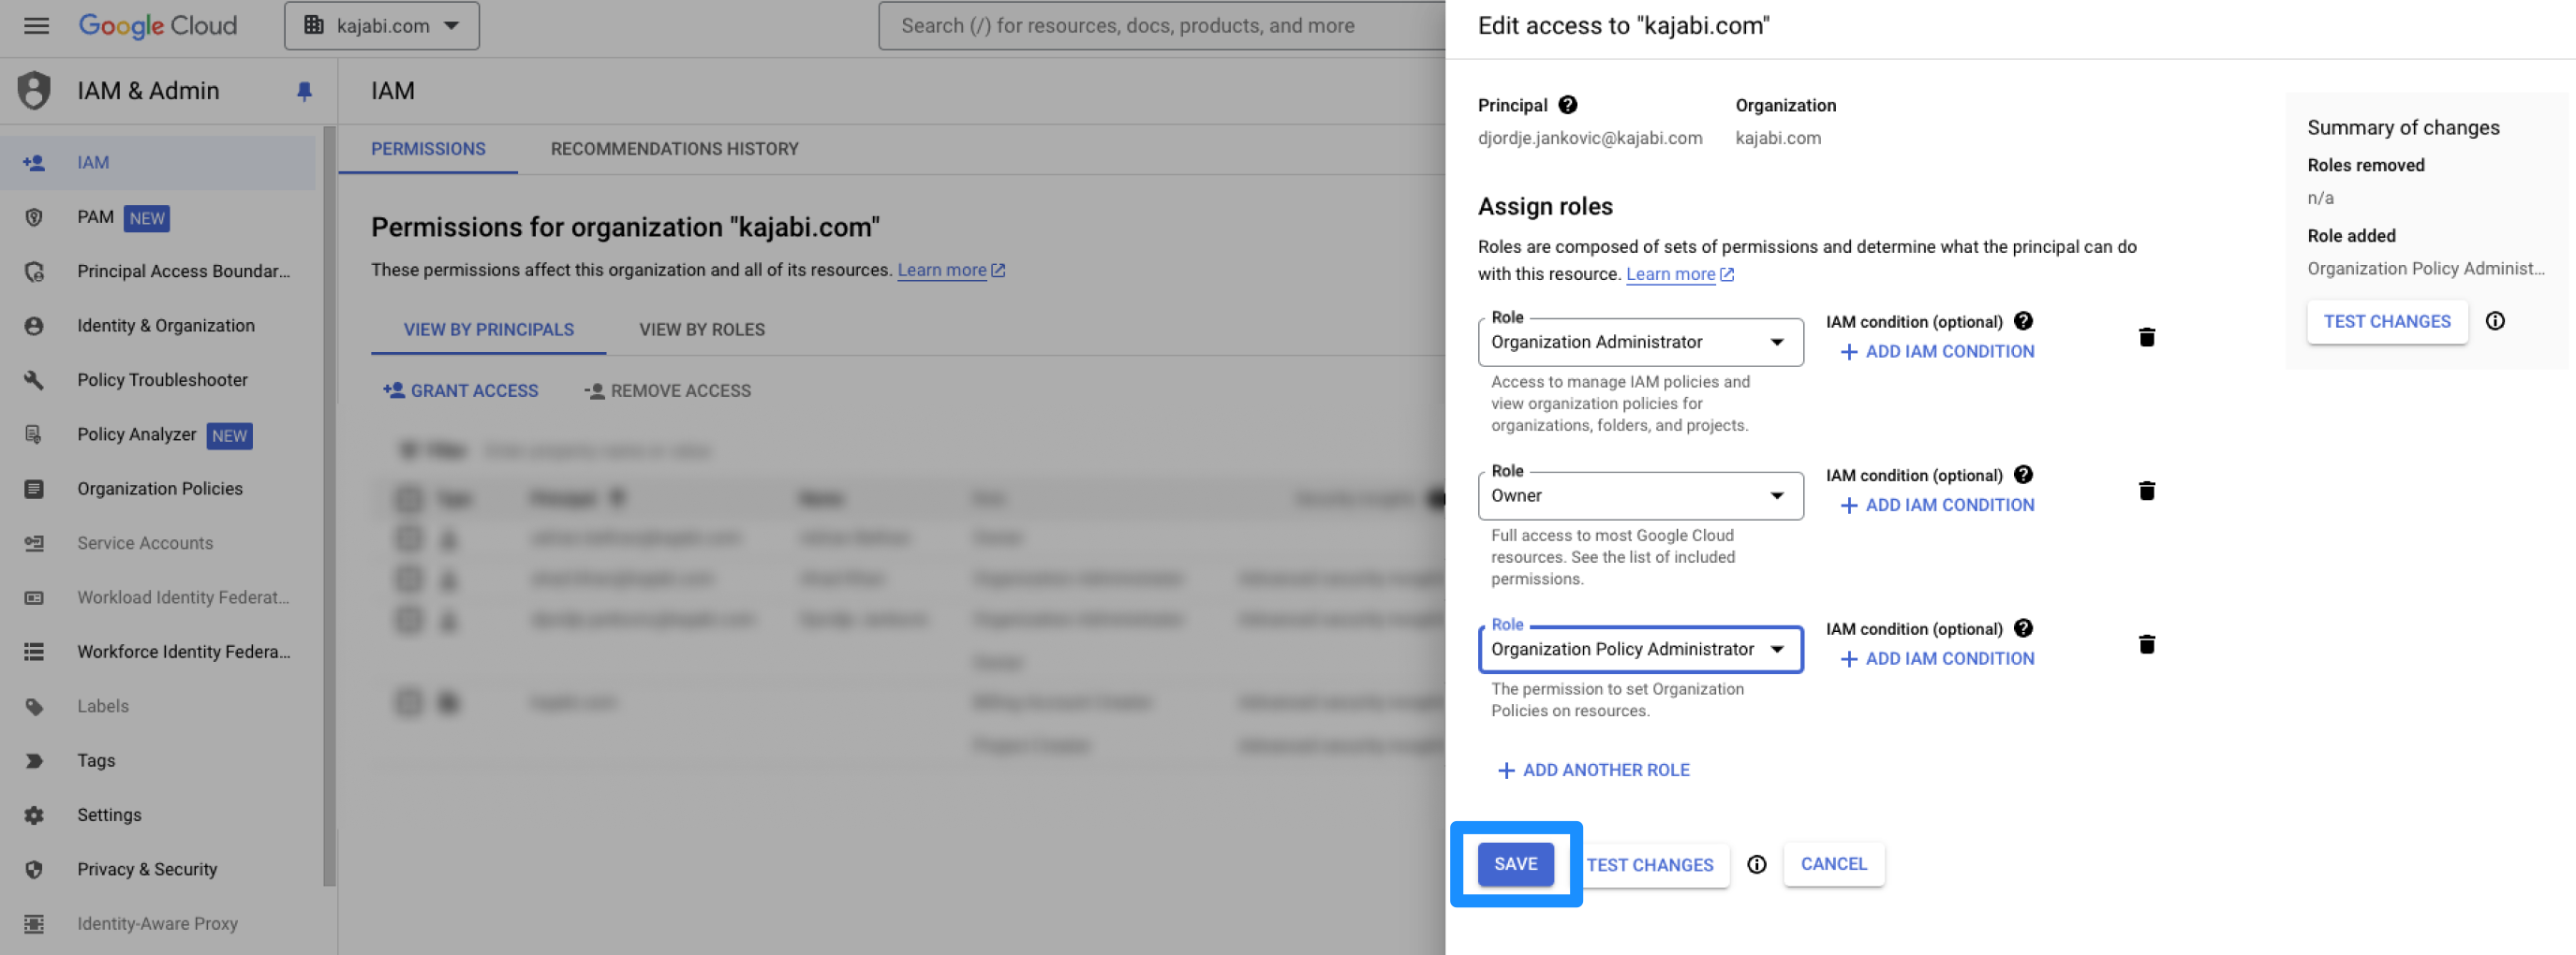
- Click add another role:
- Search for the organization policy administrator role (you can search for it by typing it in. If you cannot find it, you are likely not logged in with the Organization’s Administrator account):
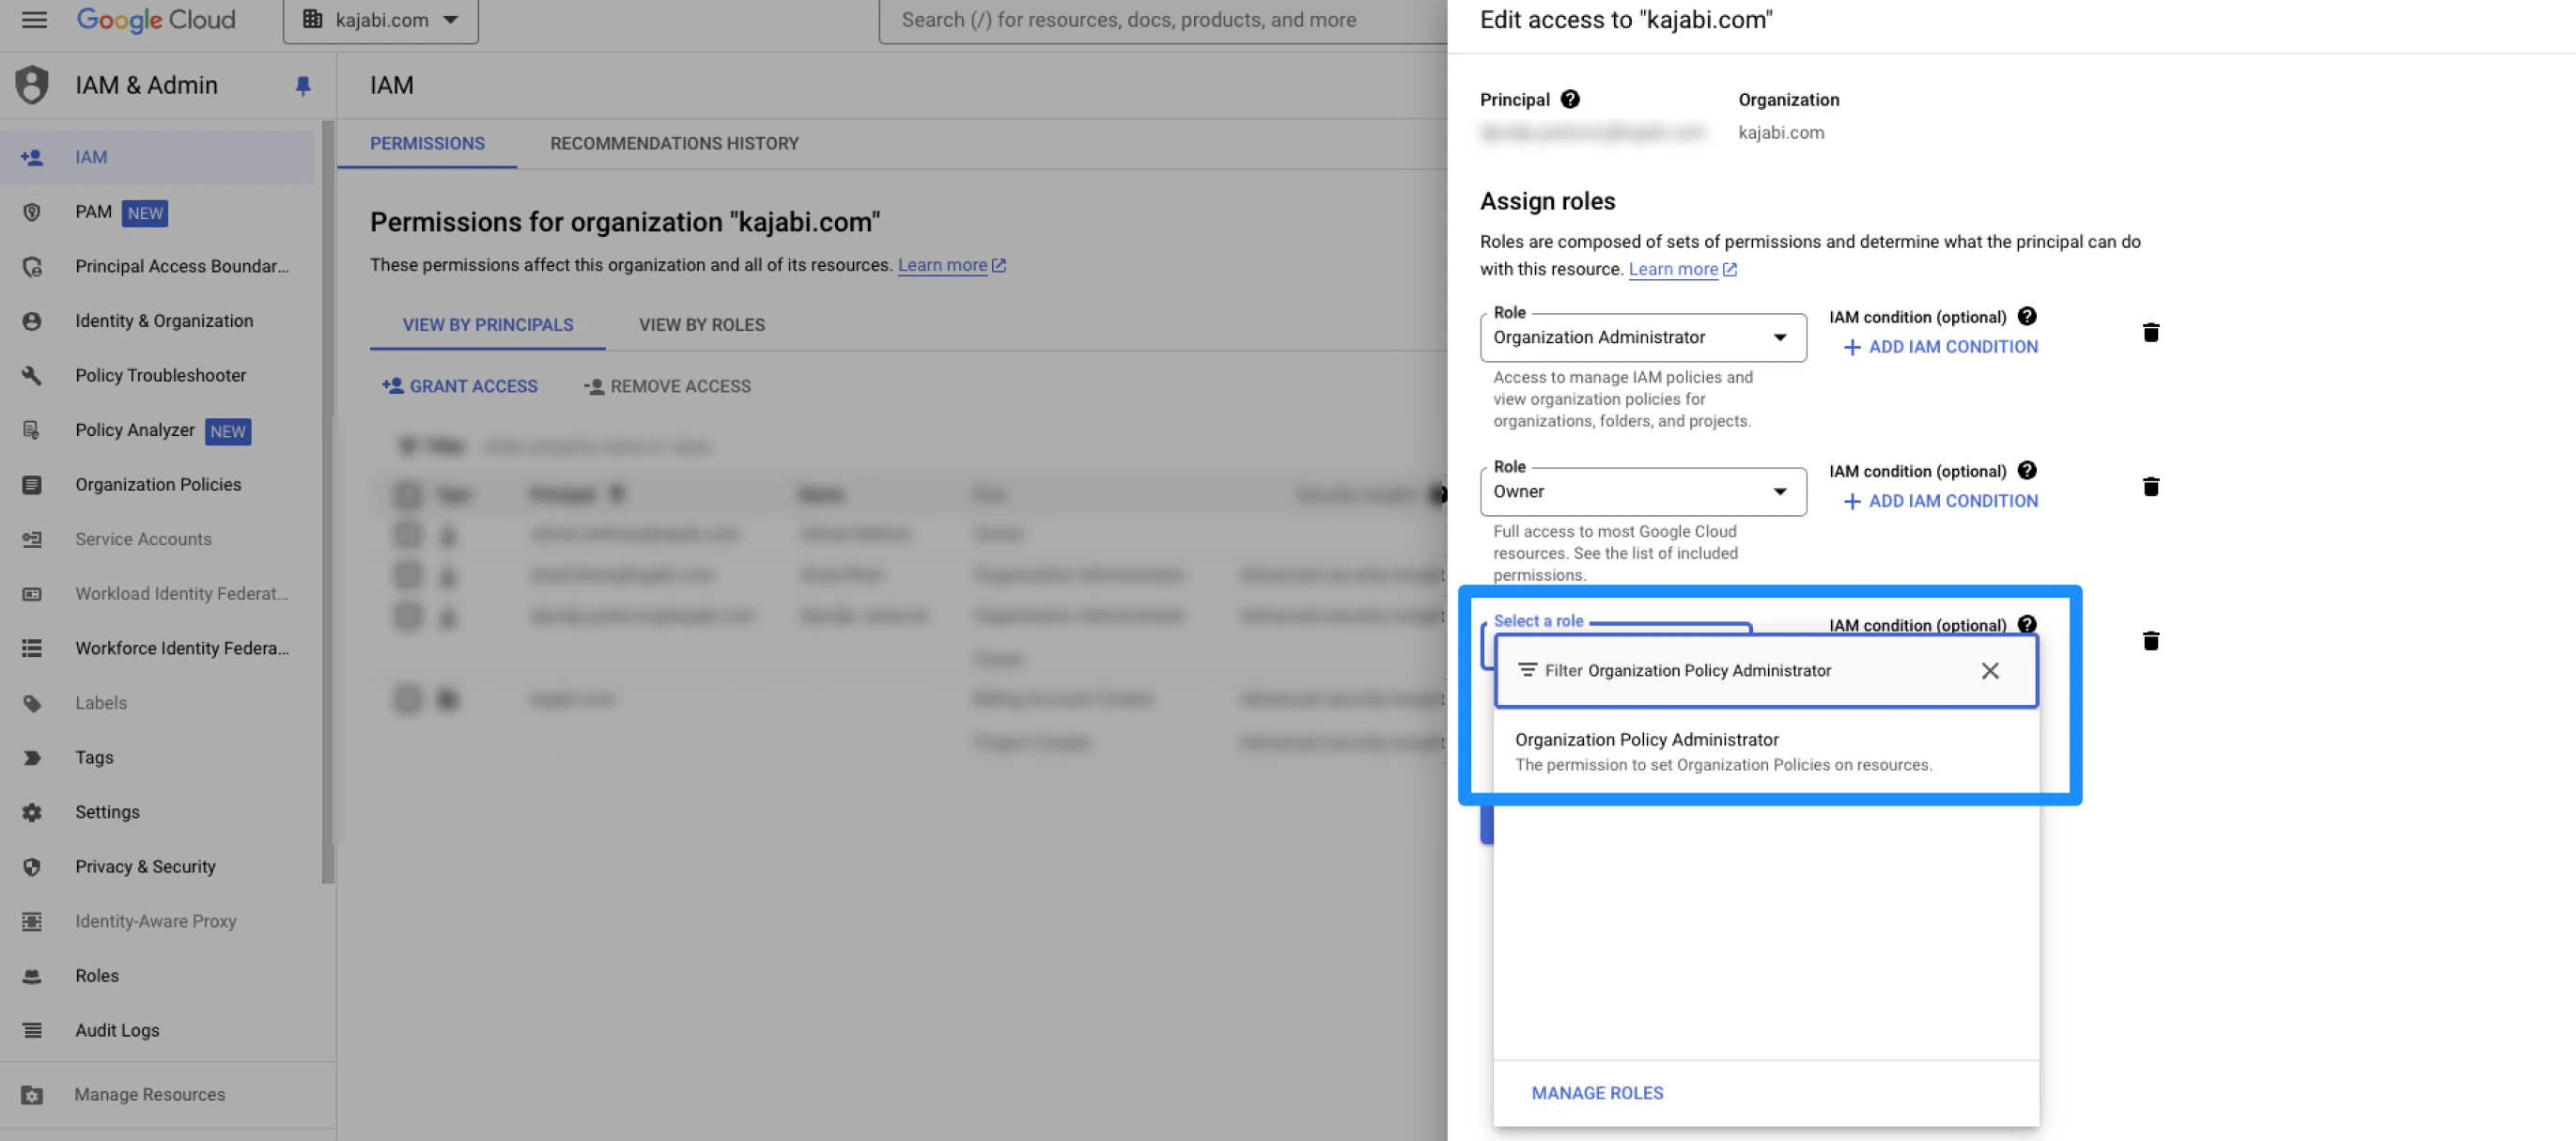
- Click Save to keep and apply the changes:
Update the organizational policy
- Open the Organization Policies tab from the left sidebar:
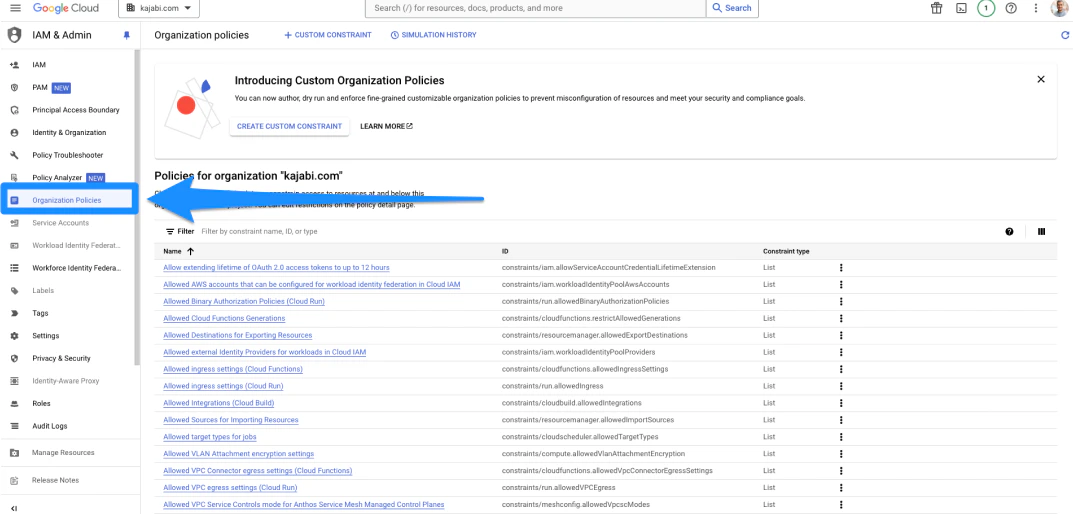
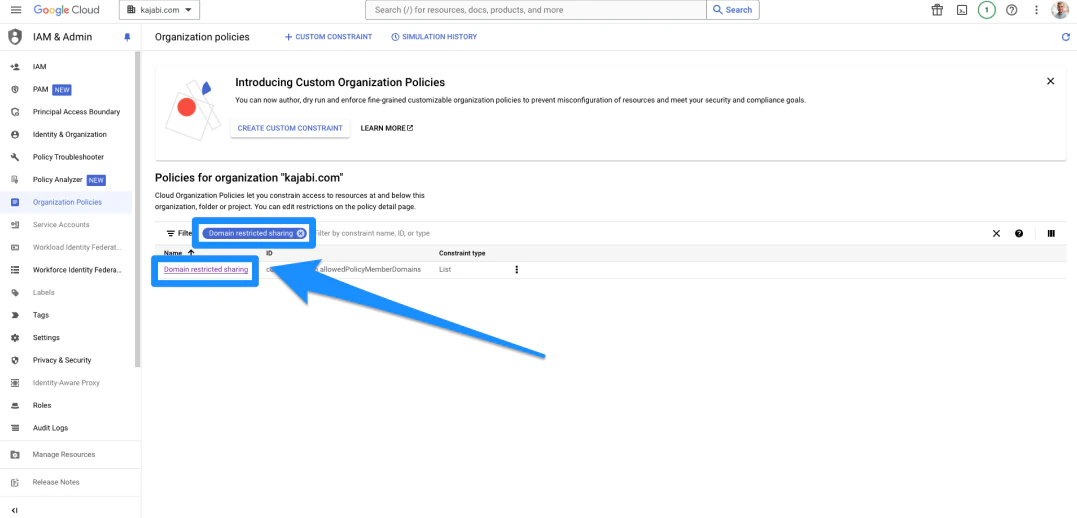
- In the Organization Policies page, search for Domain Restricted Sharing from the list of constraints, then click Domain Restricted Sharing:
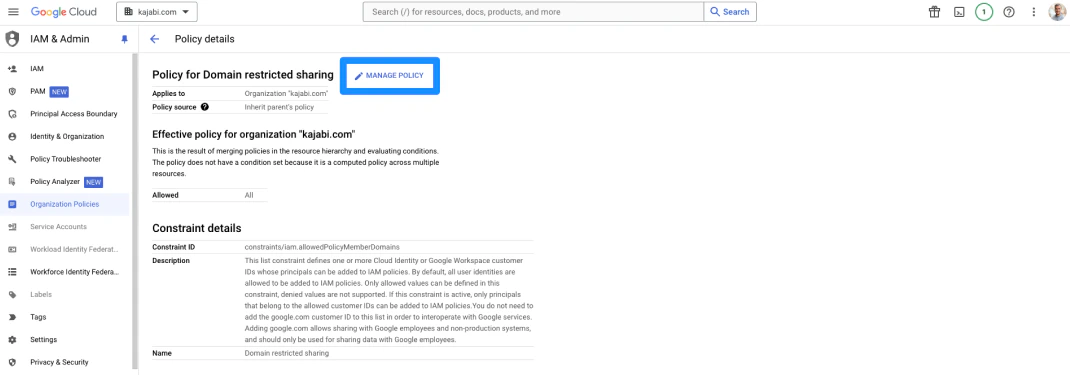
- Click Manage Policy:
- Then, select the Override Parent’s Policy option:

- Click the Replace option, then click on the rule below and change the dropdown to Allow All
- Then, click Done:
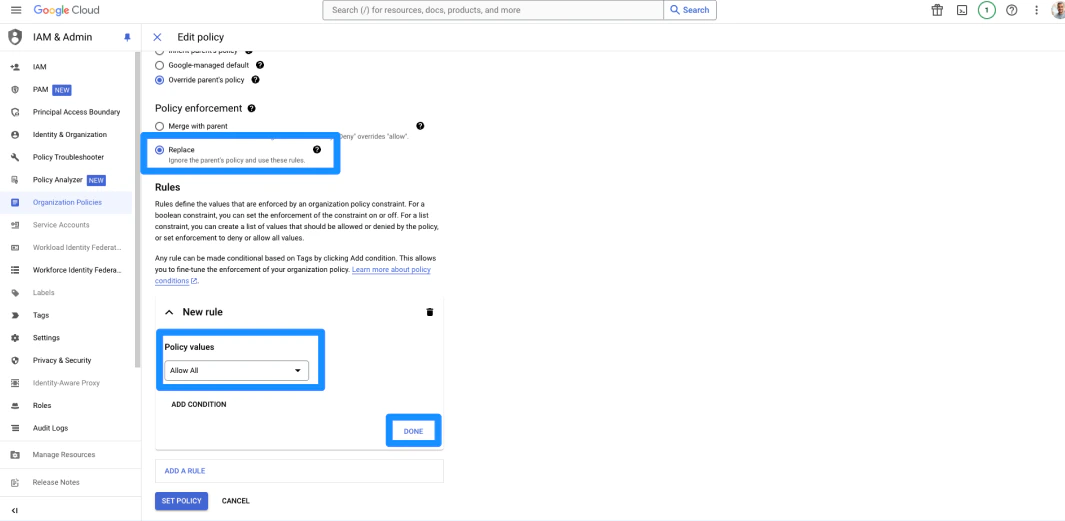
- Click Set Policy to save all changes:

- Now, return to the Organizational Policies tab to open the Organization Policies page.
- Search Disable service account creation from the list of constraints
- Click Disable service account creation:
- You will want to follow these next steps for both links
Disable service account settings
- Search Disable service account key creation from the list of constraints
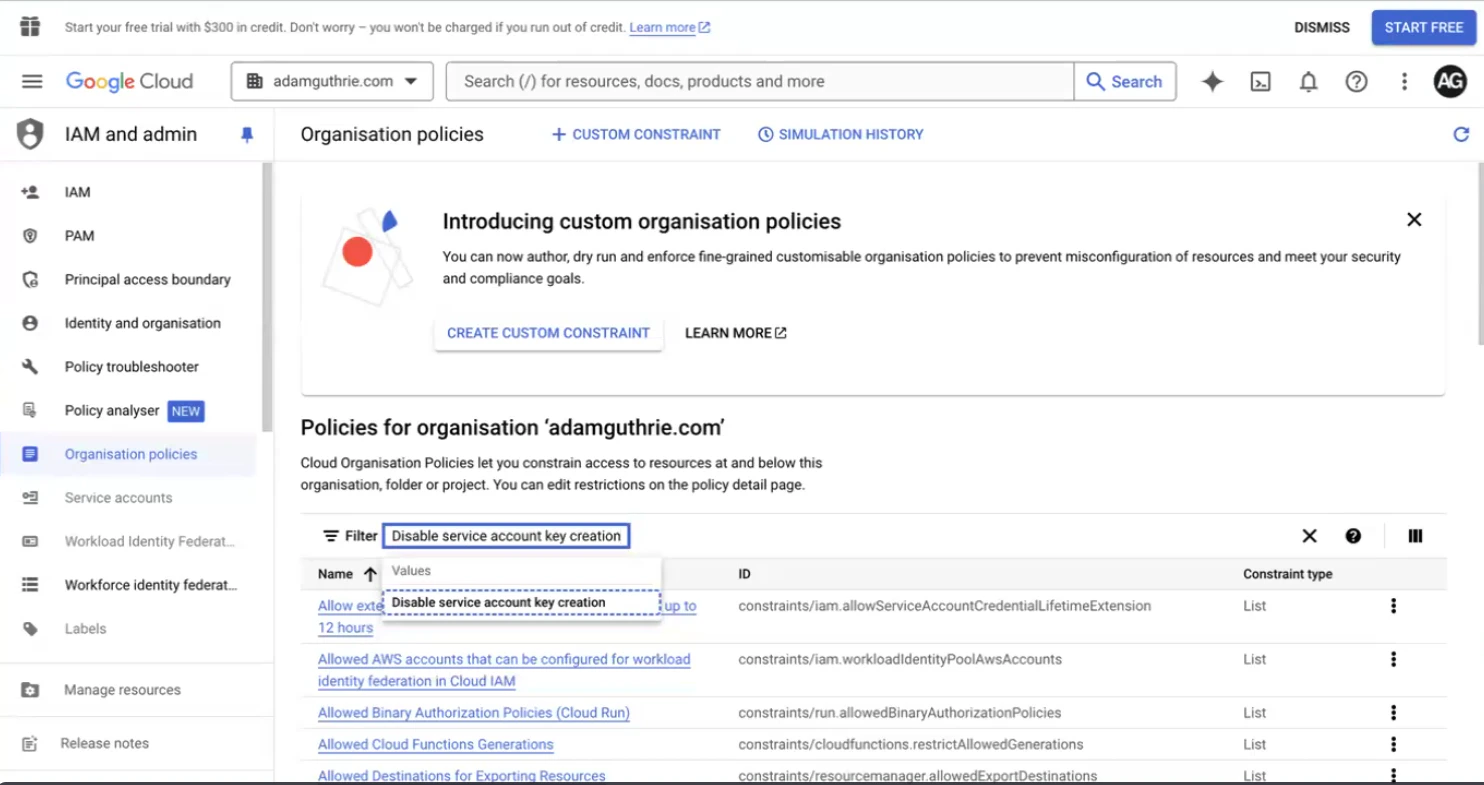
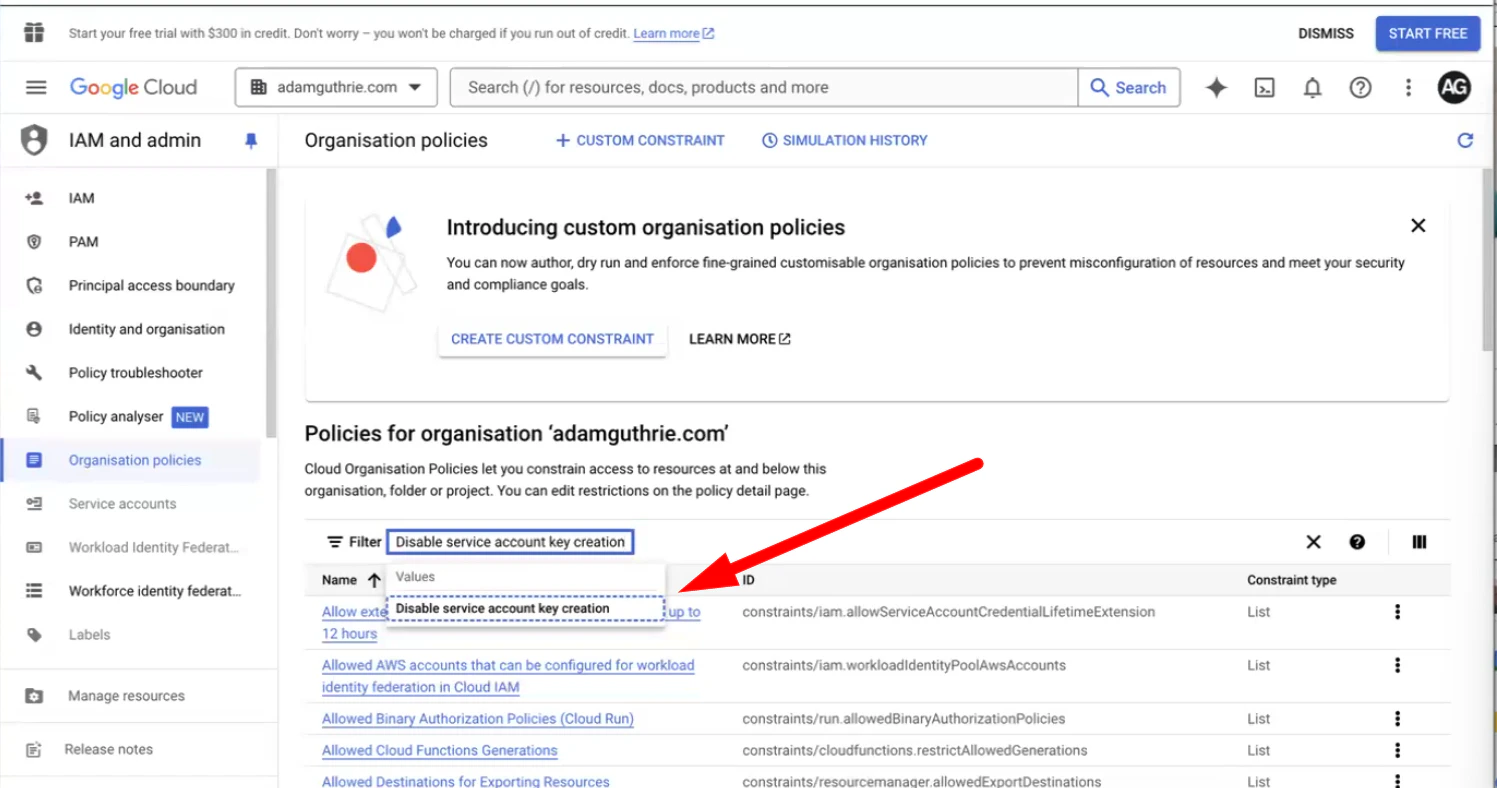
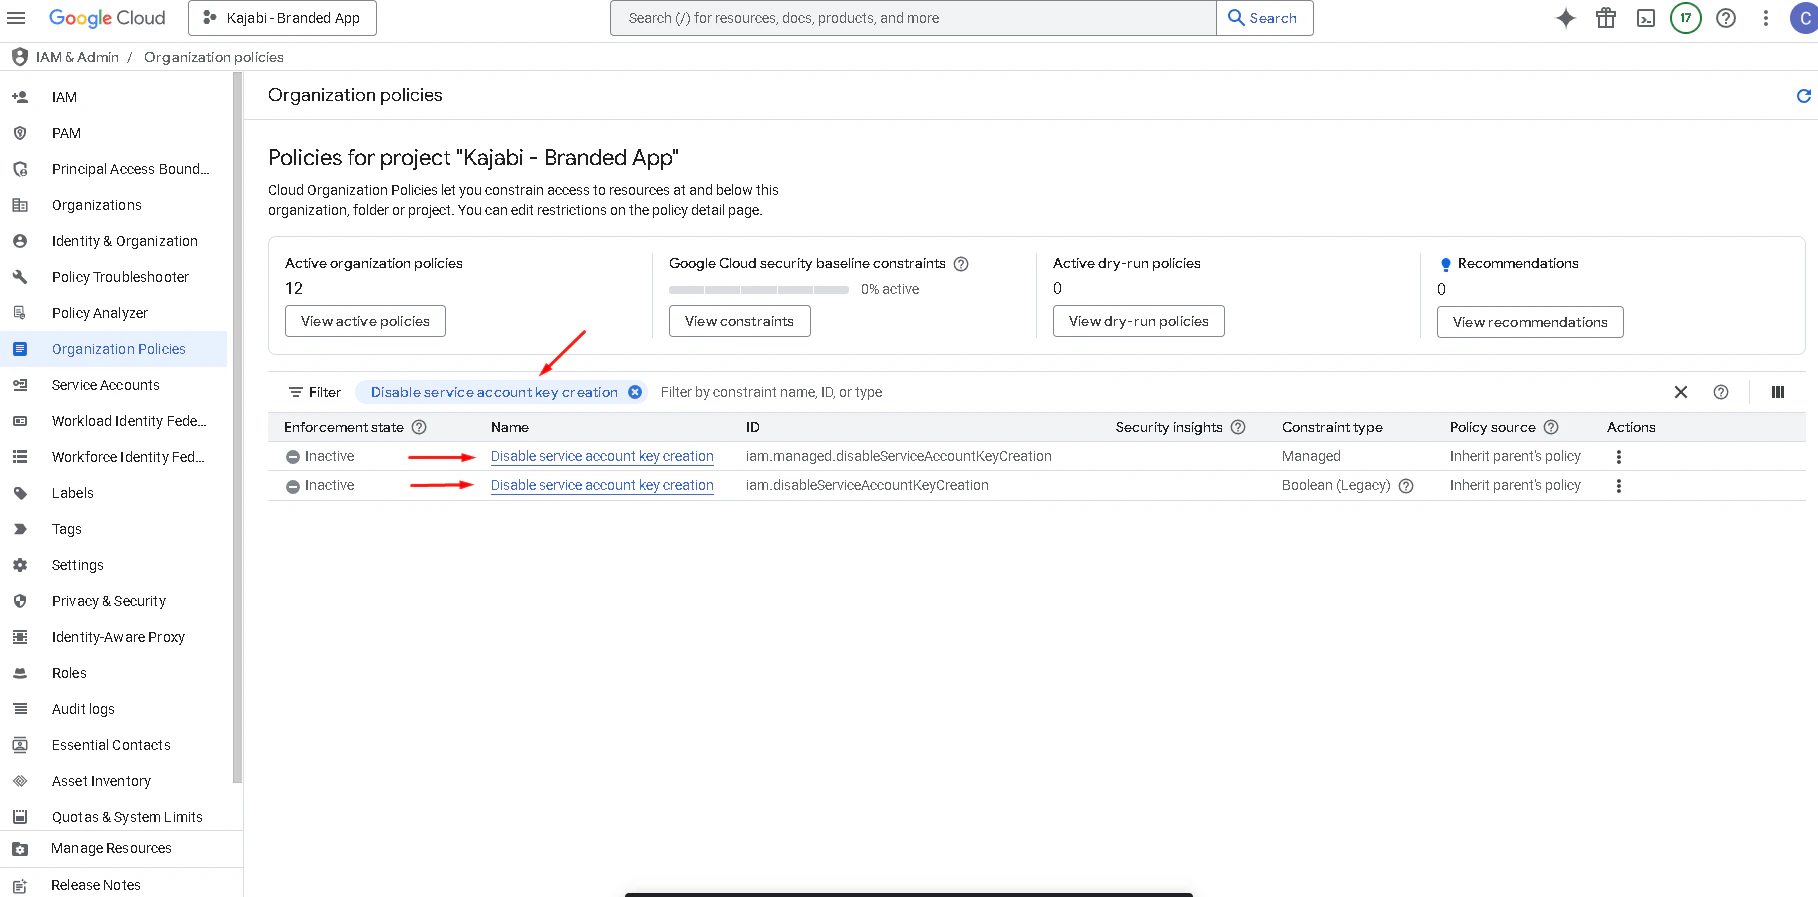
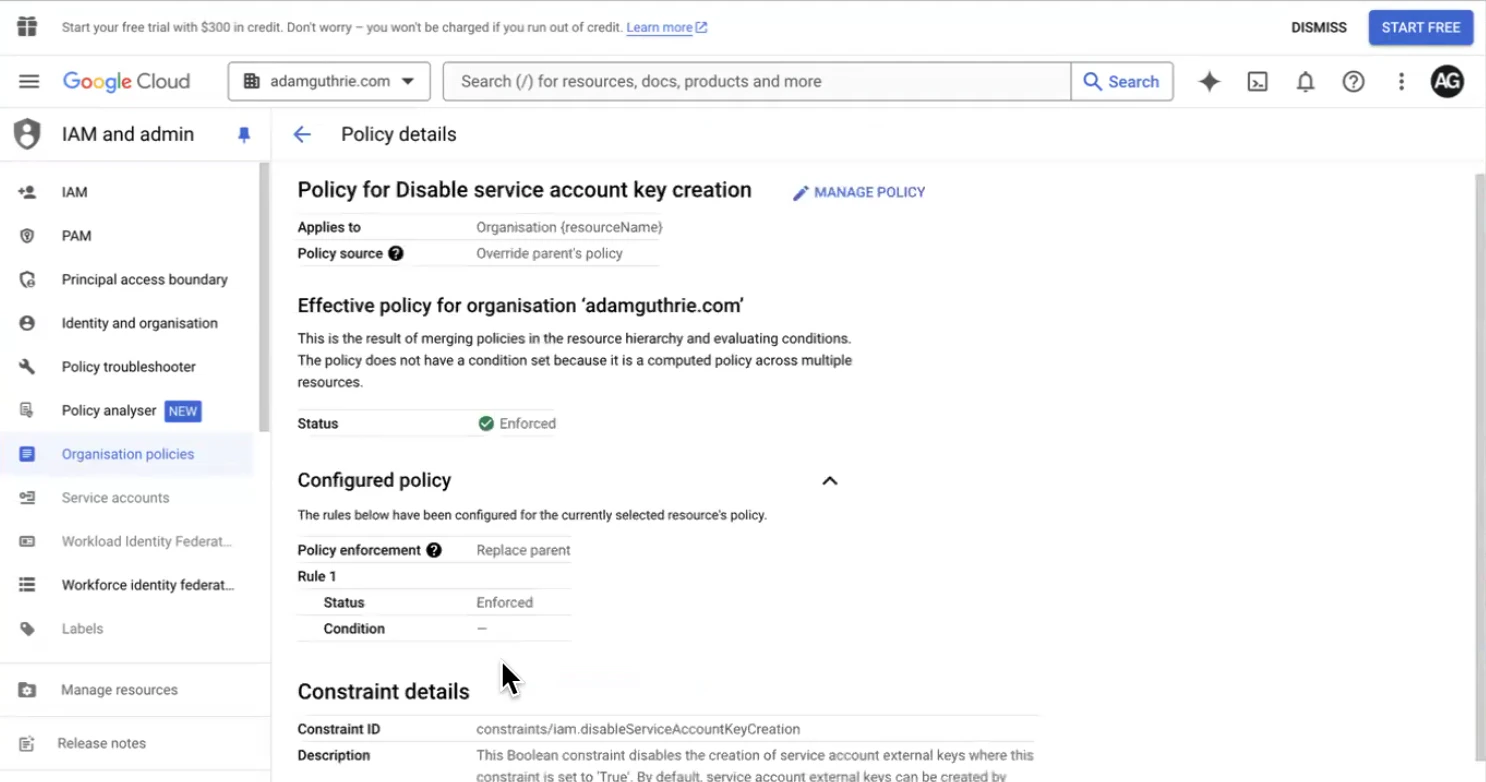
- Click Disable service account key creation:
- You will want to follow these next steps for both links
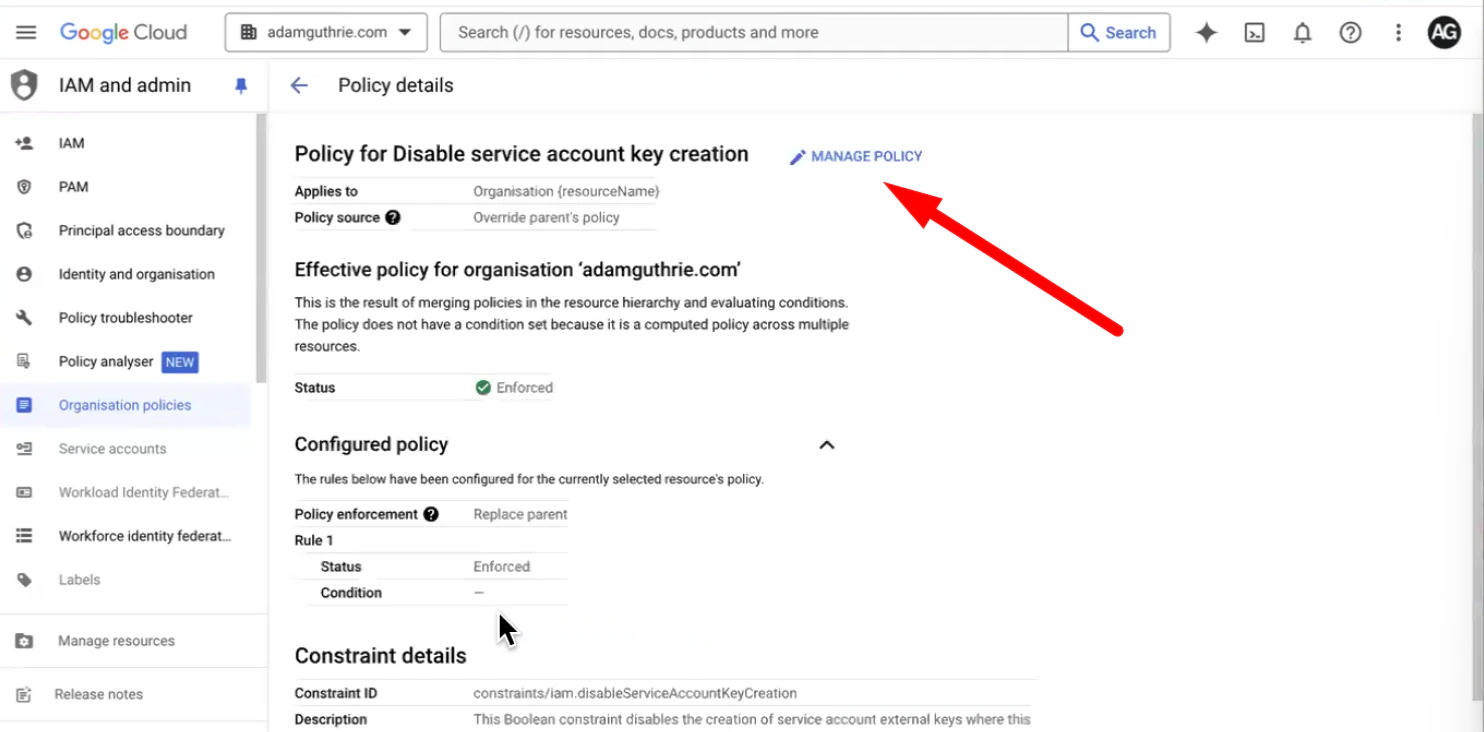
- Click Manage Policy
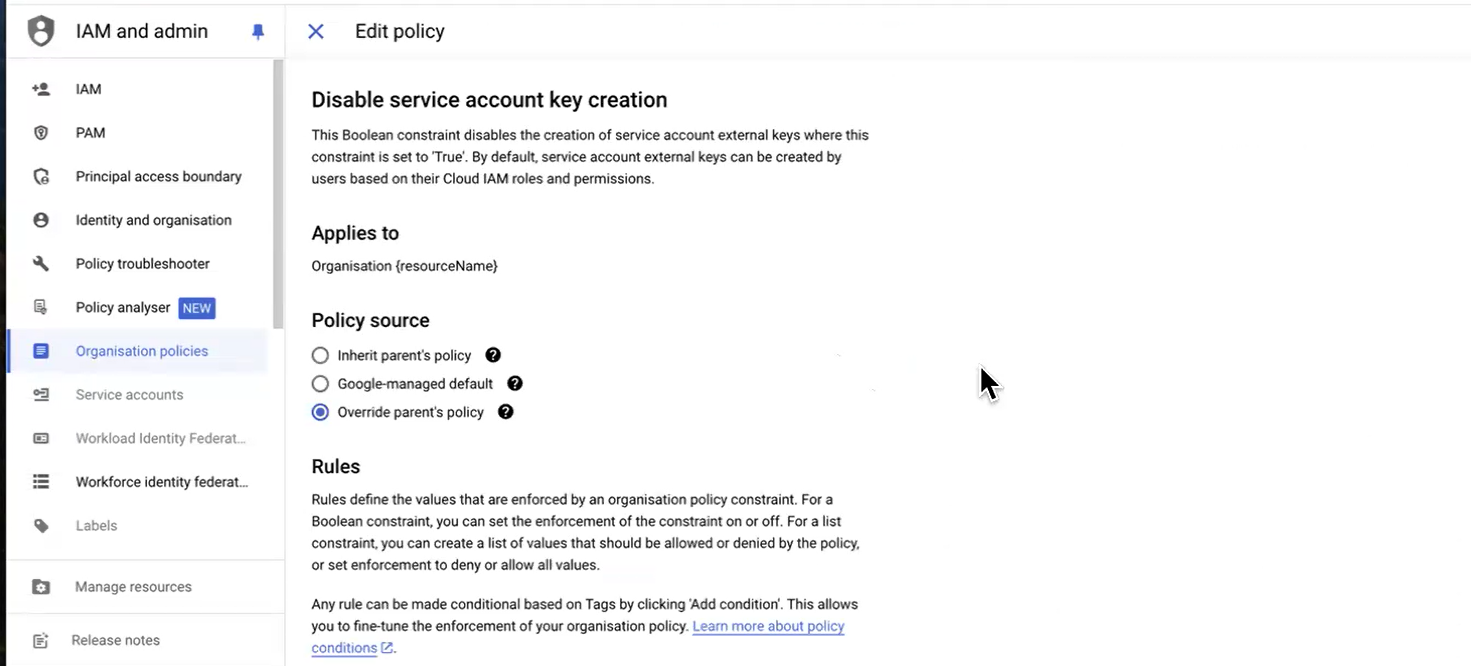
- Change the Policy Source to Override Parent’s Policy, then click on the Enforced rule
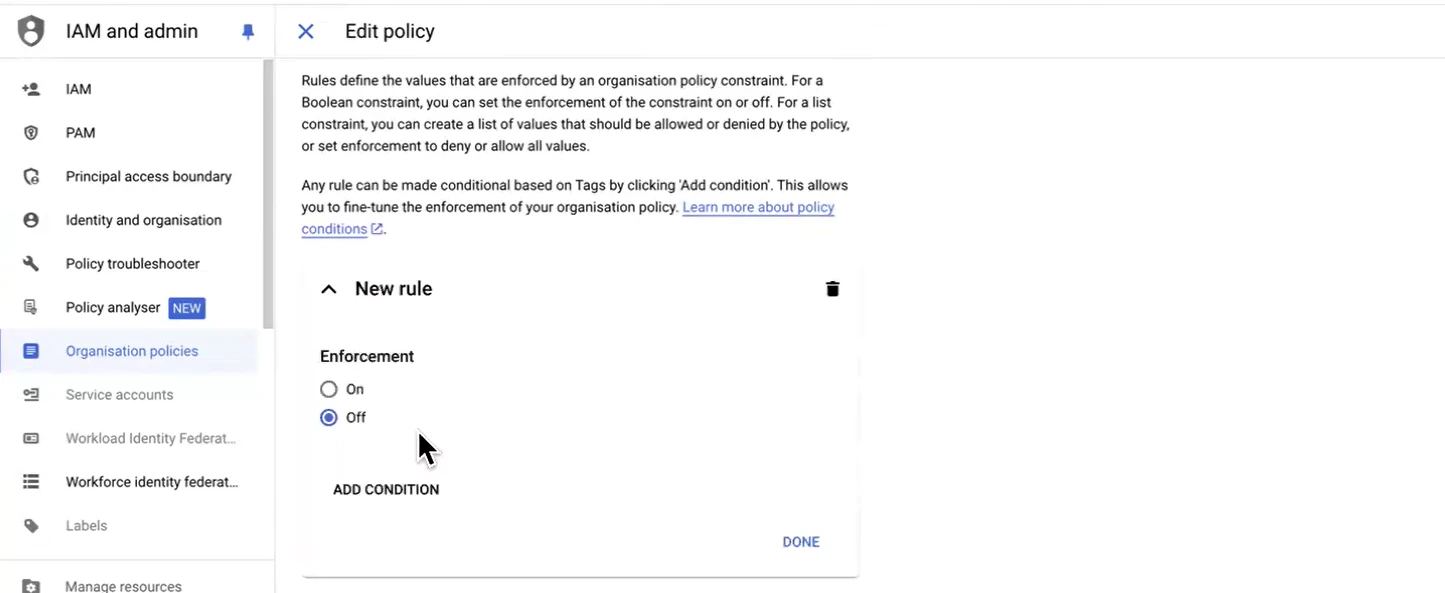
- Change the Enforced rule to Off
- Then, click Done:
- Click Set Policy to save the changes:

- Make sure to repeat these steps for the second Disable service account key creation link
Return to the project
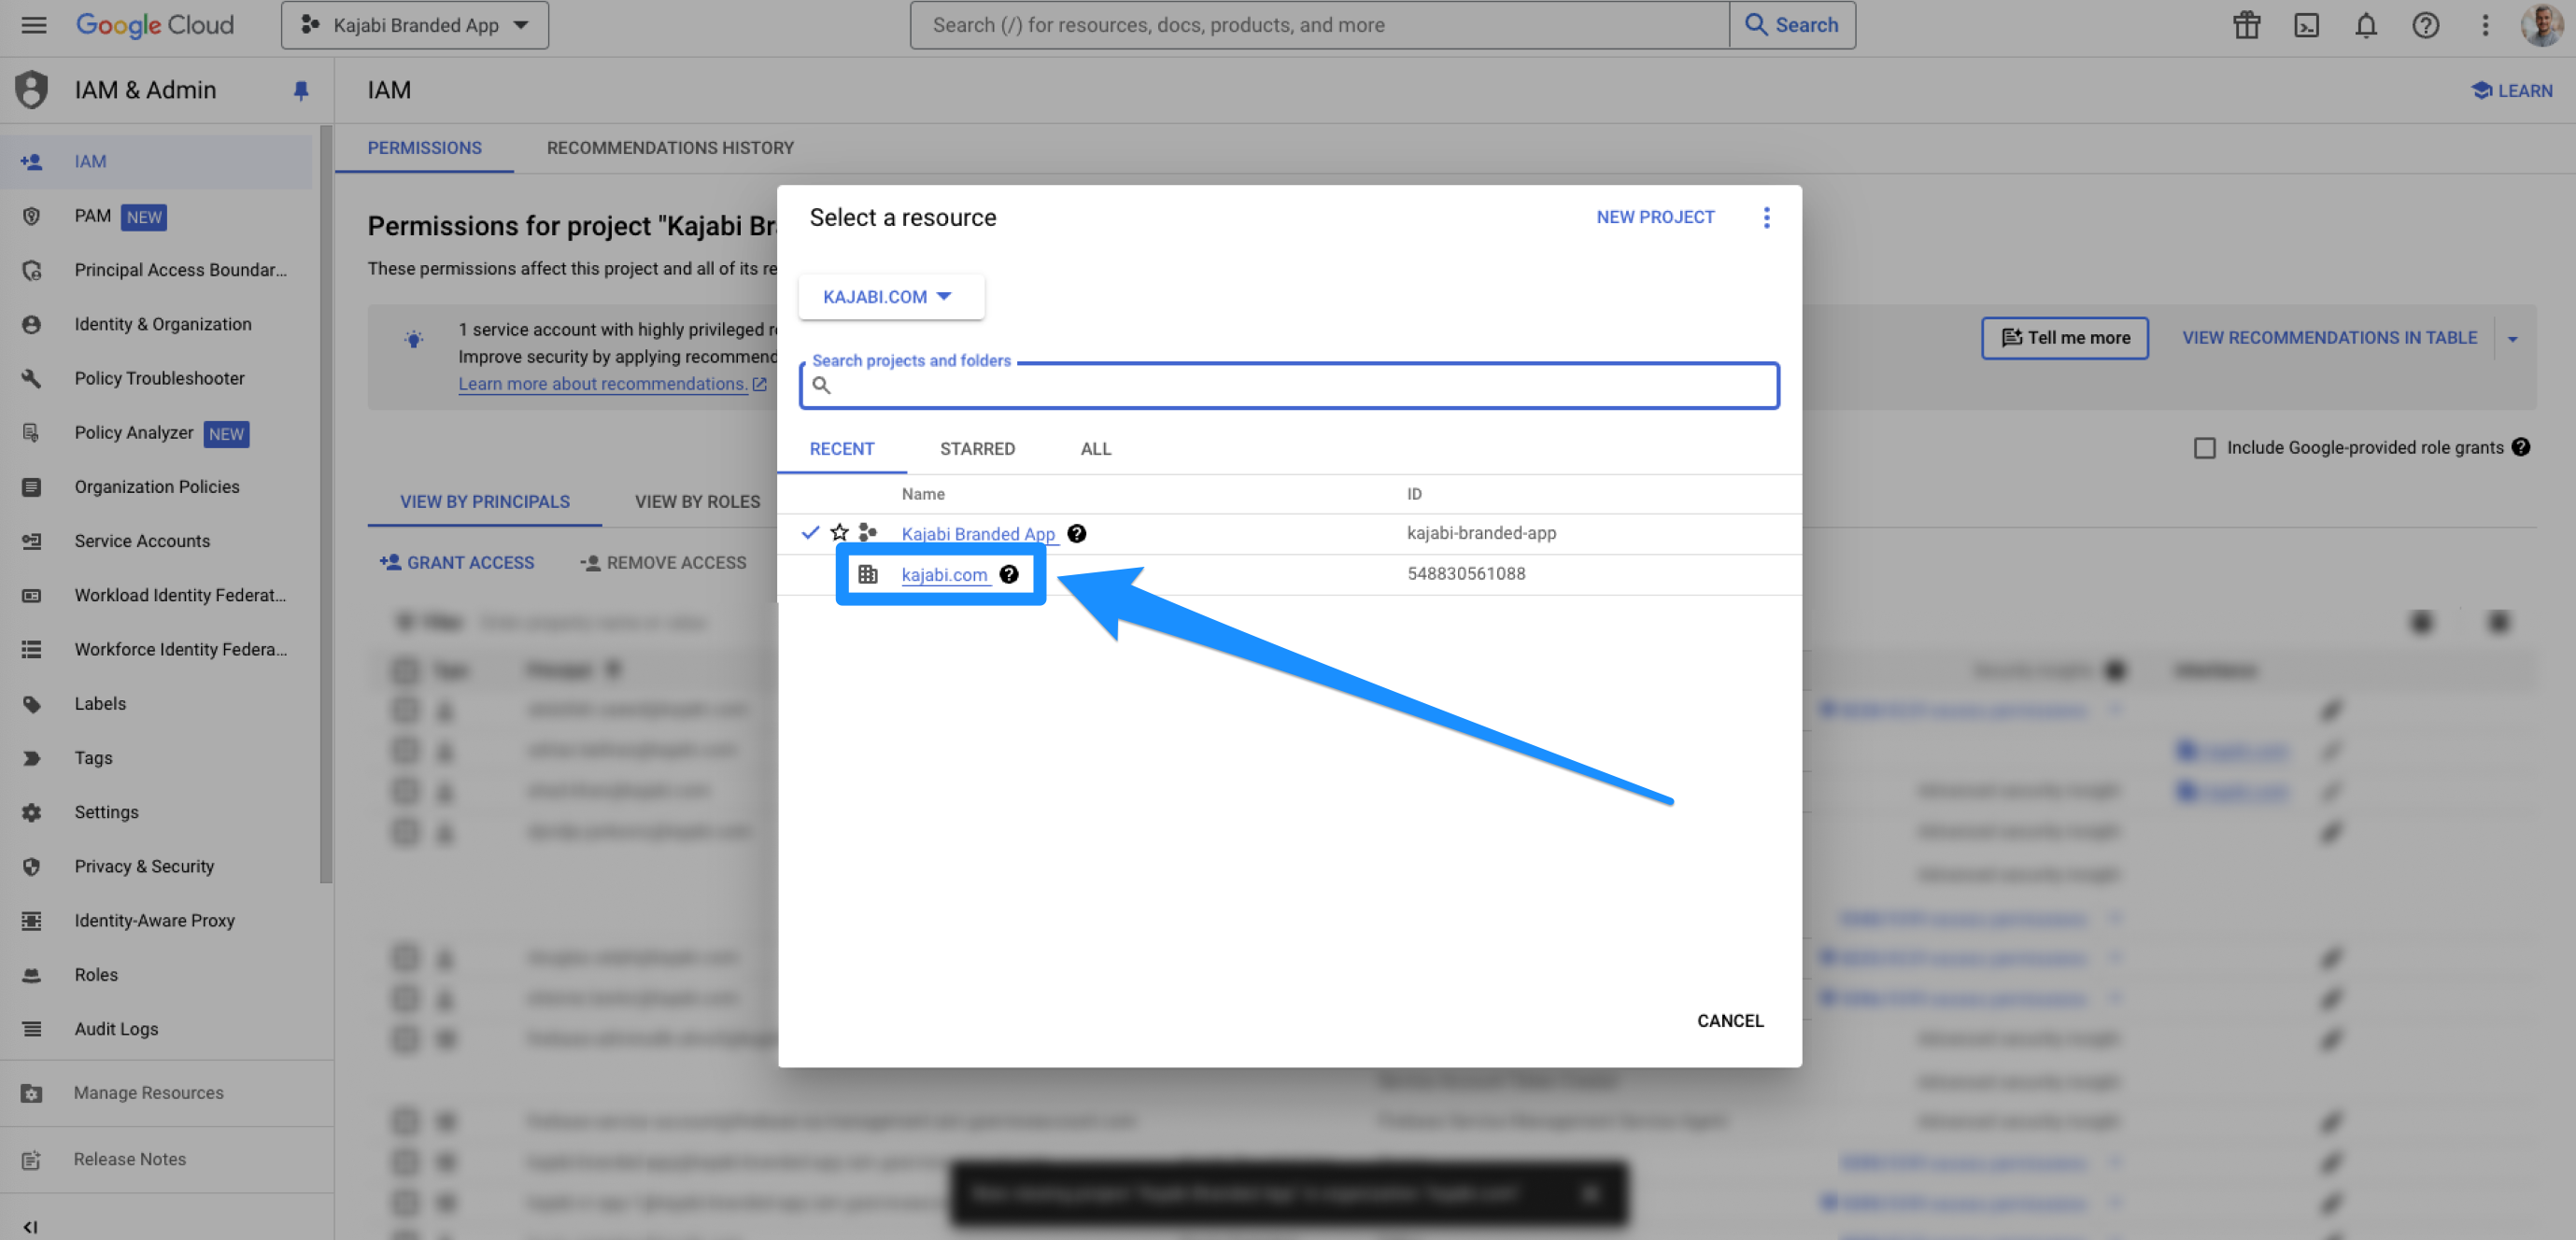
After saving the new role, return to the project:- Open the dropdown menu in the top-left corner:
- Switch back to the project you created (the app name):