

Note:
This article refers to the Premier Course Template. Installing and activating a different Template will include different features in the Course Editor. Learn how to Install and activate a new Template for a Course.
This article refers to the Premier Course Template. Installing and activating a different Template will include different features in the Course Editor. Learn how to Install and activate a new Template for a Course.
What is Premier?
The Premier editor allows you to customize sections and content blocks throughout your course pages. There are a multitude of user experience options, including course progress, cross-sells, Instructor visibility, Modules or Lesson visibility, and much more. Tap into the ultimate appearance and utilize background images on a product level with Premier.Install Premier
Installing Premier allows you to design Course pages, but they will not be visible to customers. Design and update the Course behind-the-scenes until you are ready to make it visible to customers.- Open the Products tab from your Dashboard.
- Select the **Course **you wish to design.
- Click the Customize tab.
- Select Install Template.
- Select the **Premier Template **to preview.
- Click Install Template.
Customize Course pages
After installing the template, navigate through the various Course pages from the top dropdown menu in the page editor: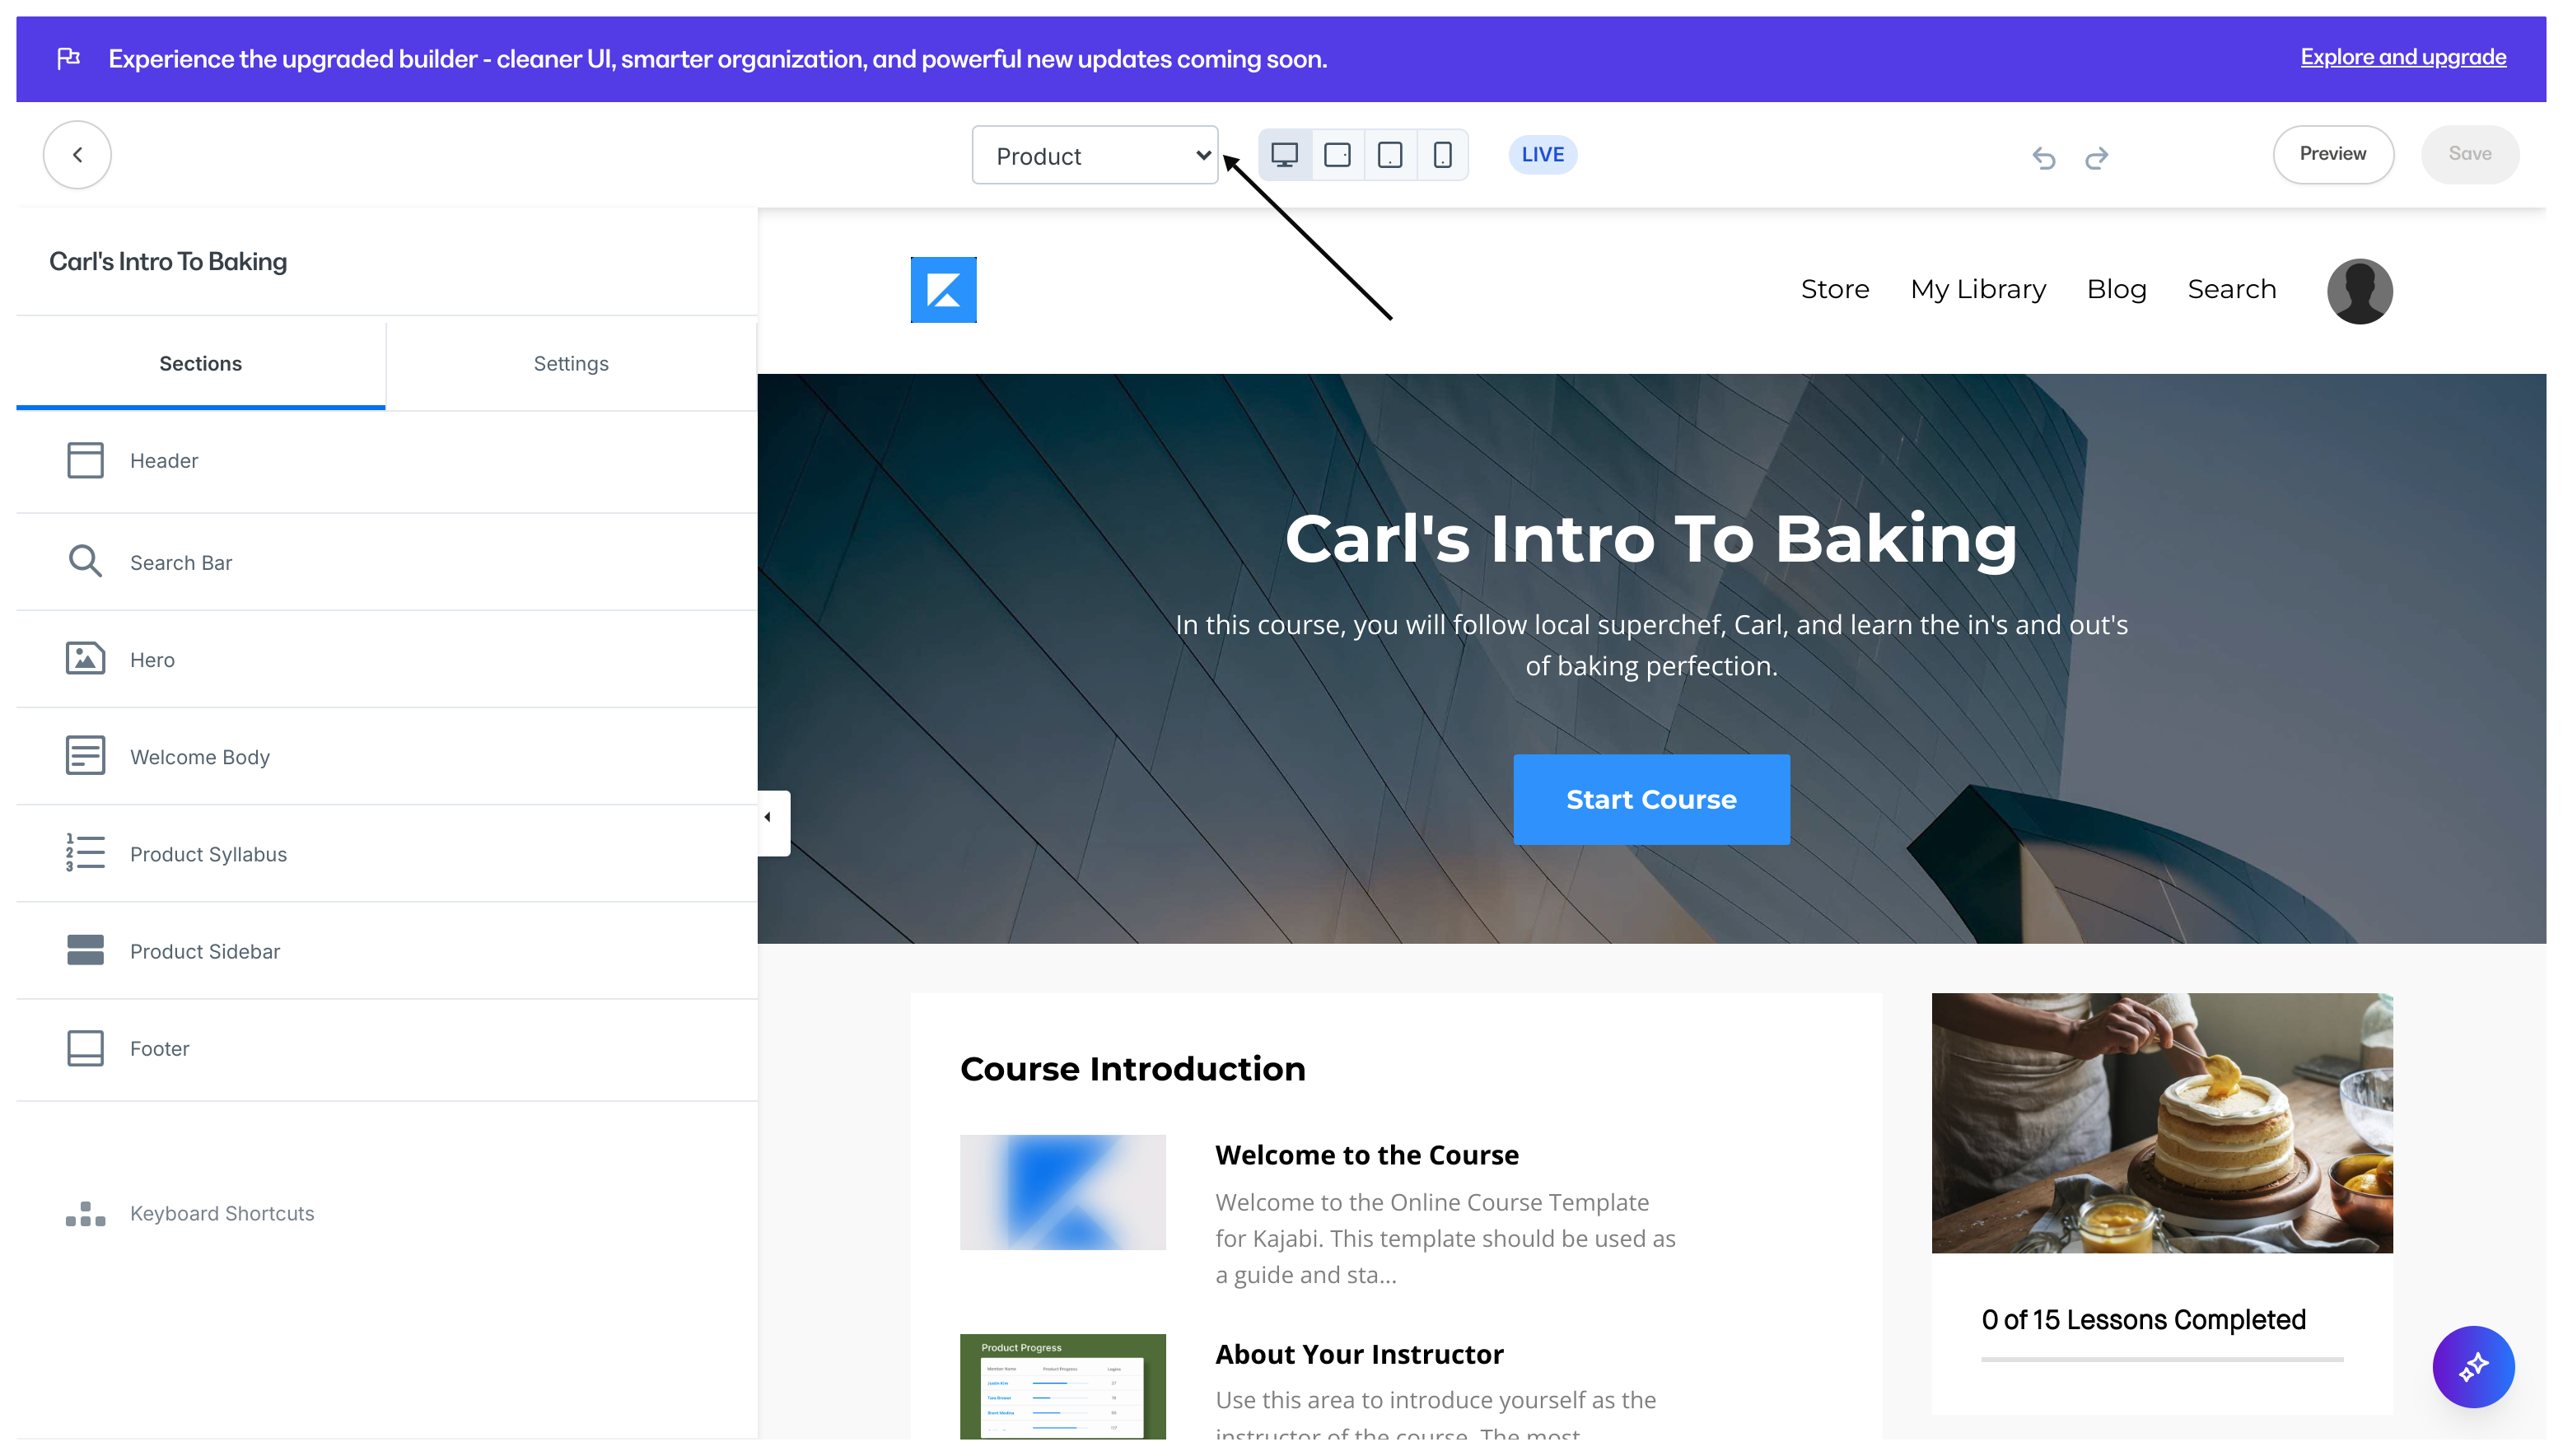
Customize with Premier
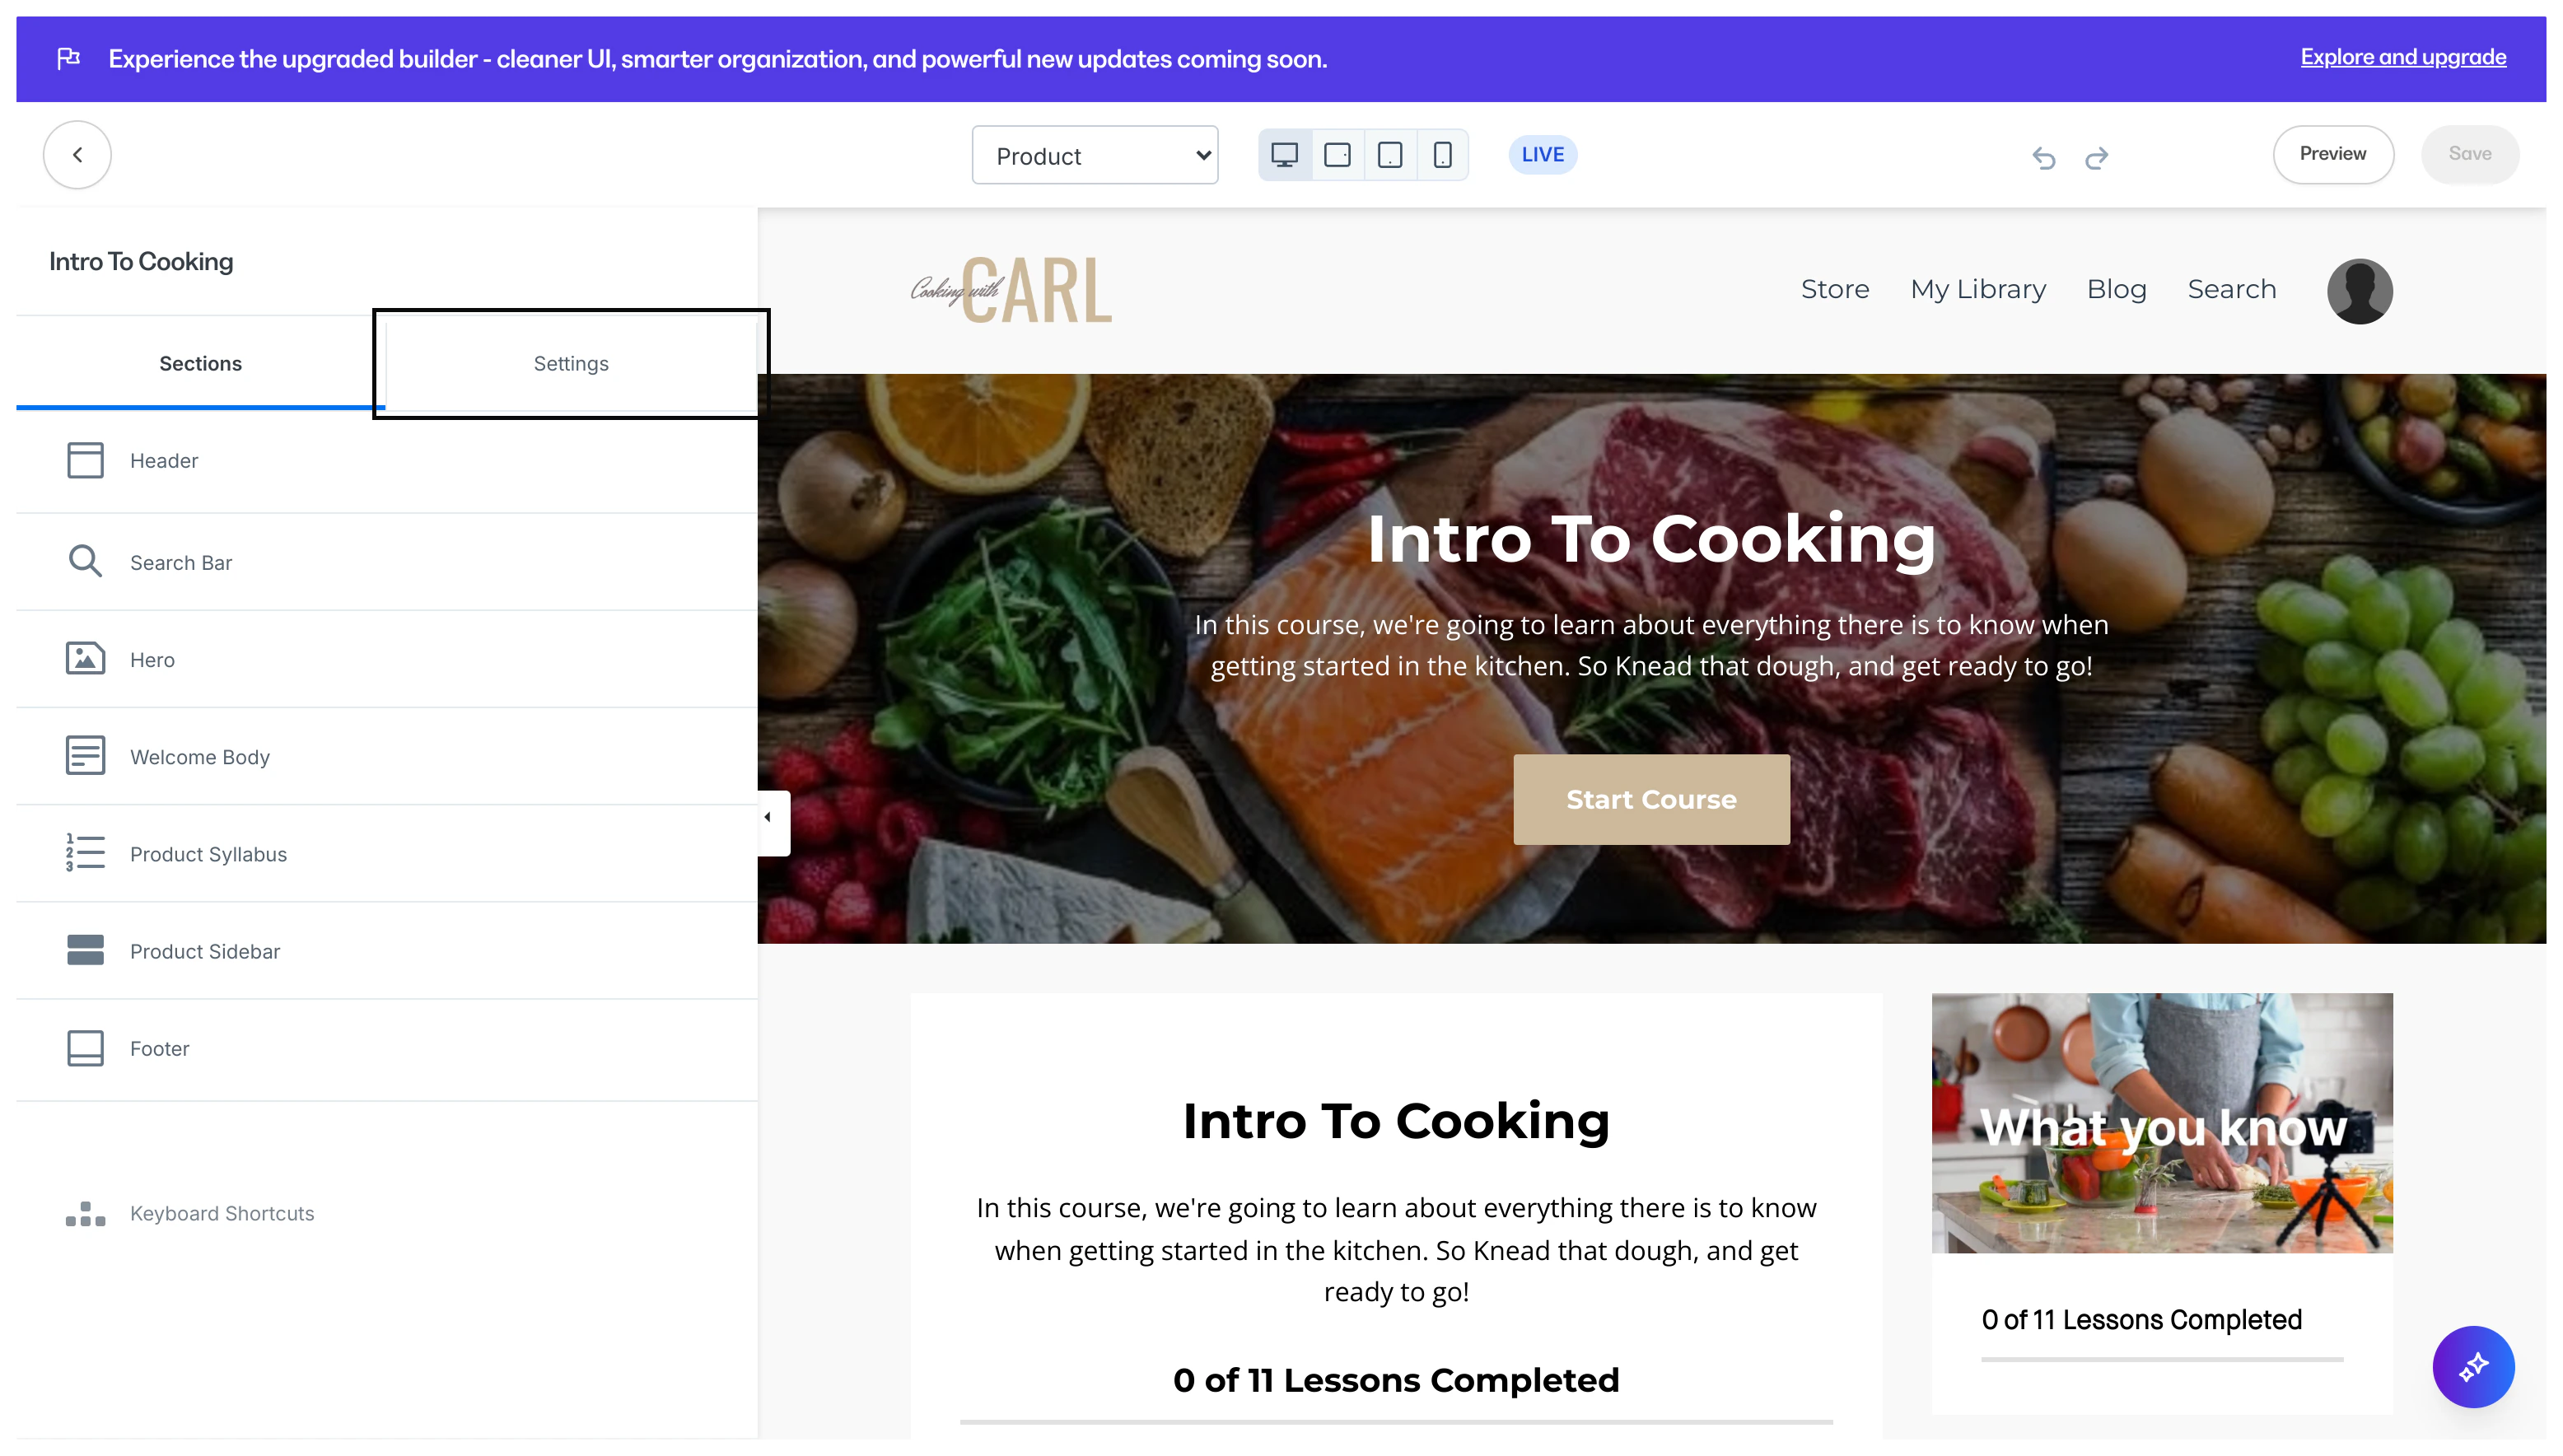
Customize the Course with Kajabi’s click-to-edit system. Simply locate the section you wish to customize and make desired changes in the sidebar control panel. Or select the different sections from the sidebar control panel to edit the various sections that make up the Course page. With the Premier Template, you can customize the various Sections of your page and the Page Settings.Premier sections
Header
Customize the look and feel of the Course header with a logo and user menu. And with the Header editor, choose to add an announcement or a call to action to the forefront of the page: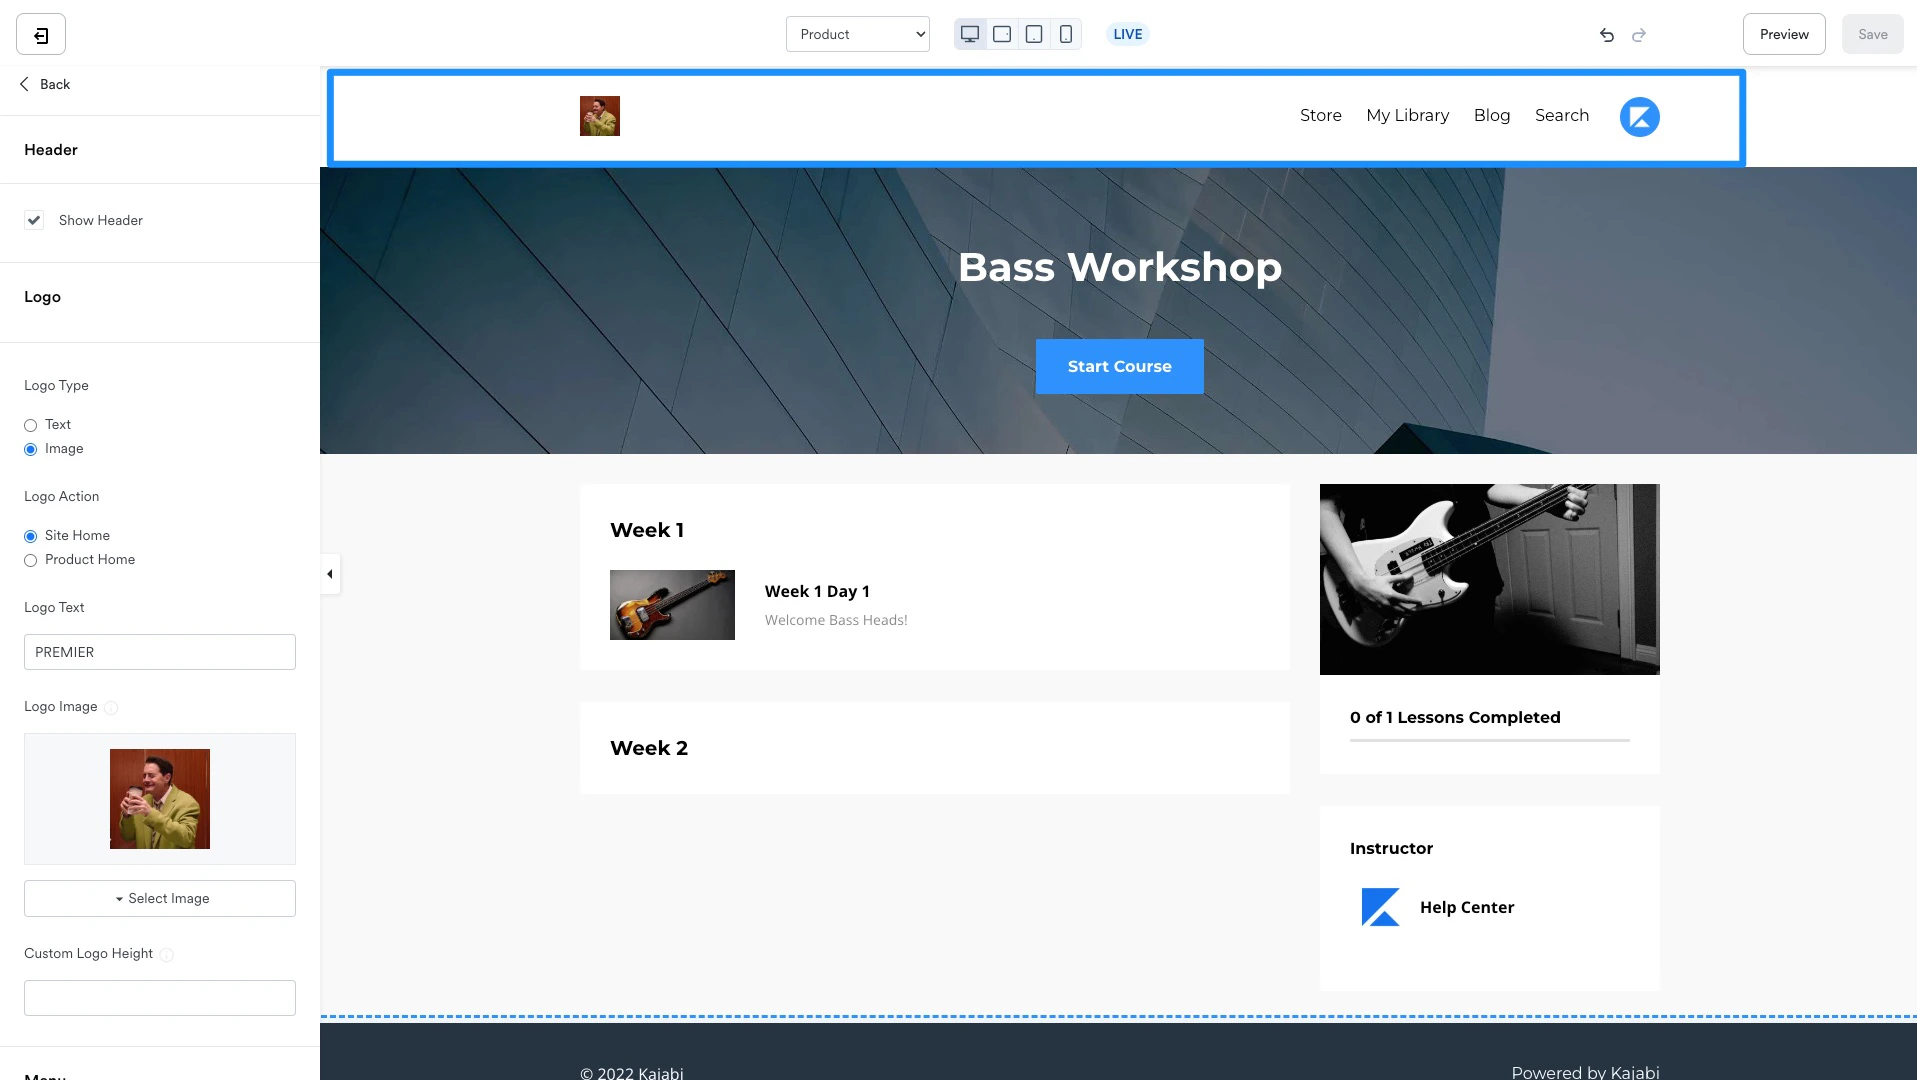
Search Bar
Choose to hide or include a search link in the header menu and customize the language and appearance of the search link: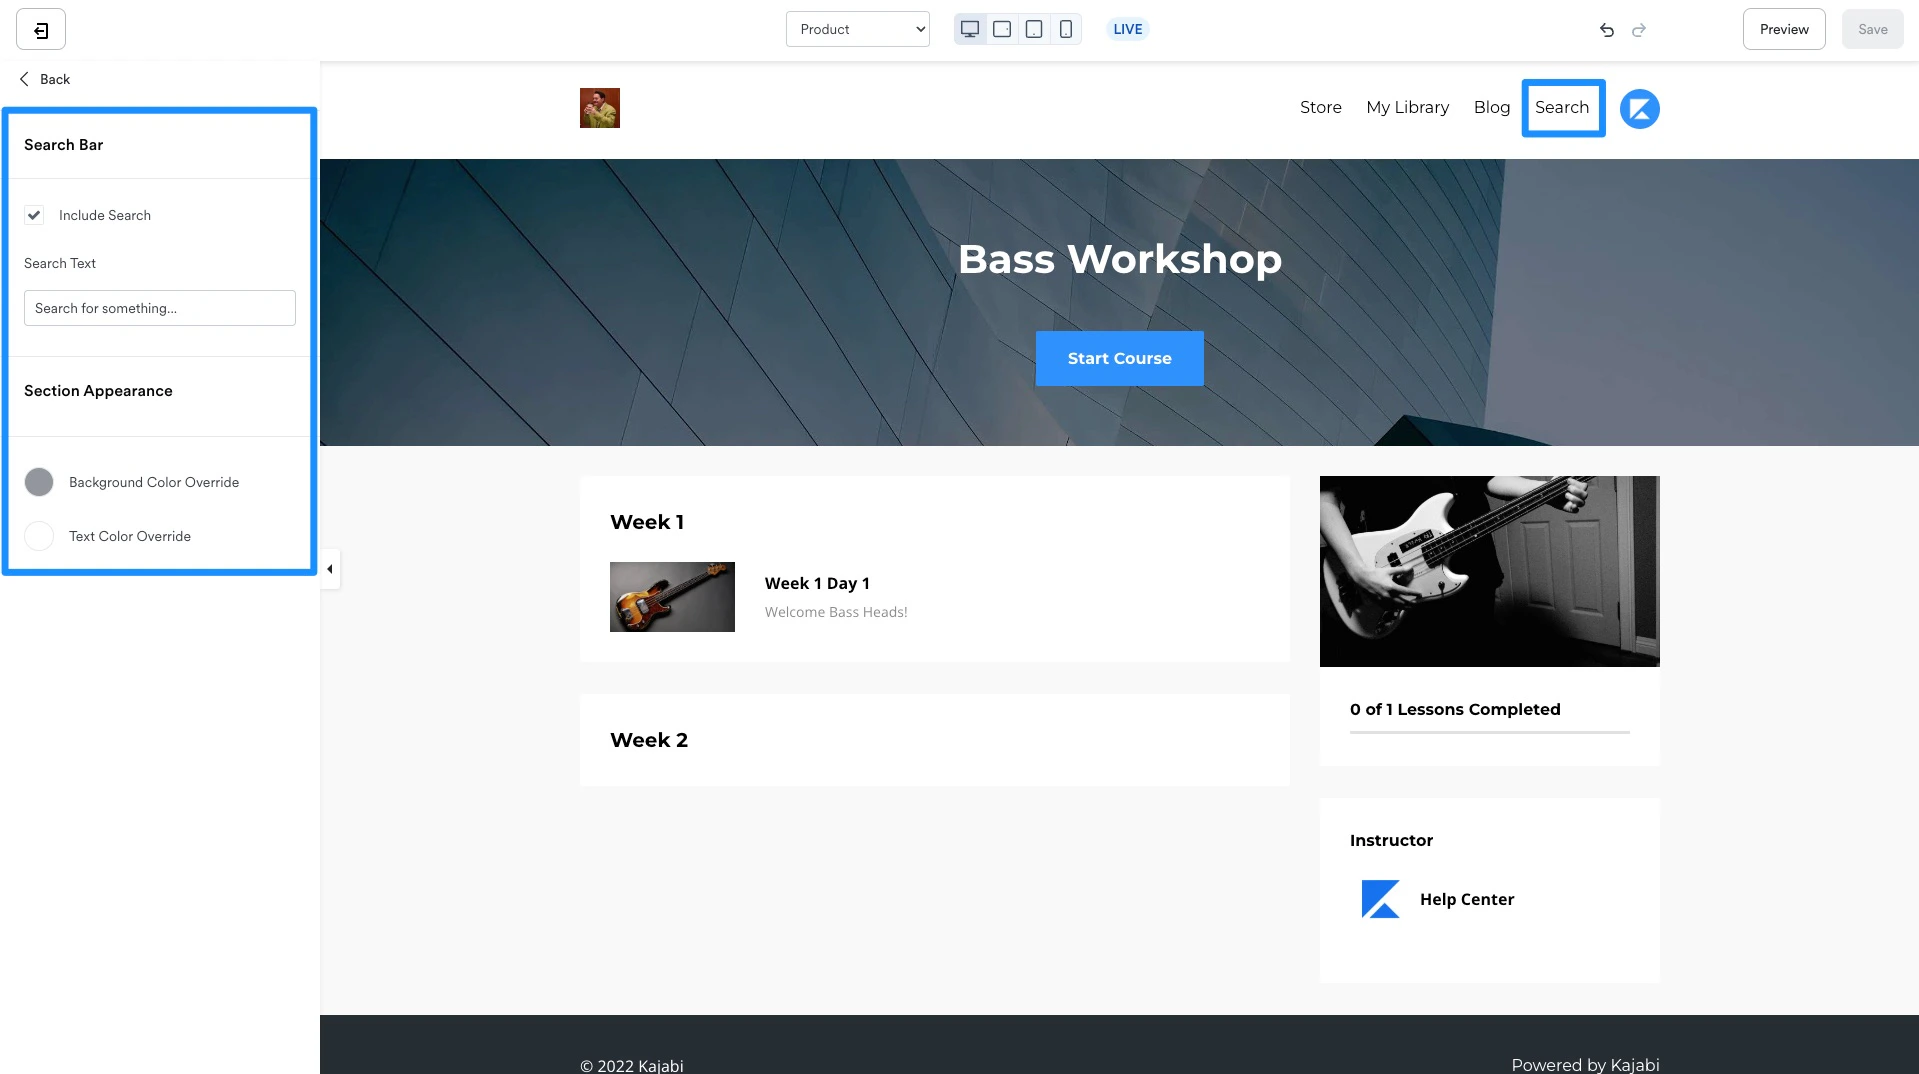
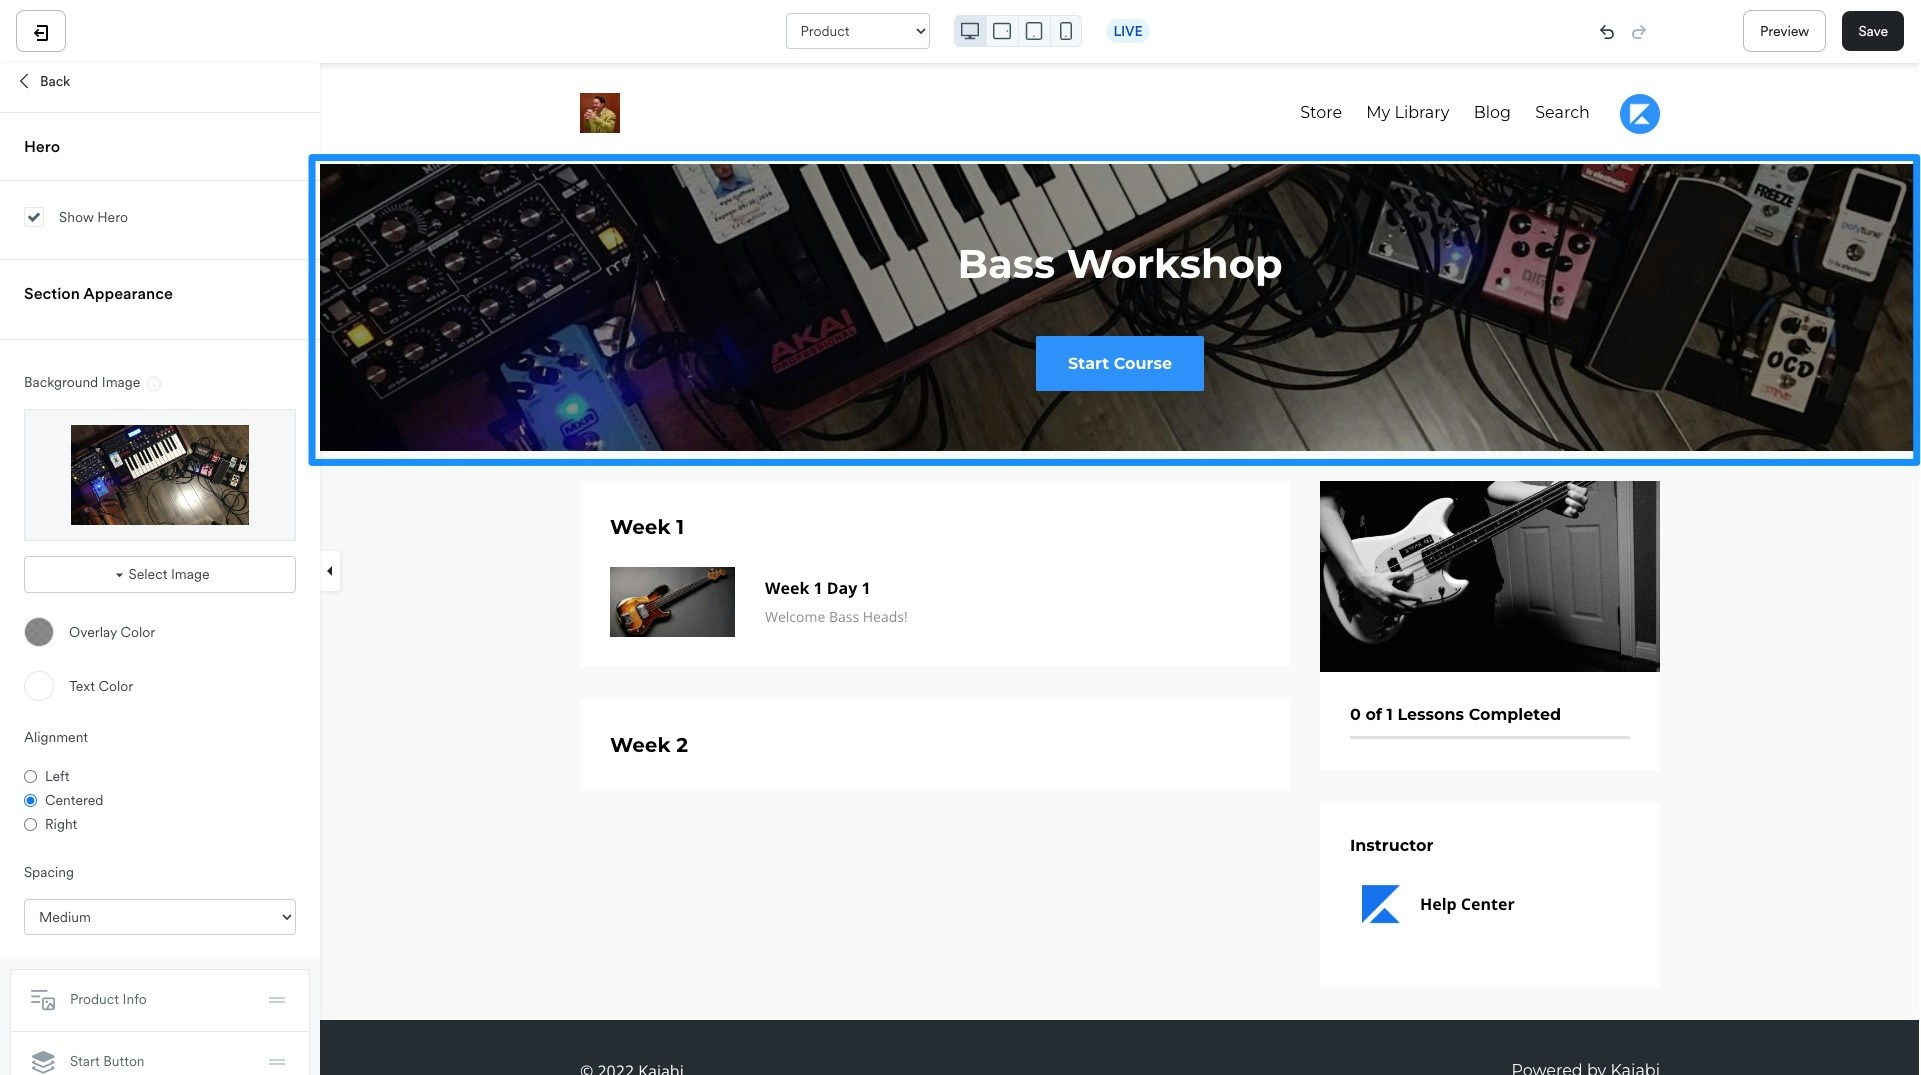
Hero
Customize the hero section of the Course page to change the appearance of the top-most section of the page. Choose to show or hide the Hero section and configure its appearance by including any additional blocks:- Product Info
- Start Button
- Call to Action
- Text
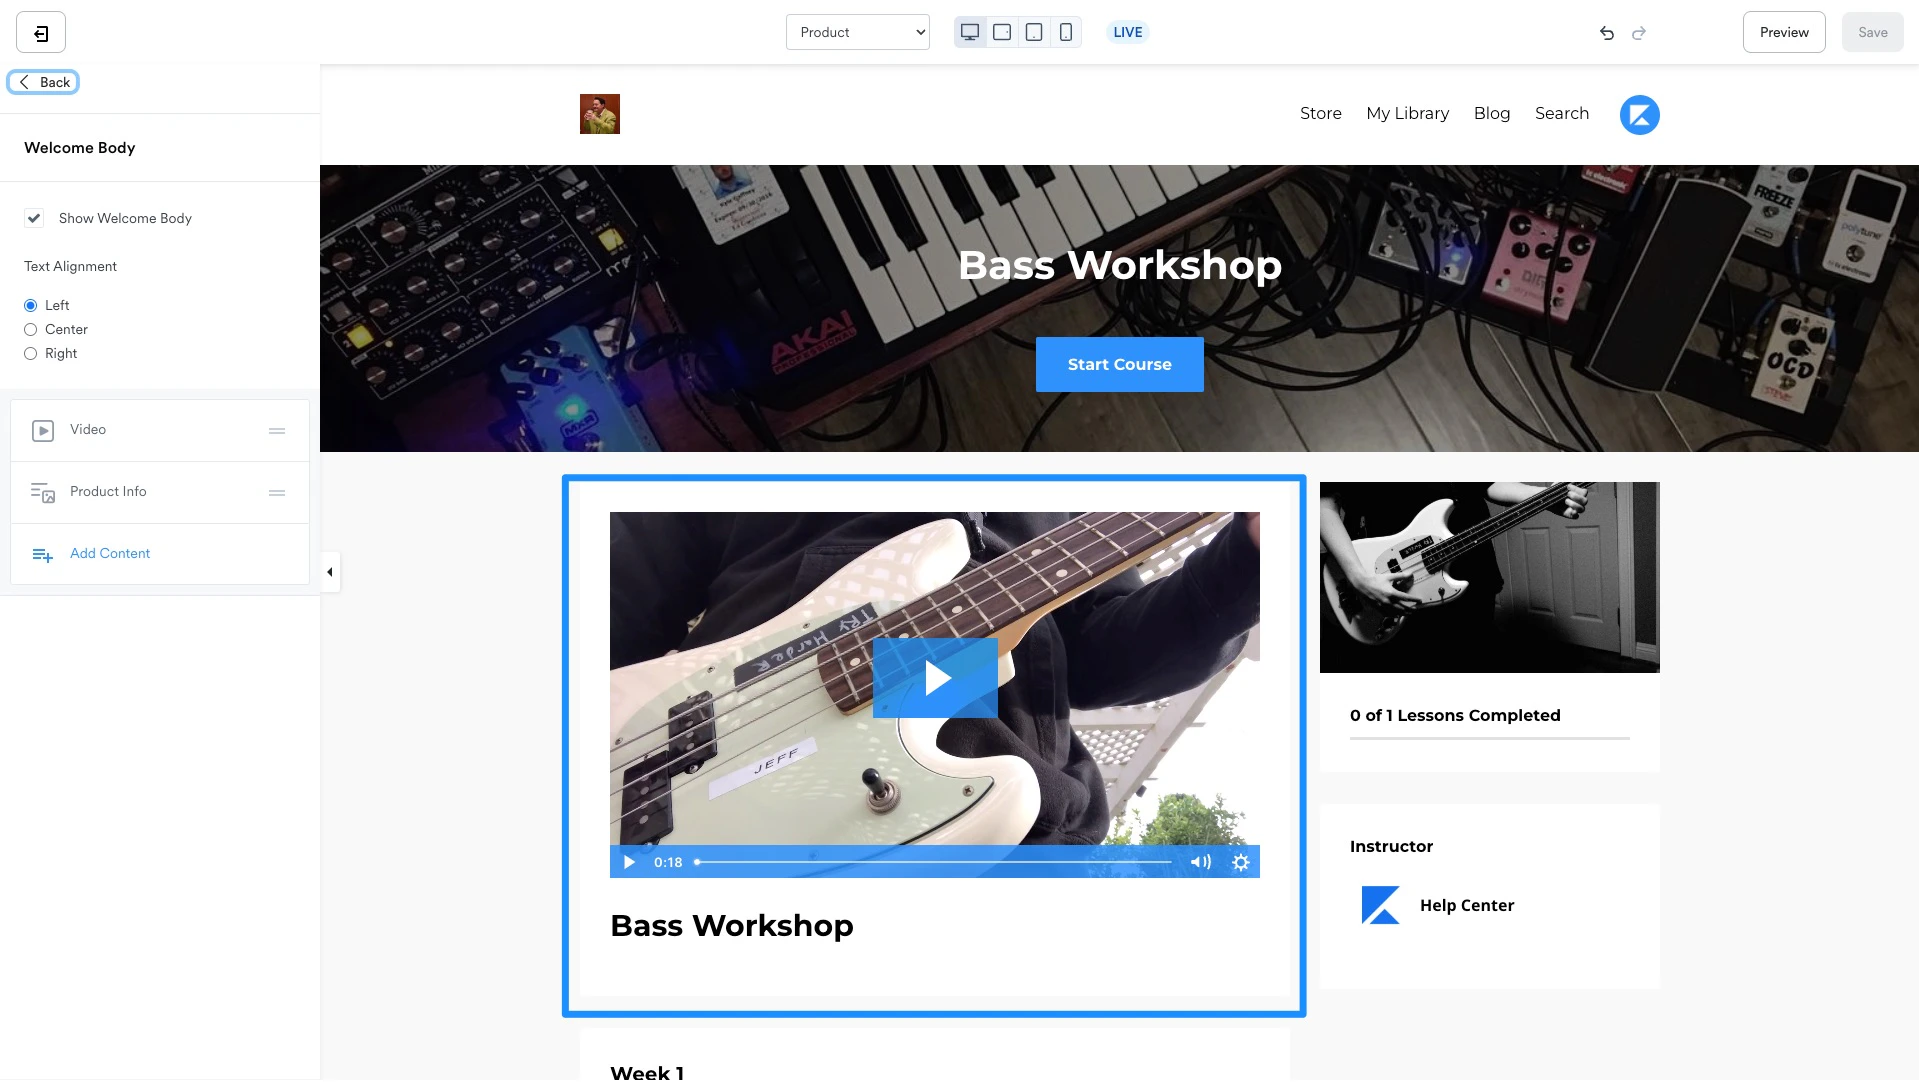
Welcome Body
Customize the Welcome Body section to choose to hide or include a welcome body directly above the Course content. Configure the text alignment and add additional blocks to design the welcome body:- Call to Action
- Code
- Course Progress
- Image
- Product Info
- Start Button
- Text
- Video
Course Syllabus
The Course Syllabus is the outline of your Course Modules and Lessons. Customize the Syllabus section to show or hide the syllabus, display the syllabus by Modules or by Lessons, truncate the number of Modules or Lessons displayed on a single page, and change the language for Modules, Coming Soon, and Show More text: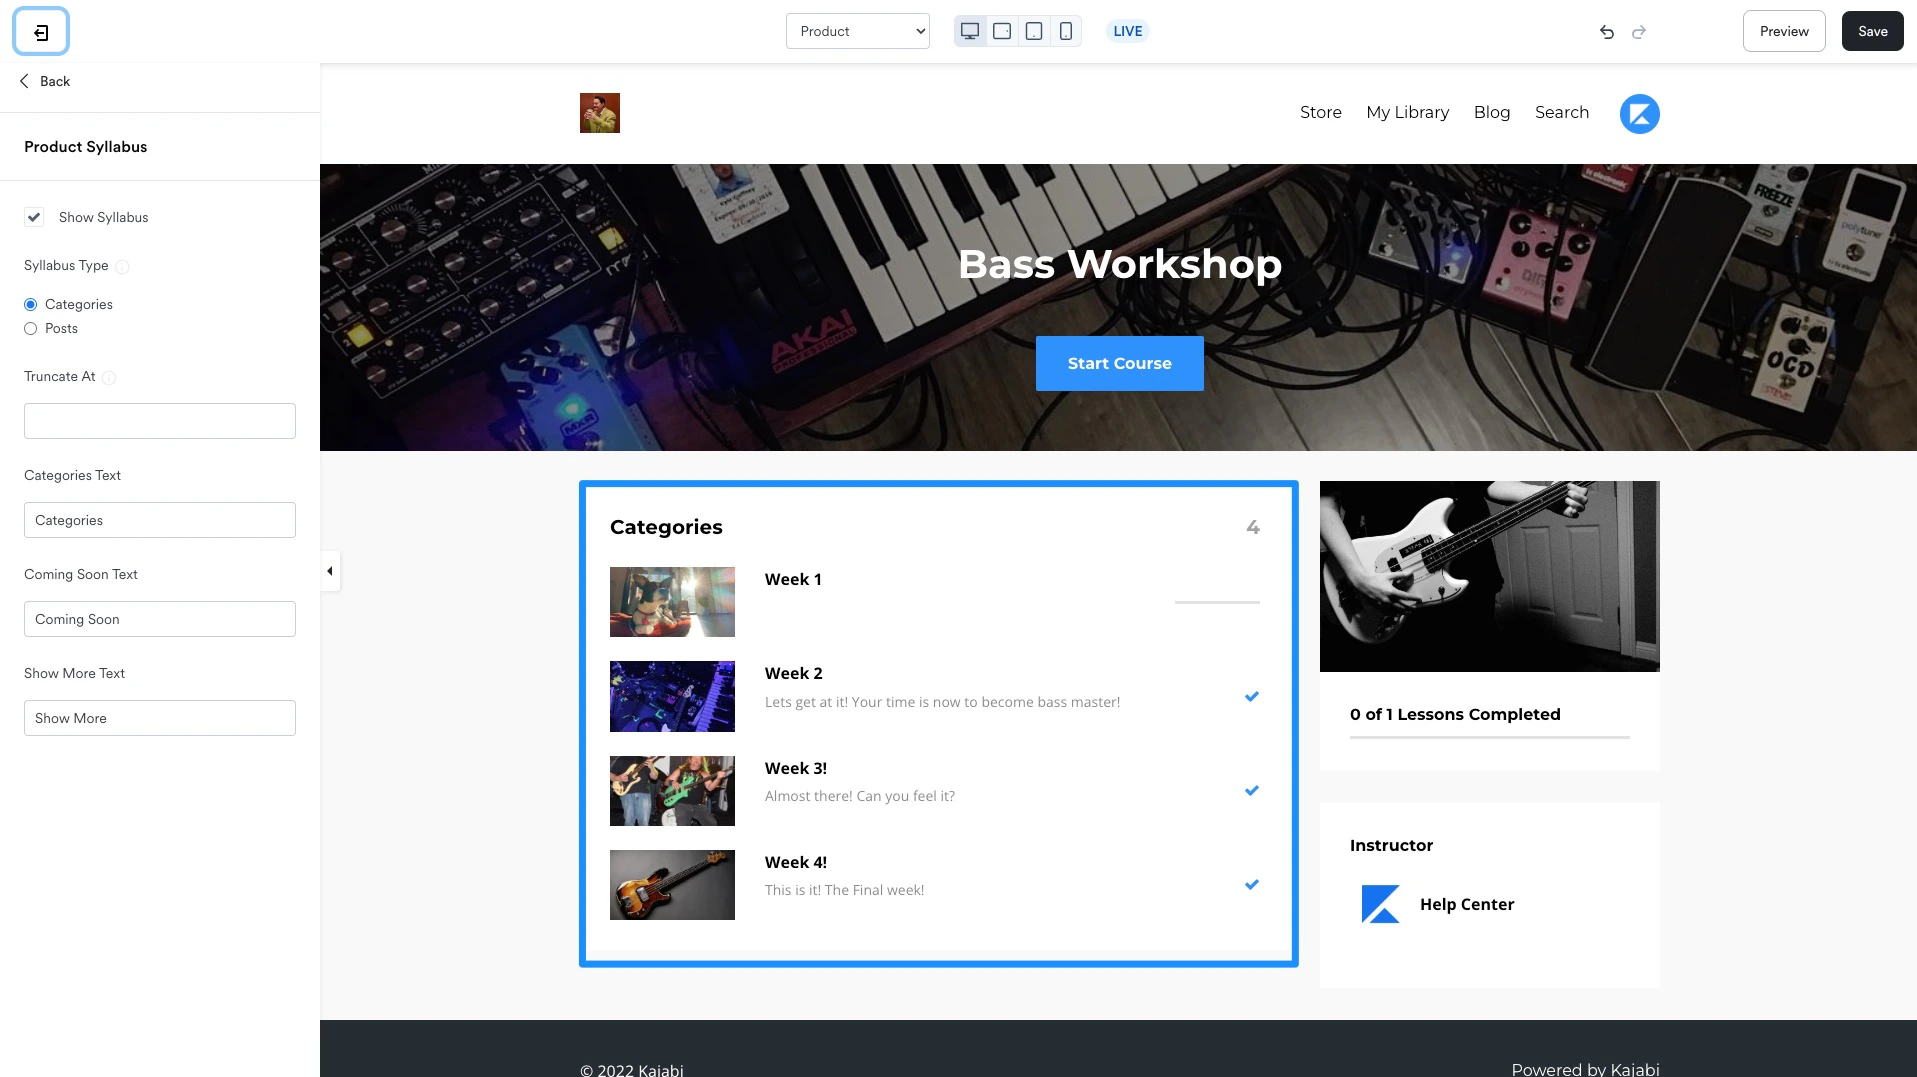
Community Widget
If you’ve created a Kajabi Community Product on the same site as the Course, you’ll have the option to add a Community Widget to the Course template to embed a Community Circle in the Course: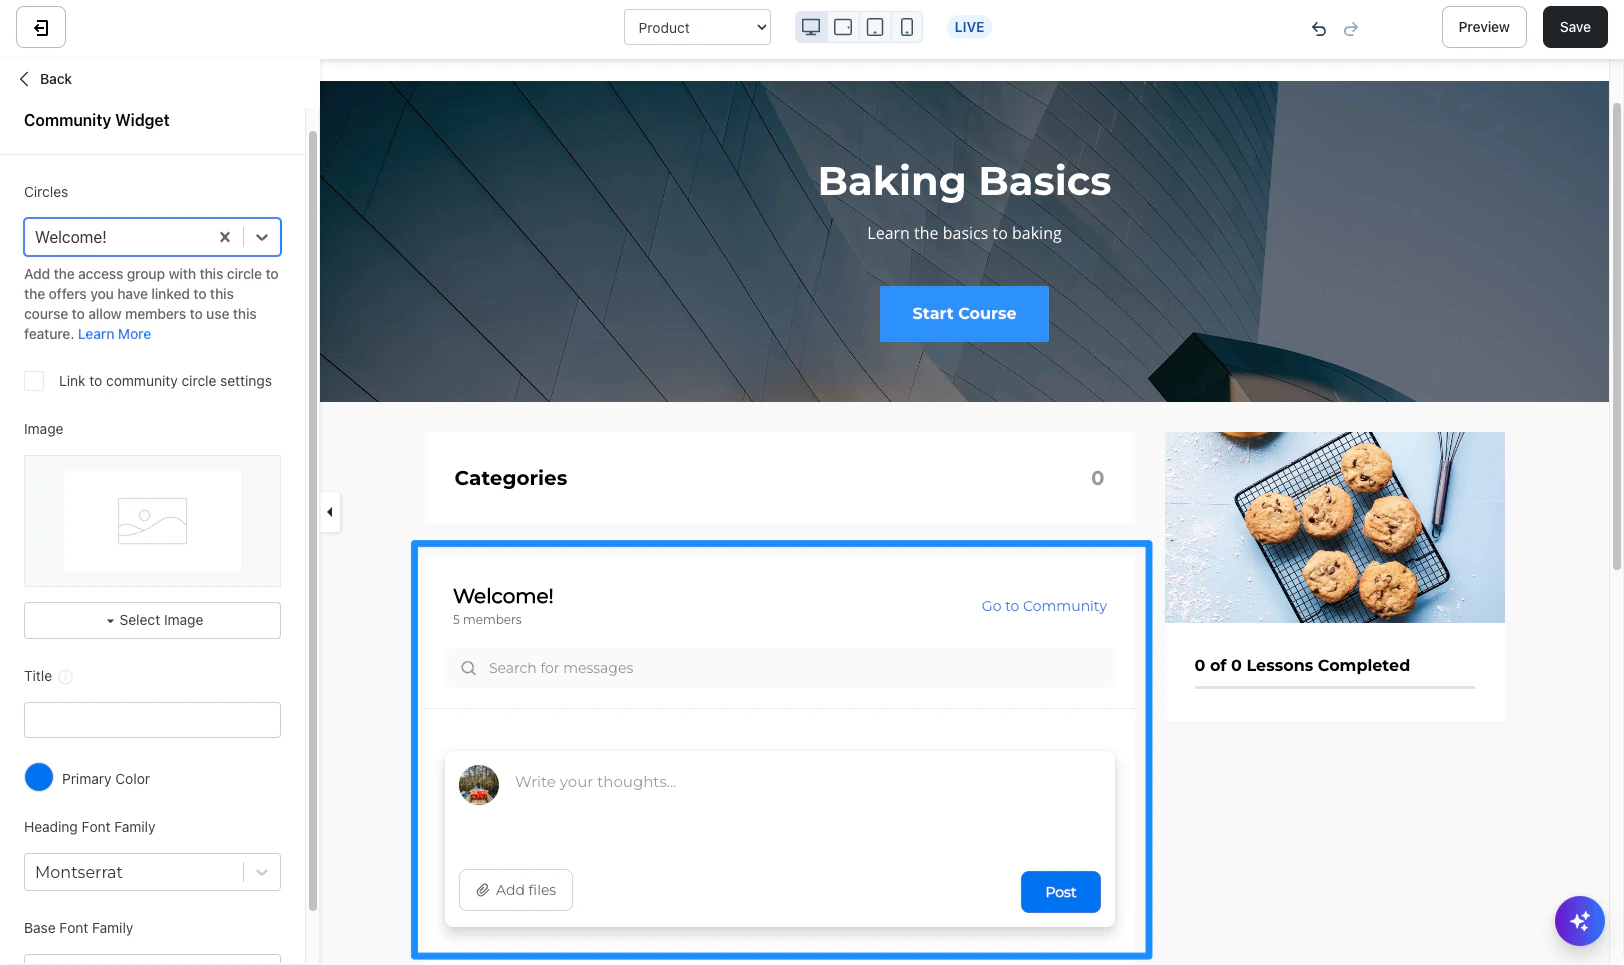
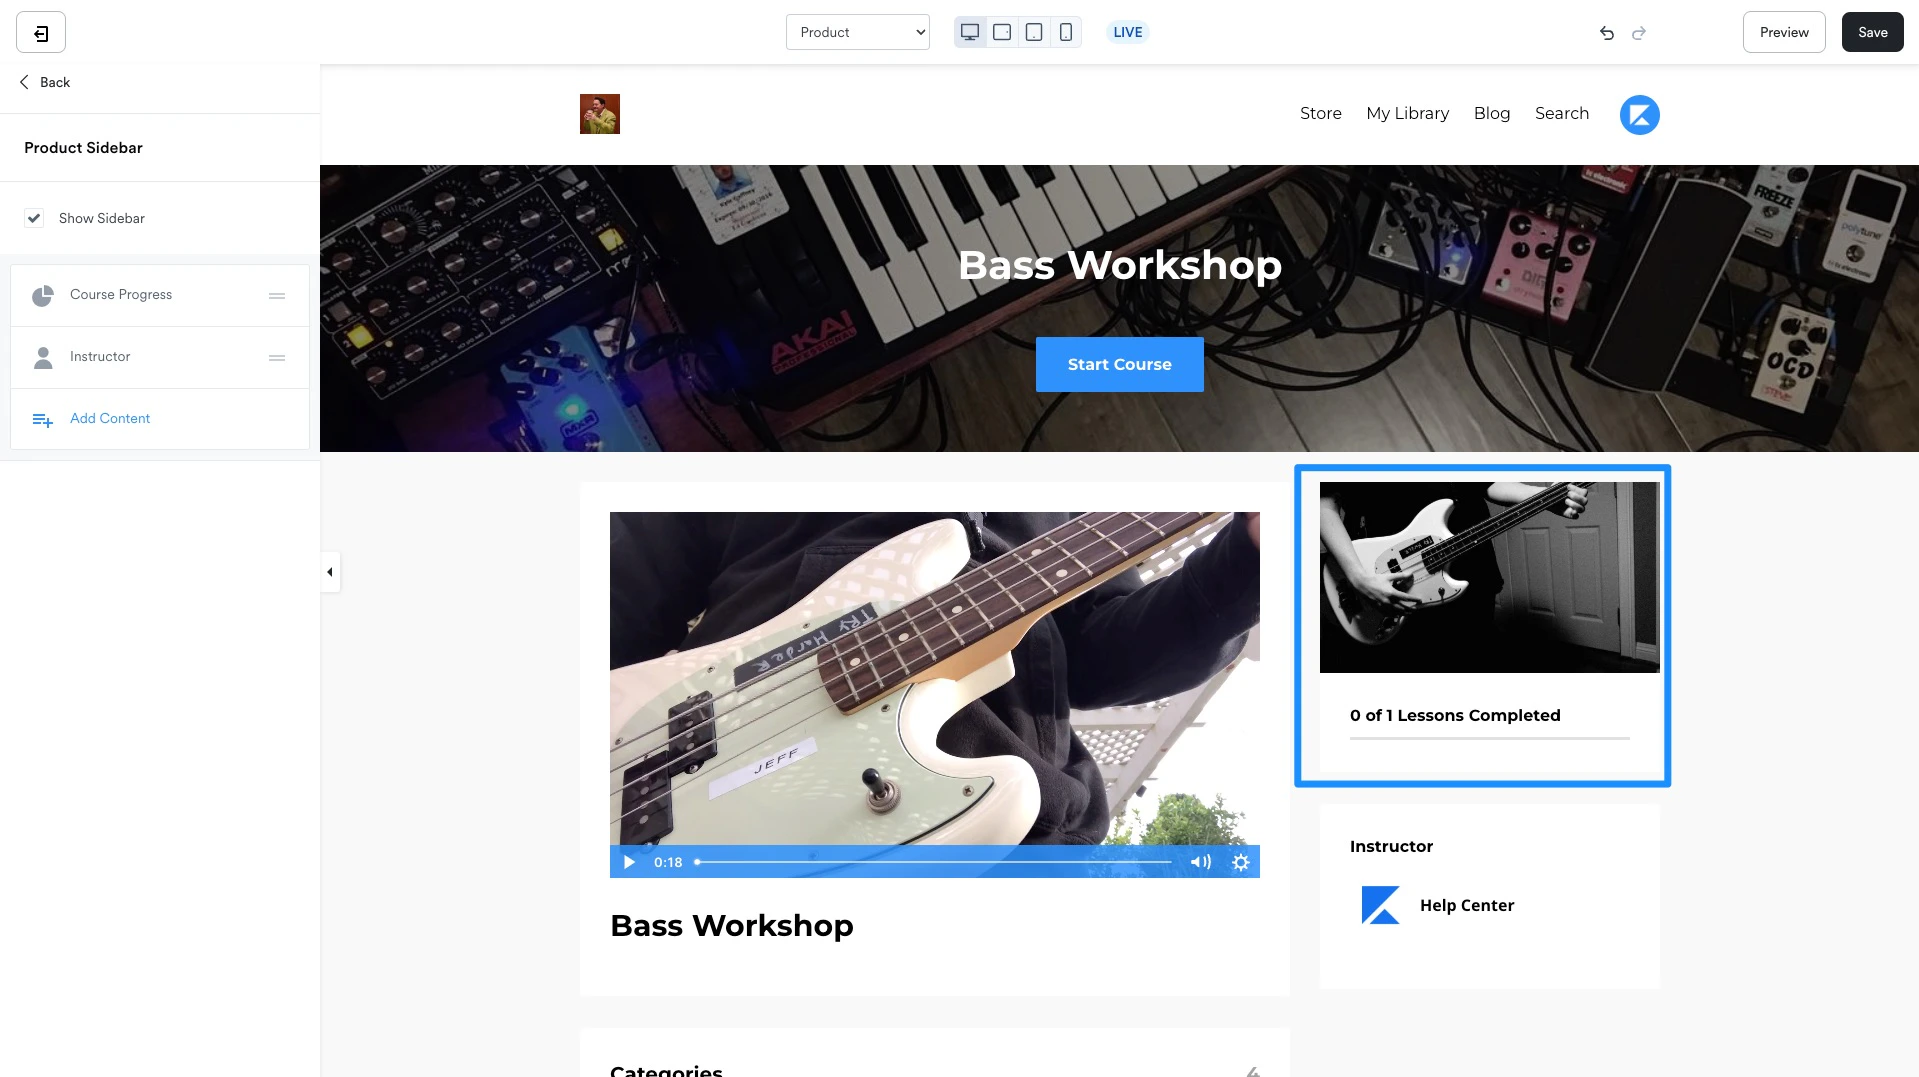
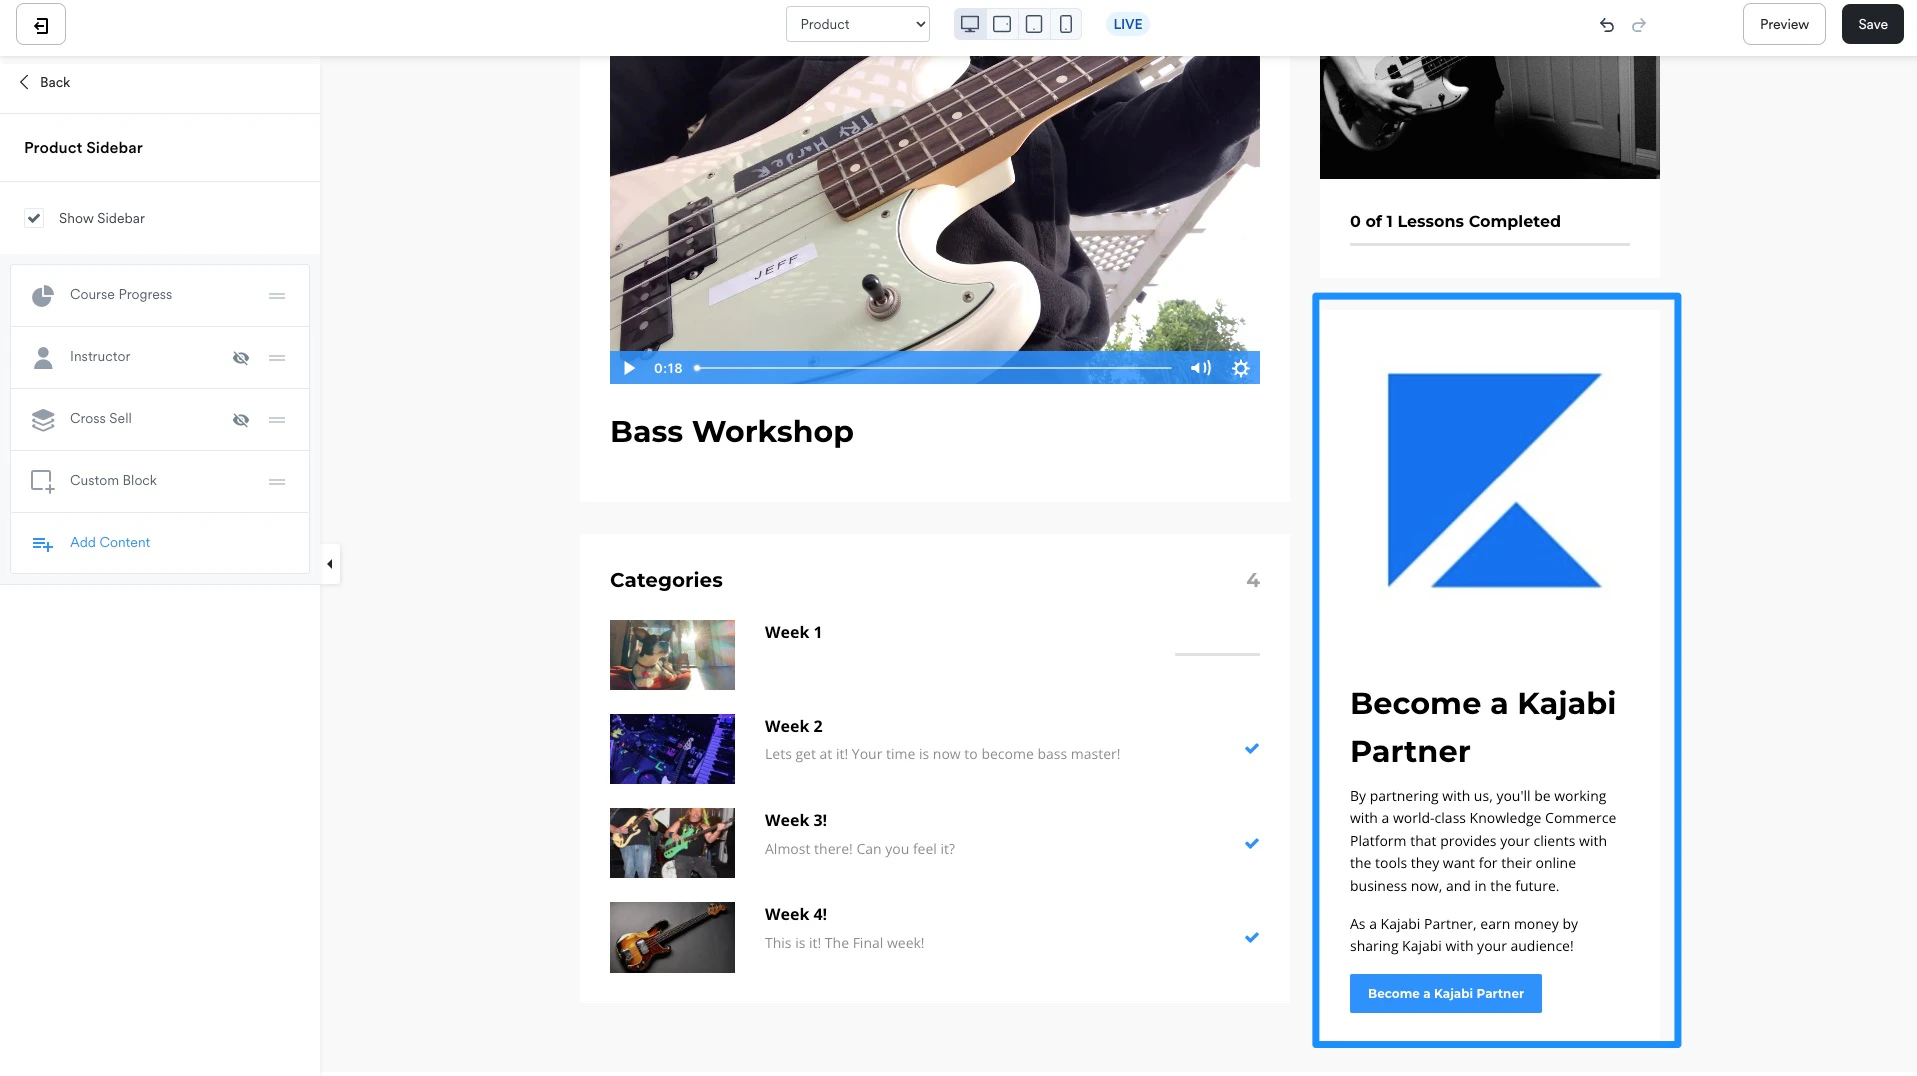
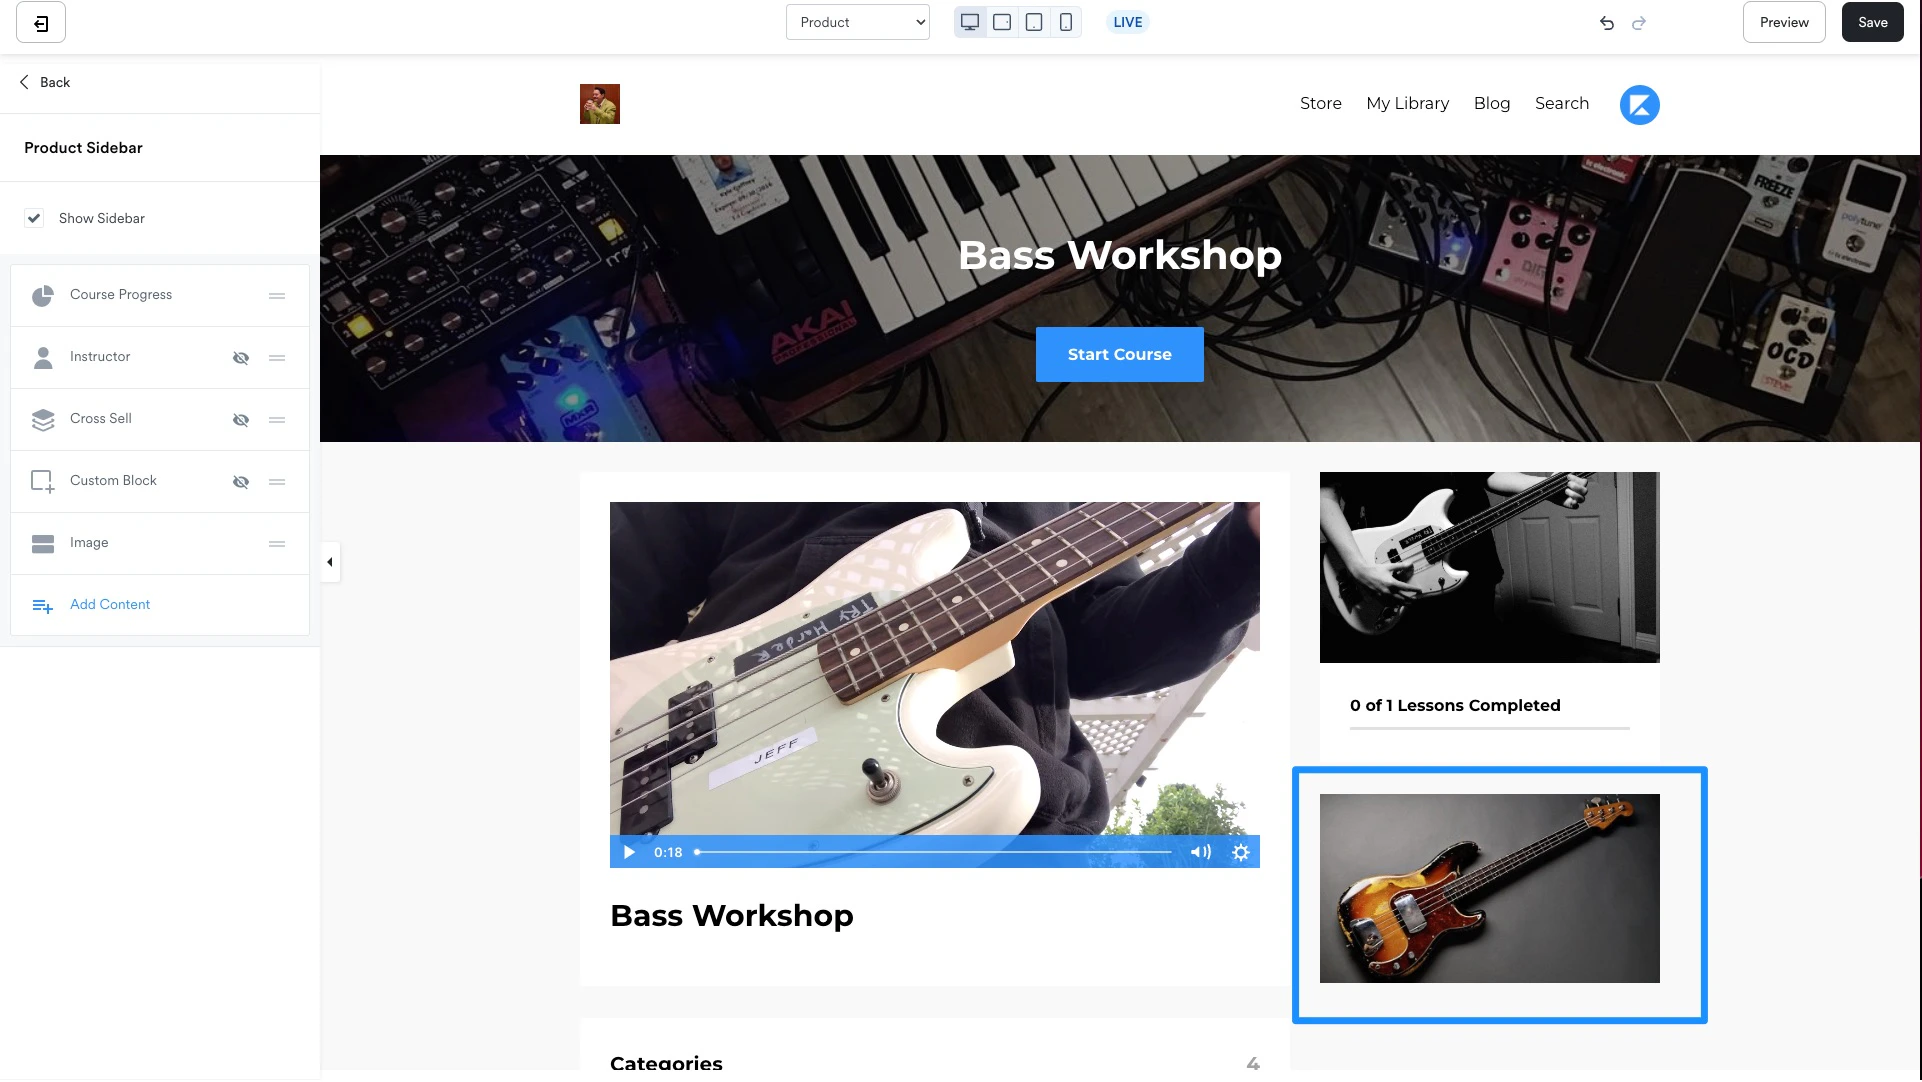
Course Sidebar
Customize the Course Sidebar by choosing to show or hide the sidebar and including any combination of blocks to optimize the customer’s experience with the page. Course Sidebar blocks:- Course Progress: Display the lessons completed with an image of the Course Thumbnail
- Cross Sell: Promote another Offer directly from the Course to encourage existing customers to purchase. Customize the appearance of the Offer within the Cross Sell block in the Sidebar:
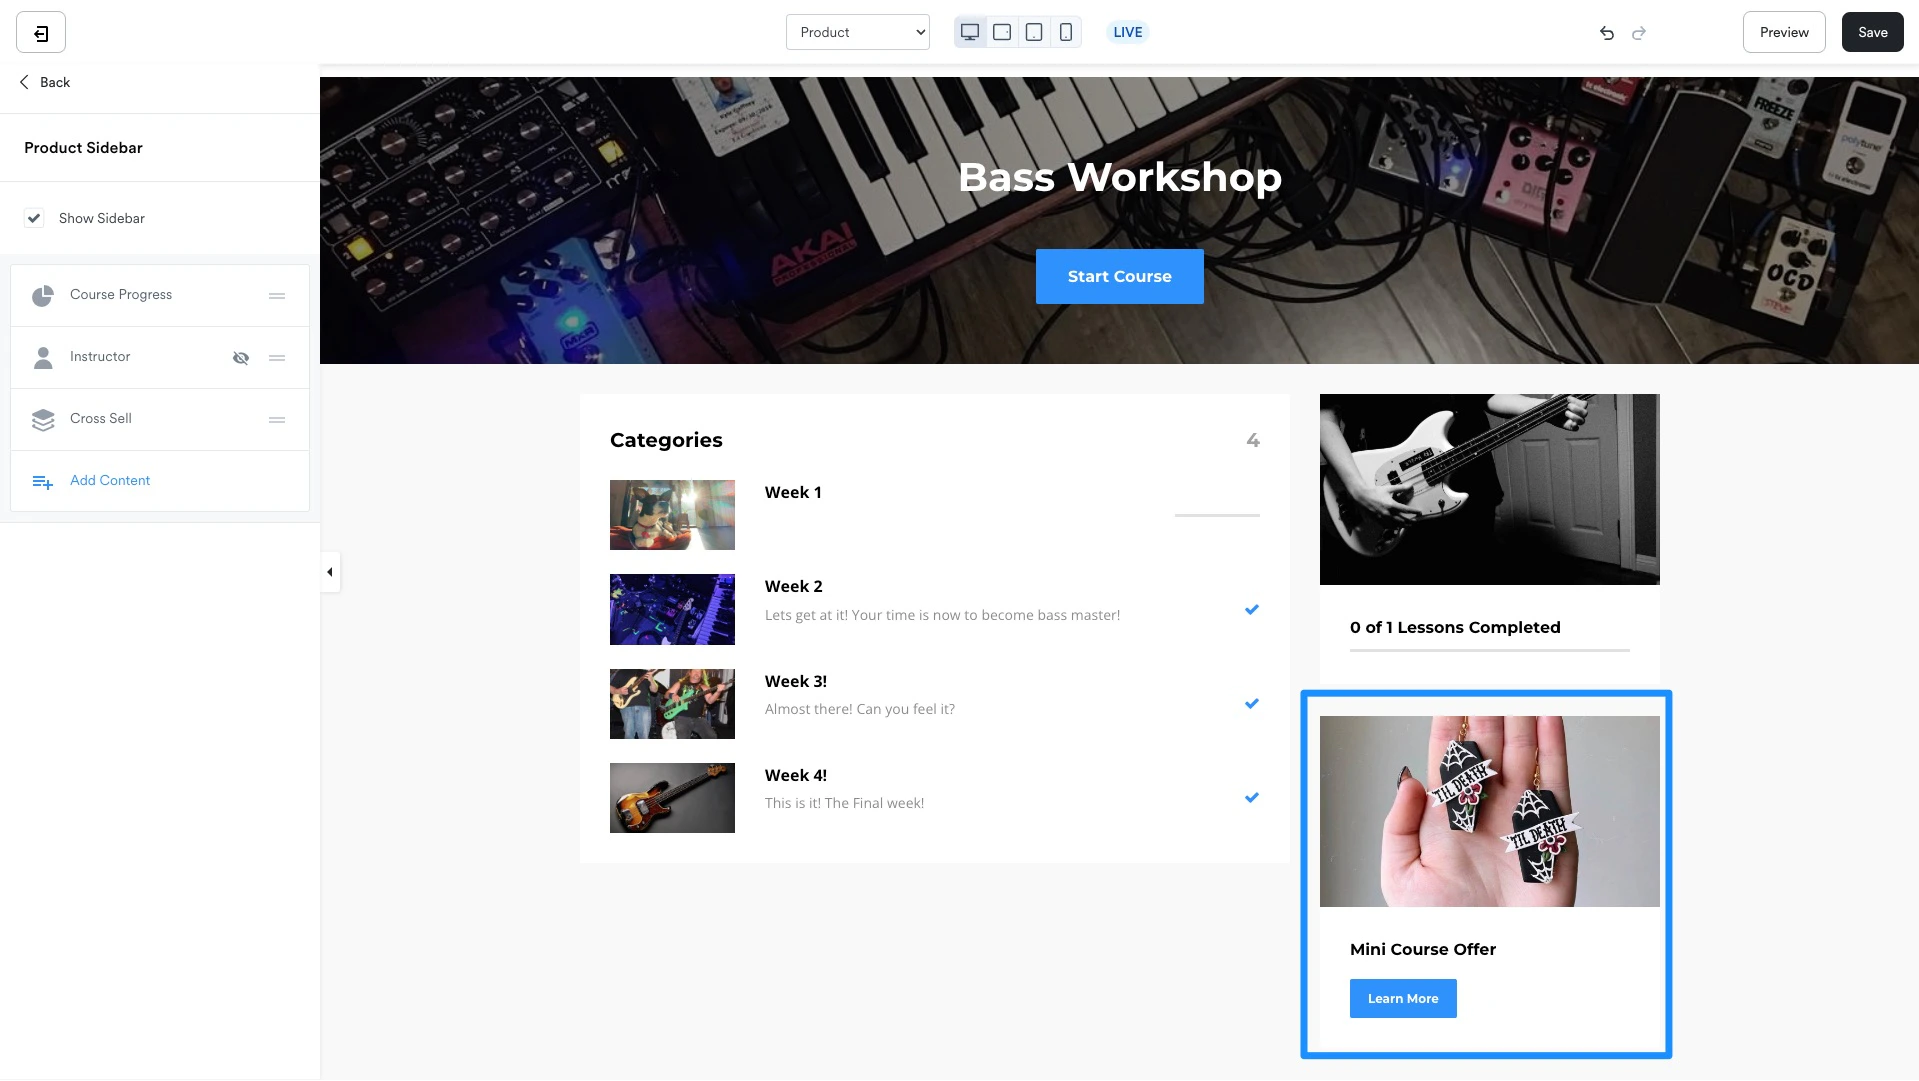
- Custom Block: Add a custom block onto the Sidebar to build in another Offer, display a promotion, communicate an announcement, and more. The custom block is fully customizable. With the custom block you can choose to include an image, text, and/or add a Call to Action:
- Image: Add an image to the Course Sidebar and choose to include an Image Action or keep the Image Action blank to simply communicate a message to customers:
- Instructor: Include instructor information for the Course by adding an Instructor section(s) to the Course Page.
Footer
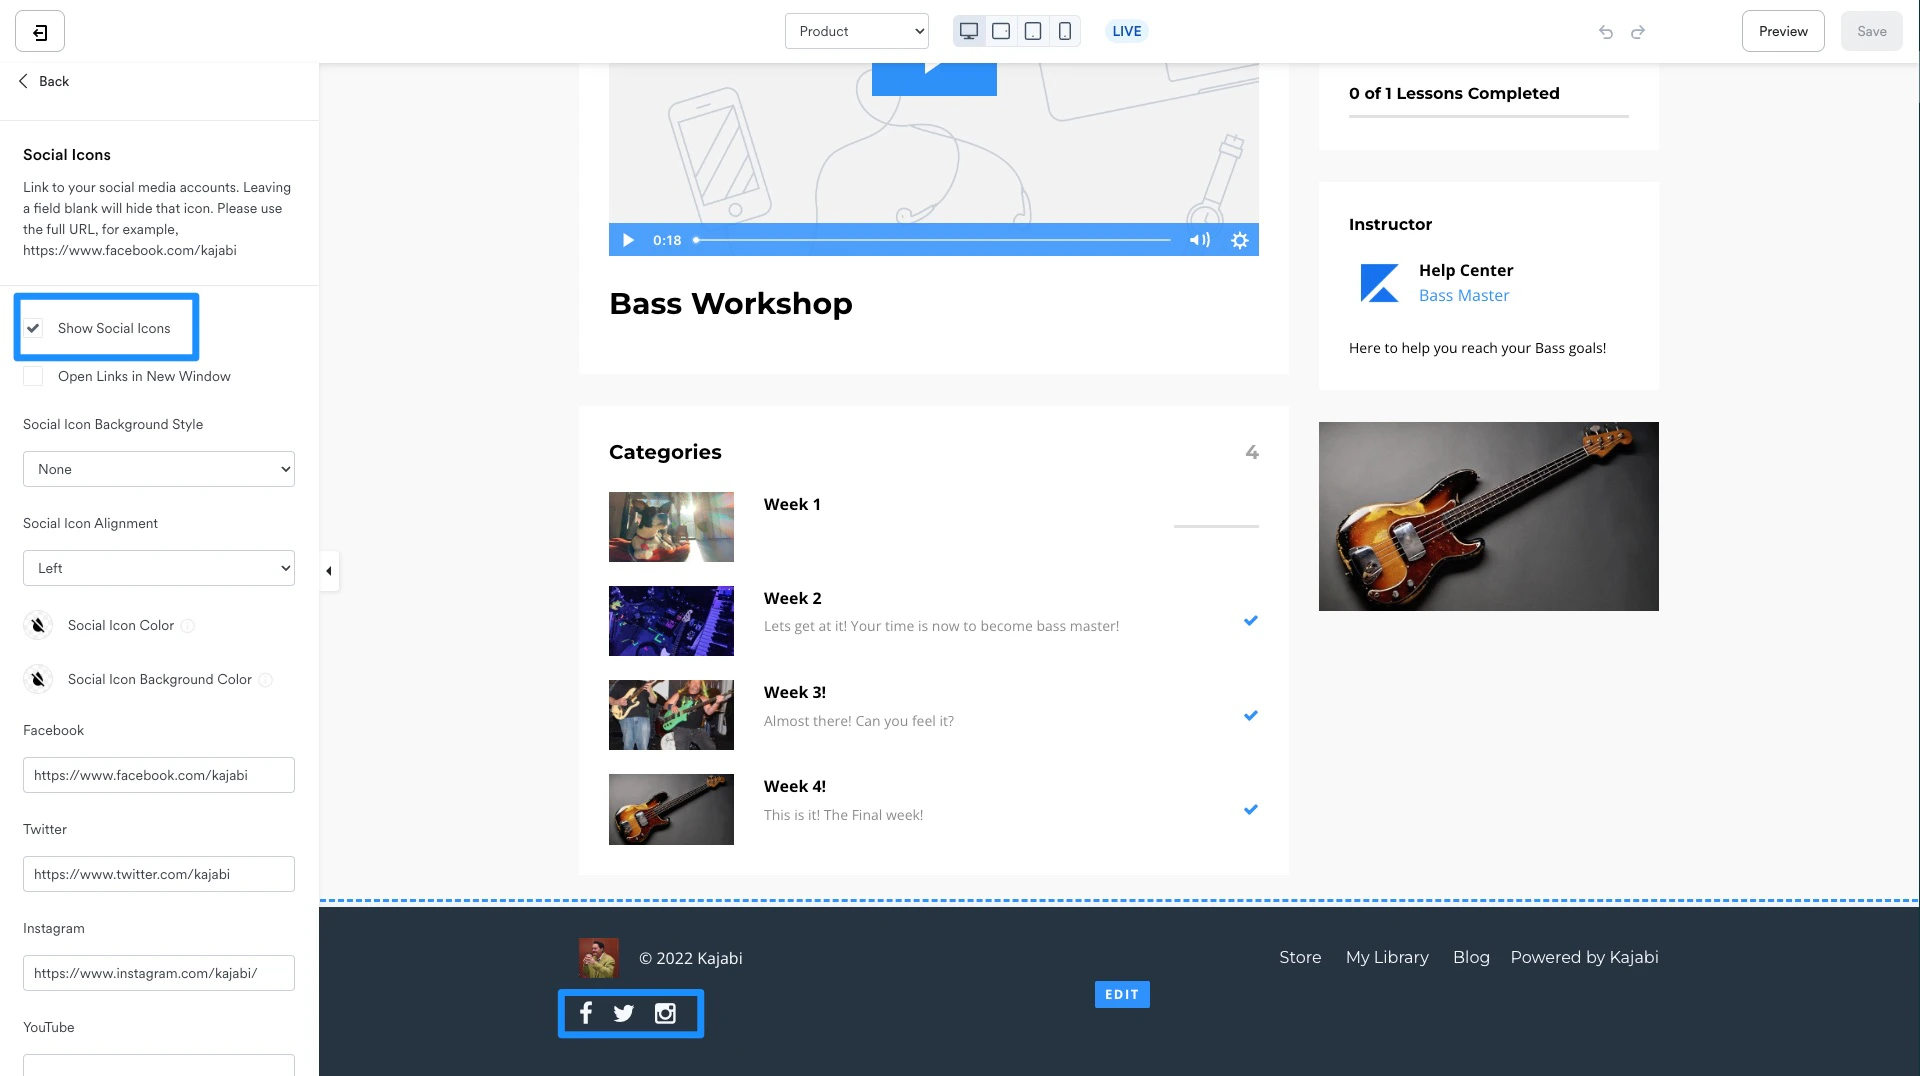
Customize the Footer section of the Course page. Choose to show or hide the Footer, include the Copyright, add a Logo, show a Menu, and/or add Social Icons: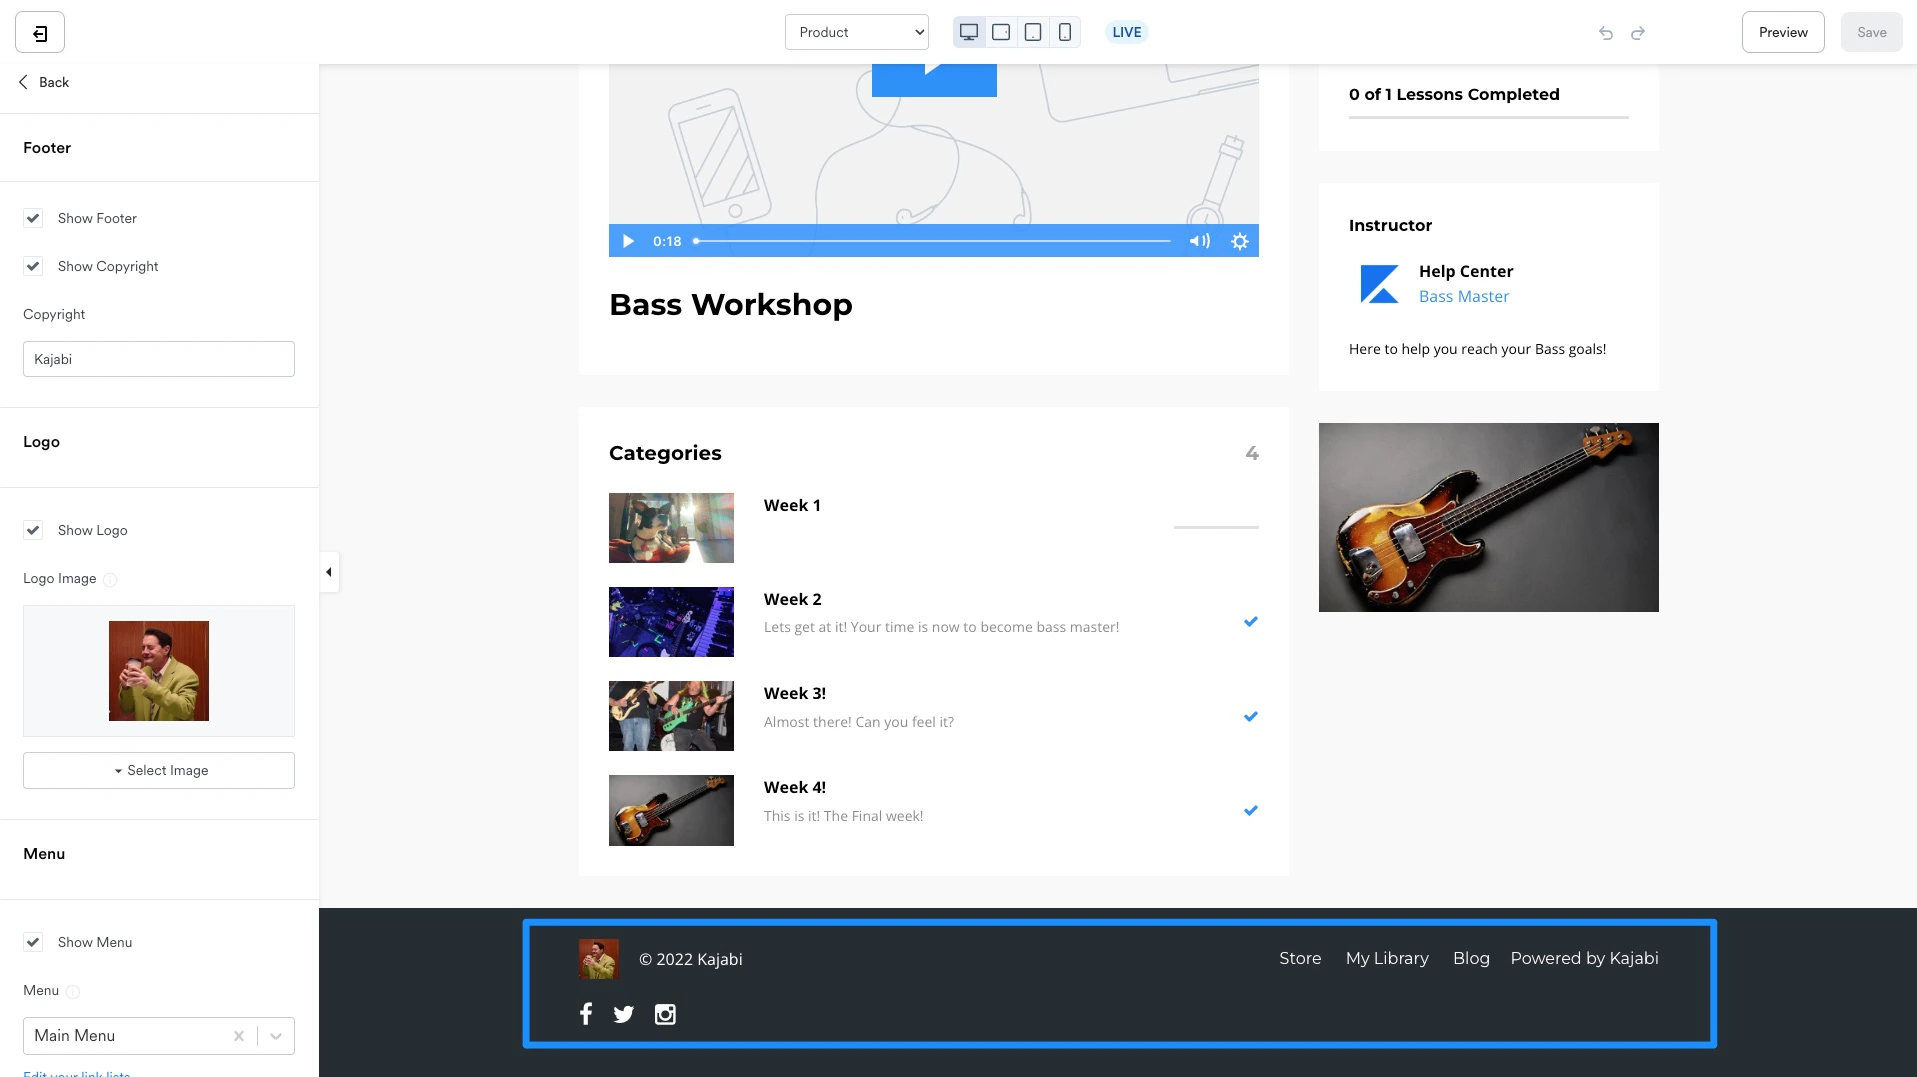
Add Social Icons to the Footer
- Under the Social Icons header, check the Show Social Icons box.
- Then, enter the full URL for your social media accounts.
- Customize the appearance of the social icons.
- Click Save to keep the changes:
Premier page settings
The page settings for the template streamline the build and design of the entire Course by generating configured page settings across every page of the Course. With Premier, this will update your favicon, typography, color scheme, and general settings across your:- Main Course page
- Announcements page
- Module page
- Lesson page
- Comment page
- Search page

Note: Please allow some time for the favicon to update.
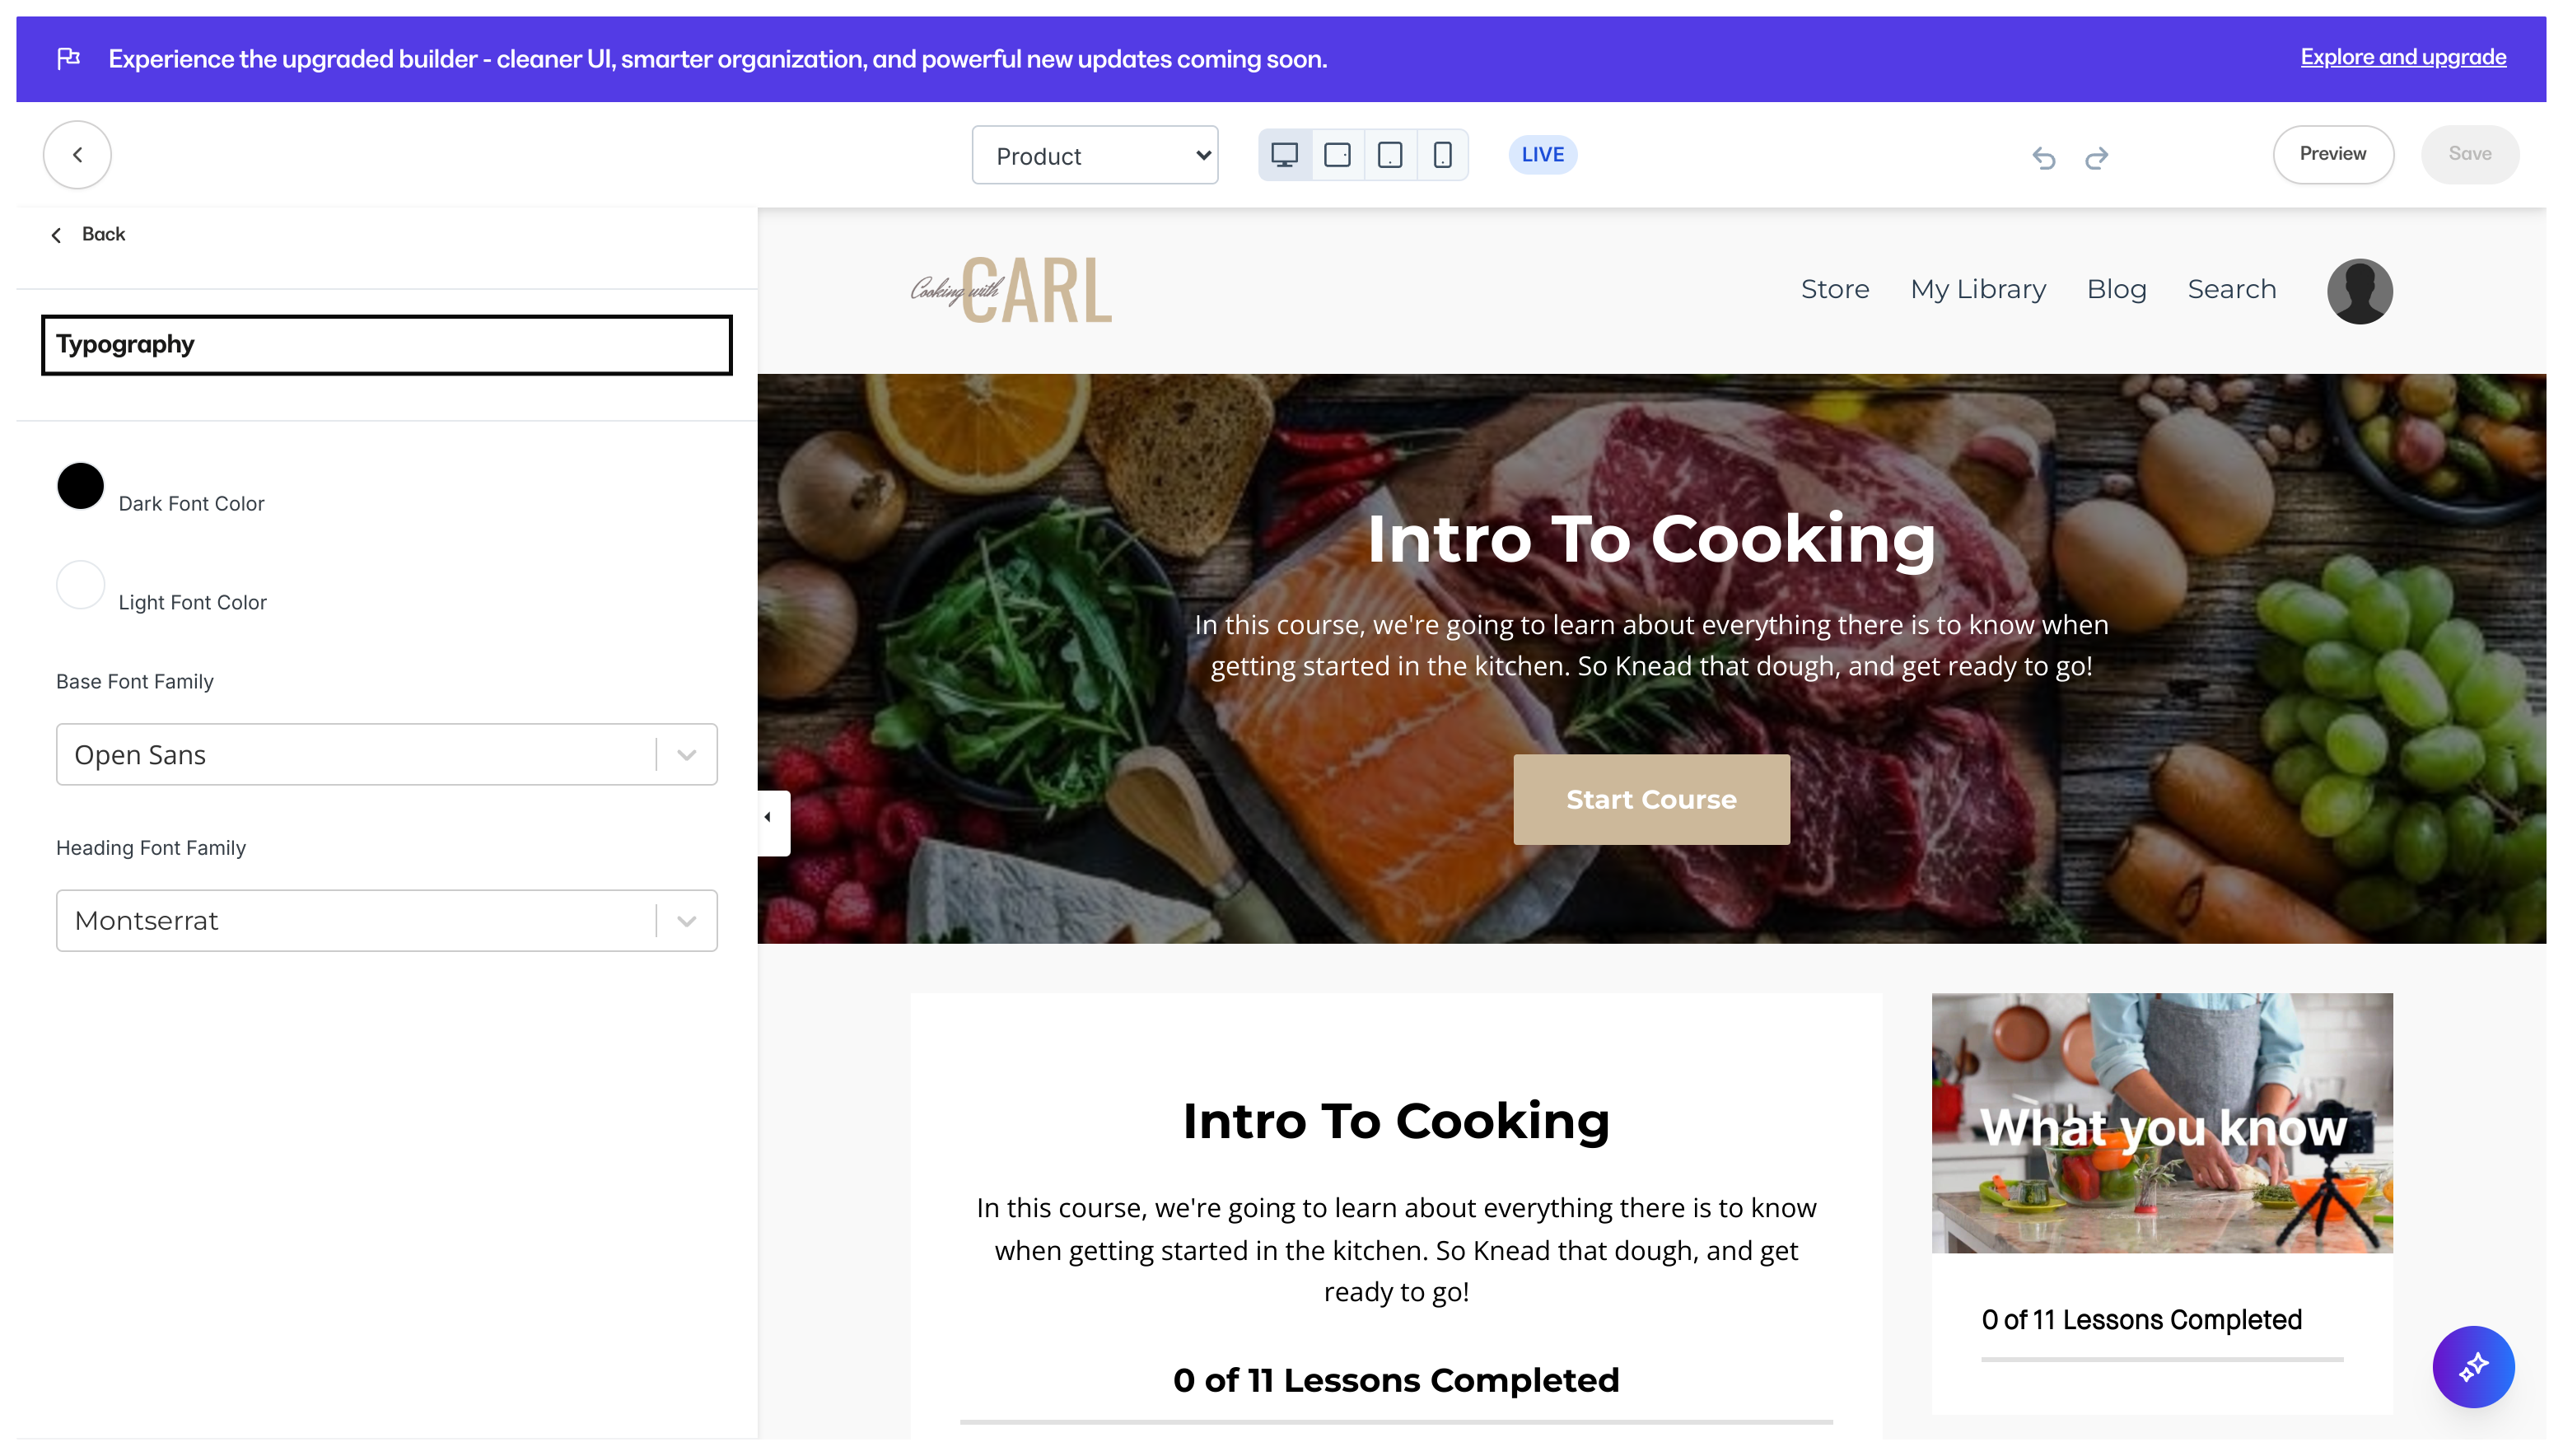
- Success
- Info
- Warning
- Danger
- The vertical bar allows you to select the hue.
- The square box allows you to adjust the brightness and saturation.
- The horizontal bar allows you to select the opacity of the color.
Customize the Course lesson
- Open the Products tab from your Dashboard.
- Select the Course.
- Click Customize.
- Open the Installed Templates folder.
- Select the Template you wish to customize.
- Click Customize.
- Navigate to the Lesson page in the editor by clicking the dropdown in the top bar.
- Select Lesson from the dropdown menu:
Course Lesson editor
The Lesson design page is very similar to the Course design page with a few additions: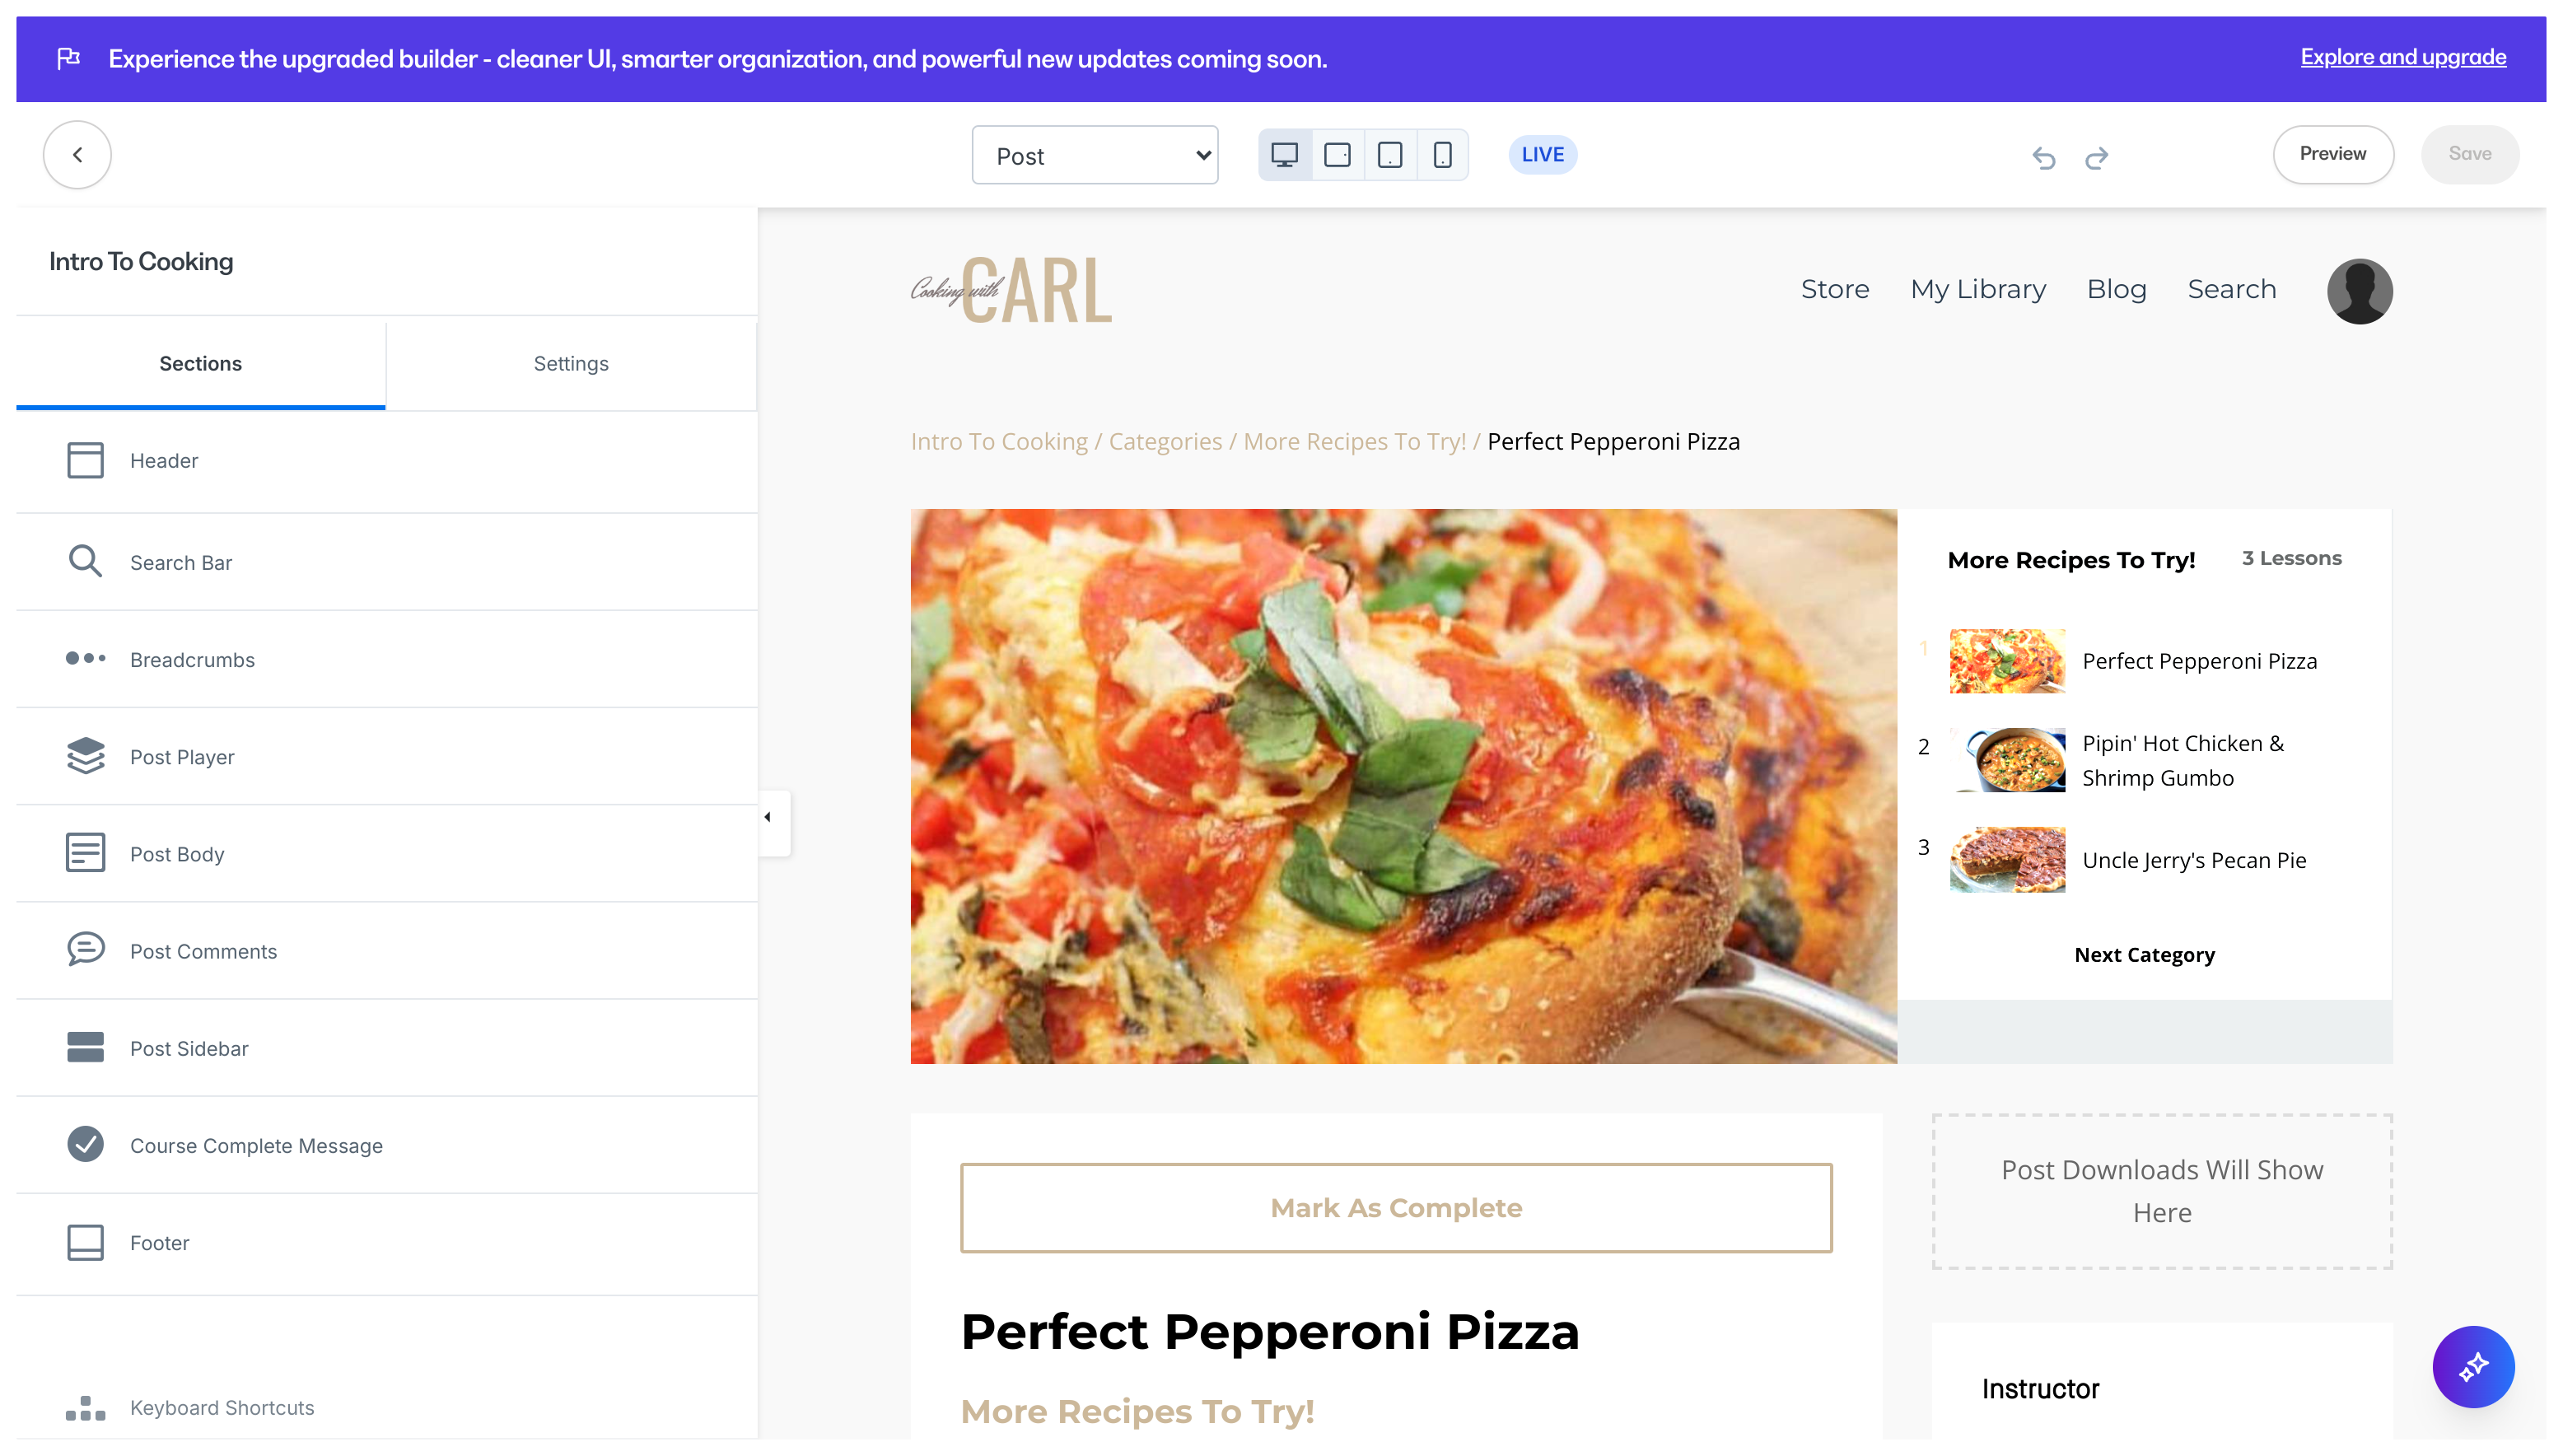
- Breadcrumbs can be displayed to act as a trail leading back to the Course homepage.
- Lesson Player can be used to customize the Video Player Layout and Color, Language, Player Pagination Design, and the Auto Advance feature. Learn about the Lesson Player Auto Advance feature.
- Lesson Body allows you to configure the appearance of your Lesson Body to adjust the text alignment, the Mark as Complete button, allow Lesson and Video Downloads, include a Call to Action (CTA), and add custom Code. Note: If you choose to remove the Mark as Complete button, product progress can only be tracked by the progress of a Video or an Assessment uploaded into the Lesson.
- Lesson Comments can be configured to customize the text and button color of your Course Lesson comments section.
- Lesson Sidebar allows you to add static or clickable images, instructor information across all Lessons, allow Lesson and Video Downloads, and more.