Customize the Lesson Player auto advance
Enable your Lesson Player Auto Advance by checking Use Auto Advance in the Lesson Editor.Locate the Auto Advance setting
- Open the Products tab from your Dashboard.
- Select the Course that you want to edit.
- Click Customize.
- Click Customize again in the Builder you want to use for your Course.
Premier template
If you are using a Premier template to customize your Course:- Navigate to the top menu.
- Open the drop-down menu for your Product page.
- Click Lesson.
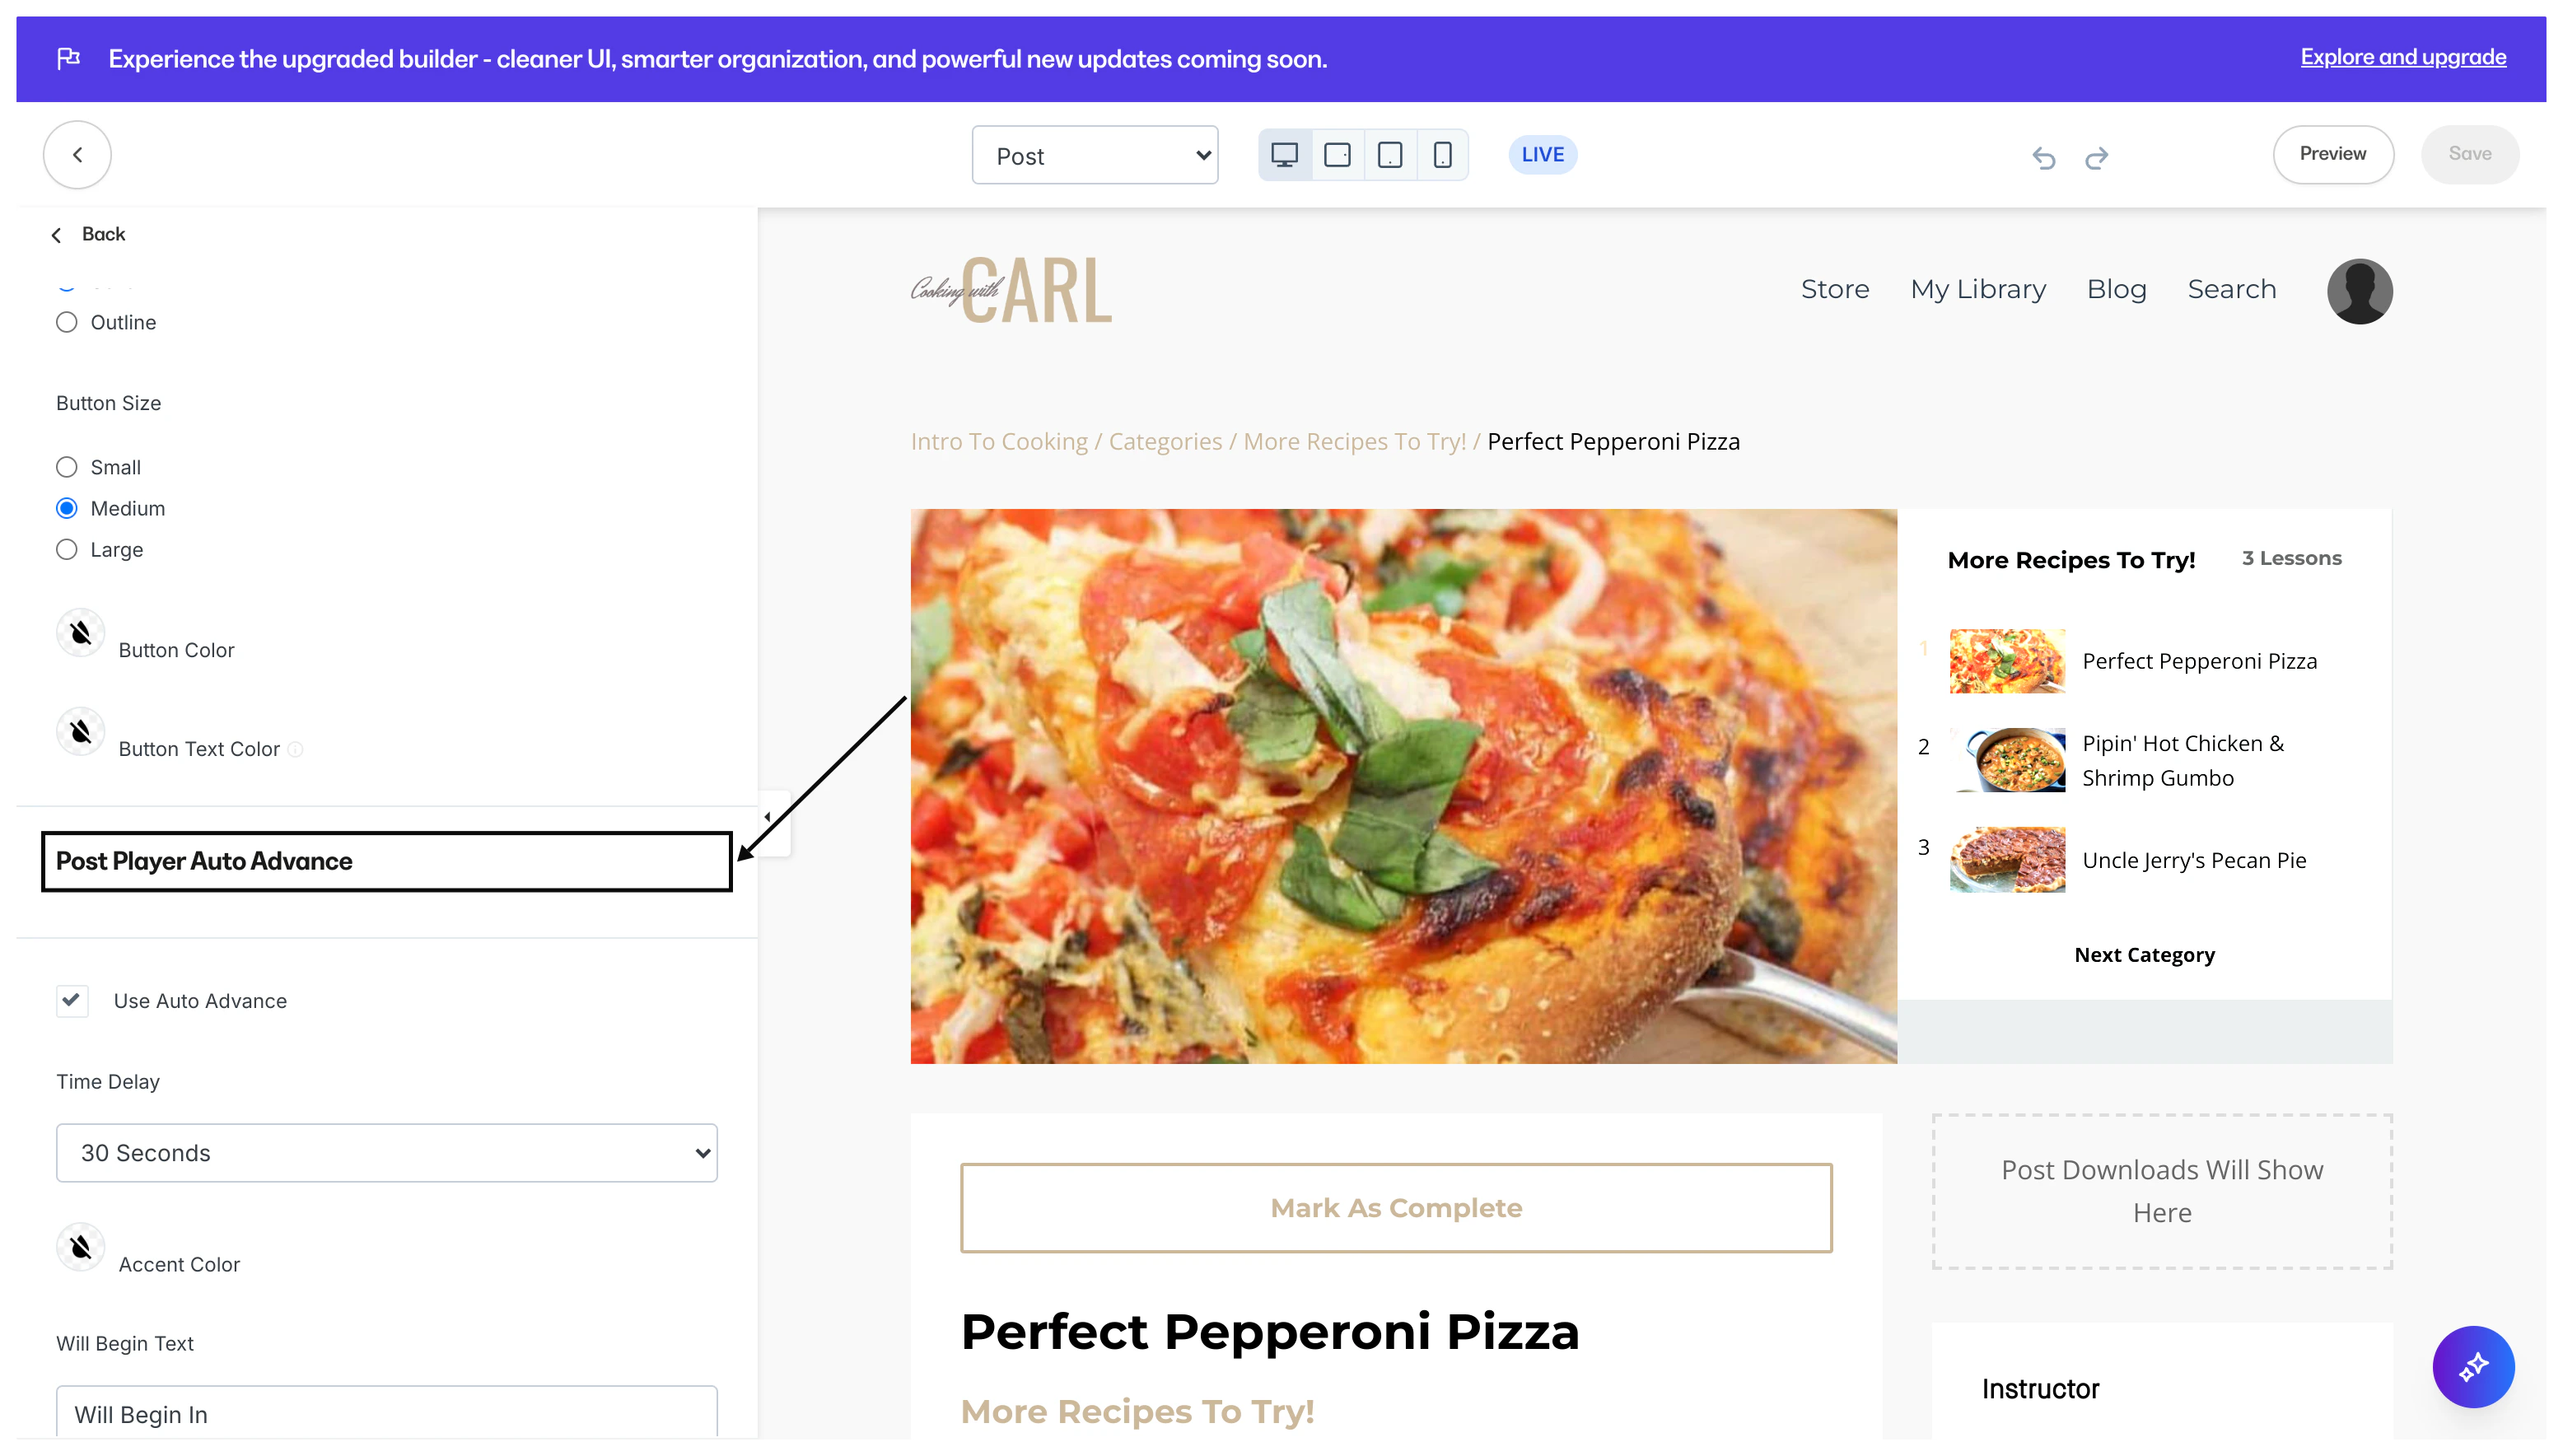
- Select Lesson Player from your sidebar editor.
- Select Use Auto Advance to enable or disable the feature.
- Customize your Auto Advance settings.
- Click Save to keep and apply your changes:
Momentum template
If you are using a Momentum template to customize your Course:- Navigate to the top menu.
- Open the drop-down menu for your Product page.
- Click Lesson.
- Select Completion Message from your sidebar editor.
- Select Auto Advance to enable or disable the feature.
- Customize your Auto Advance language.
- Click Save to keep and apply your changes:
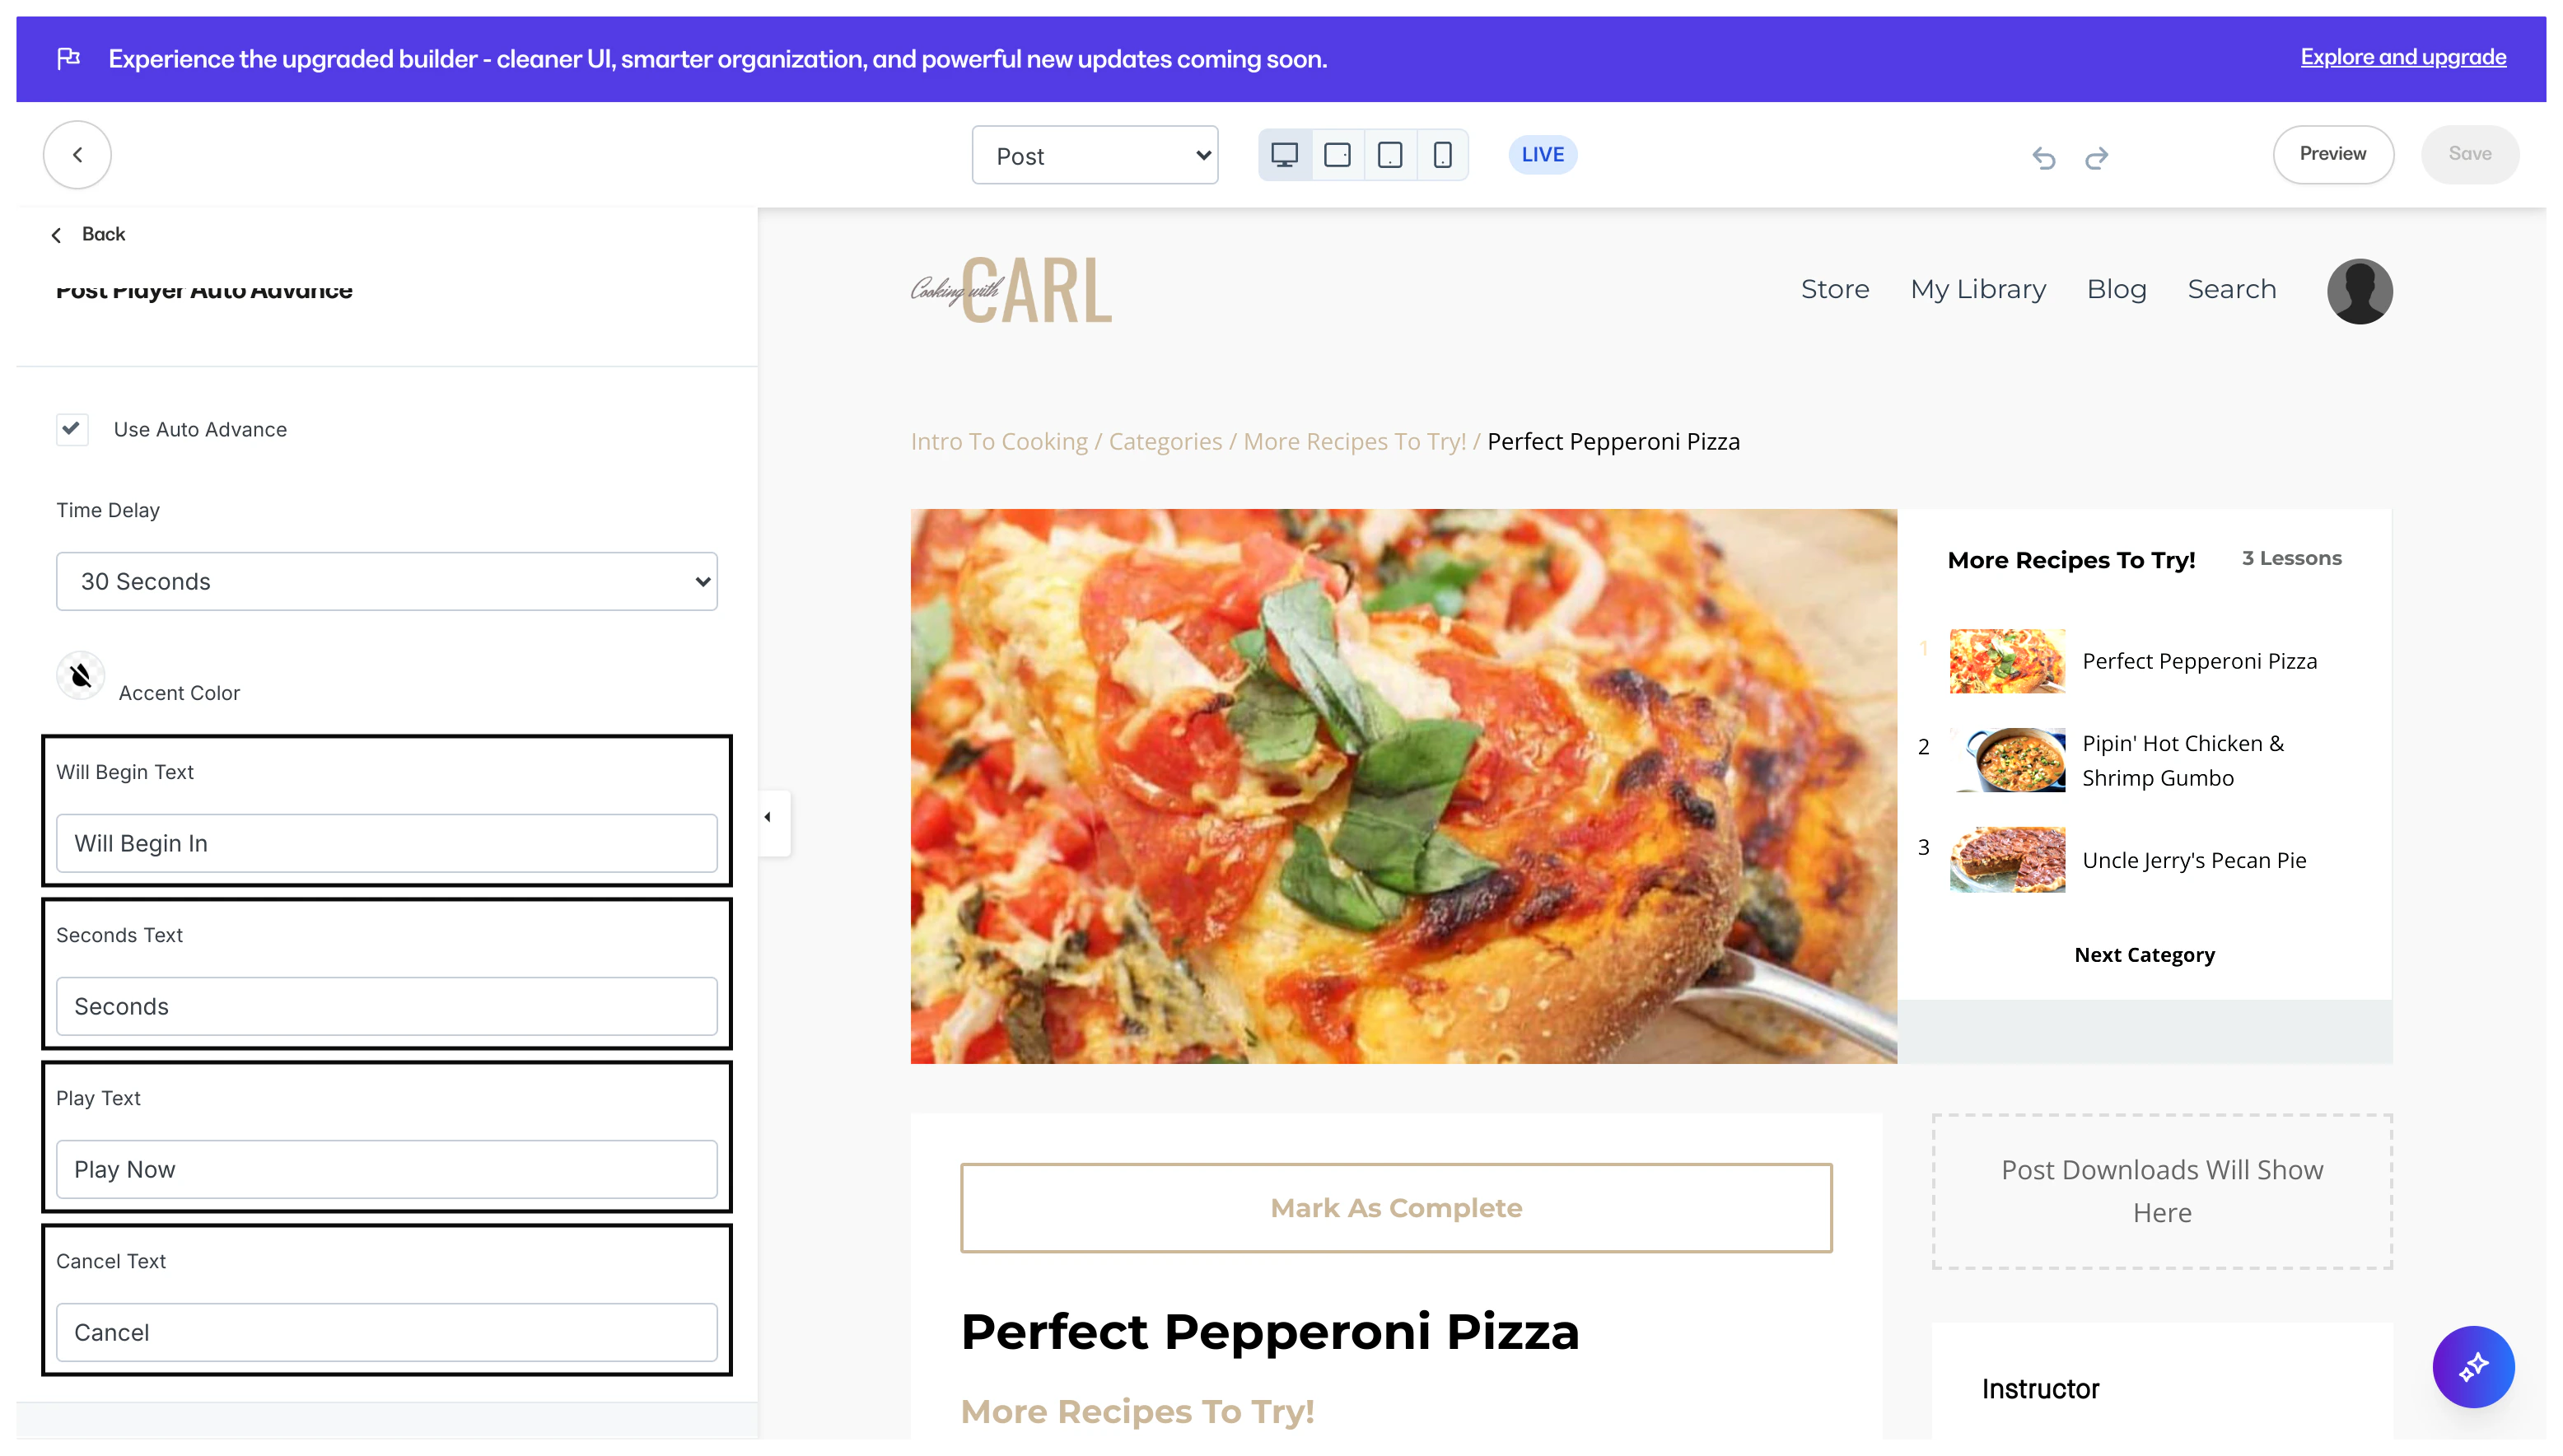
Auto Advance settings
Time delay
Select your Time Delay to specify the number of seconds before the next video in the module automatically begins to play: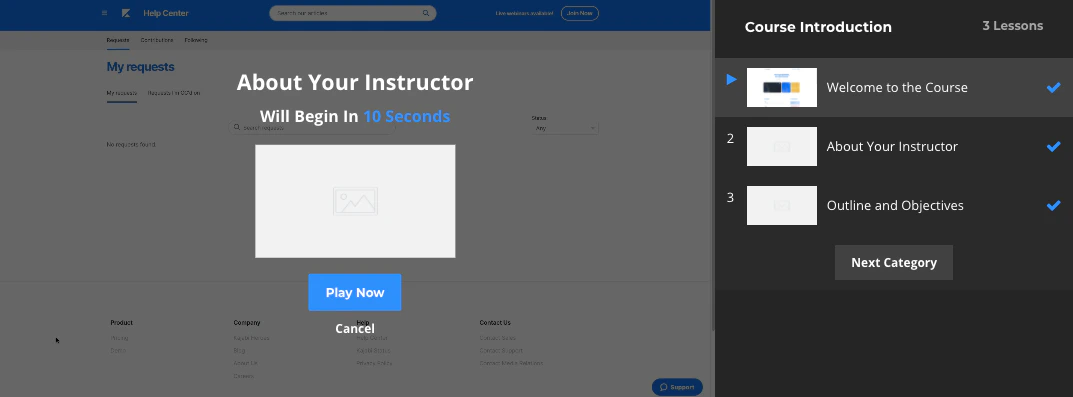
Accent color
Change the color of your Auto Advance messaging: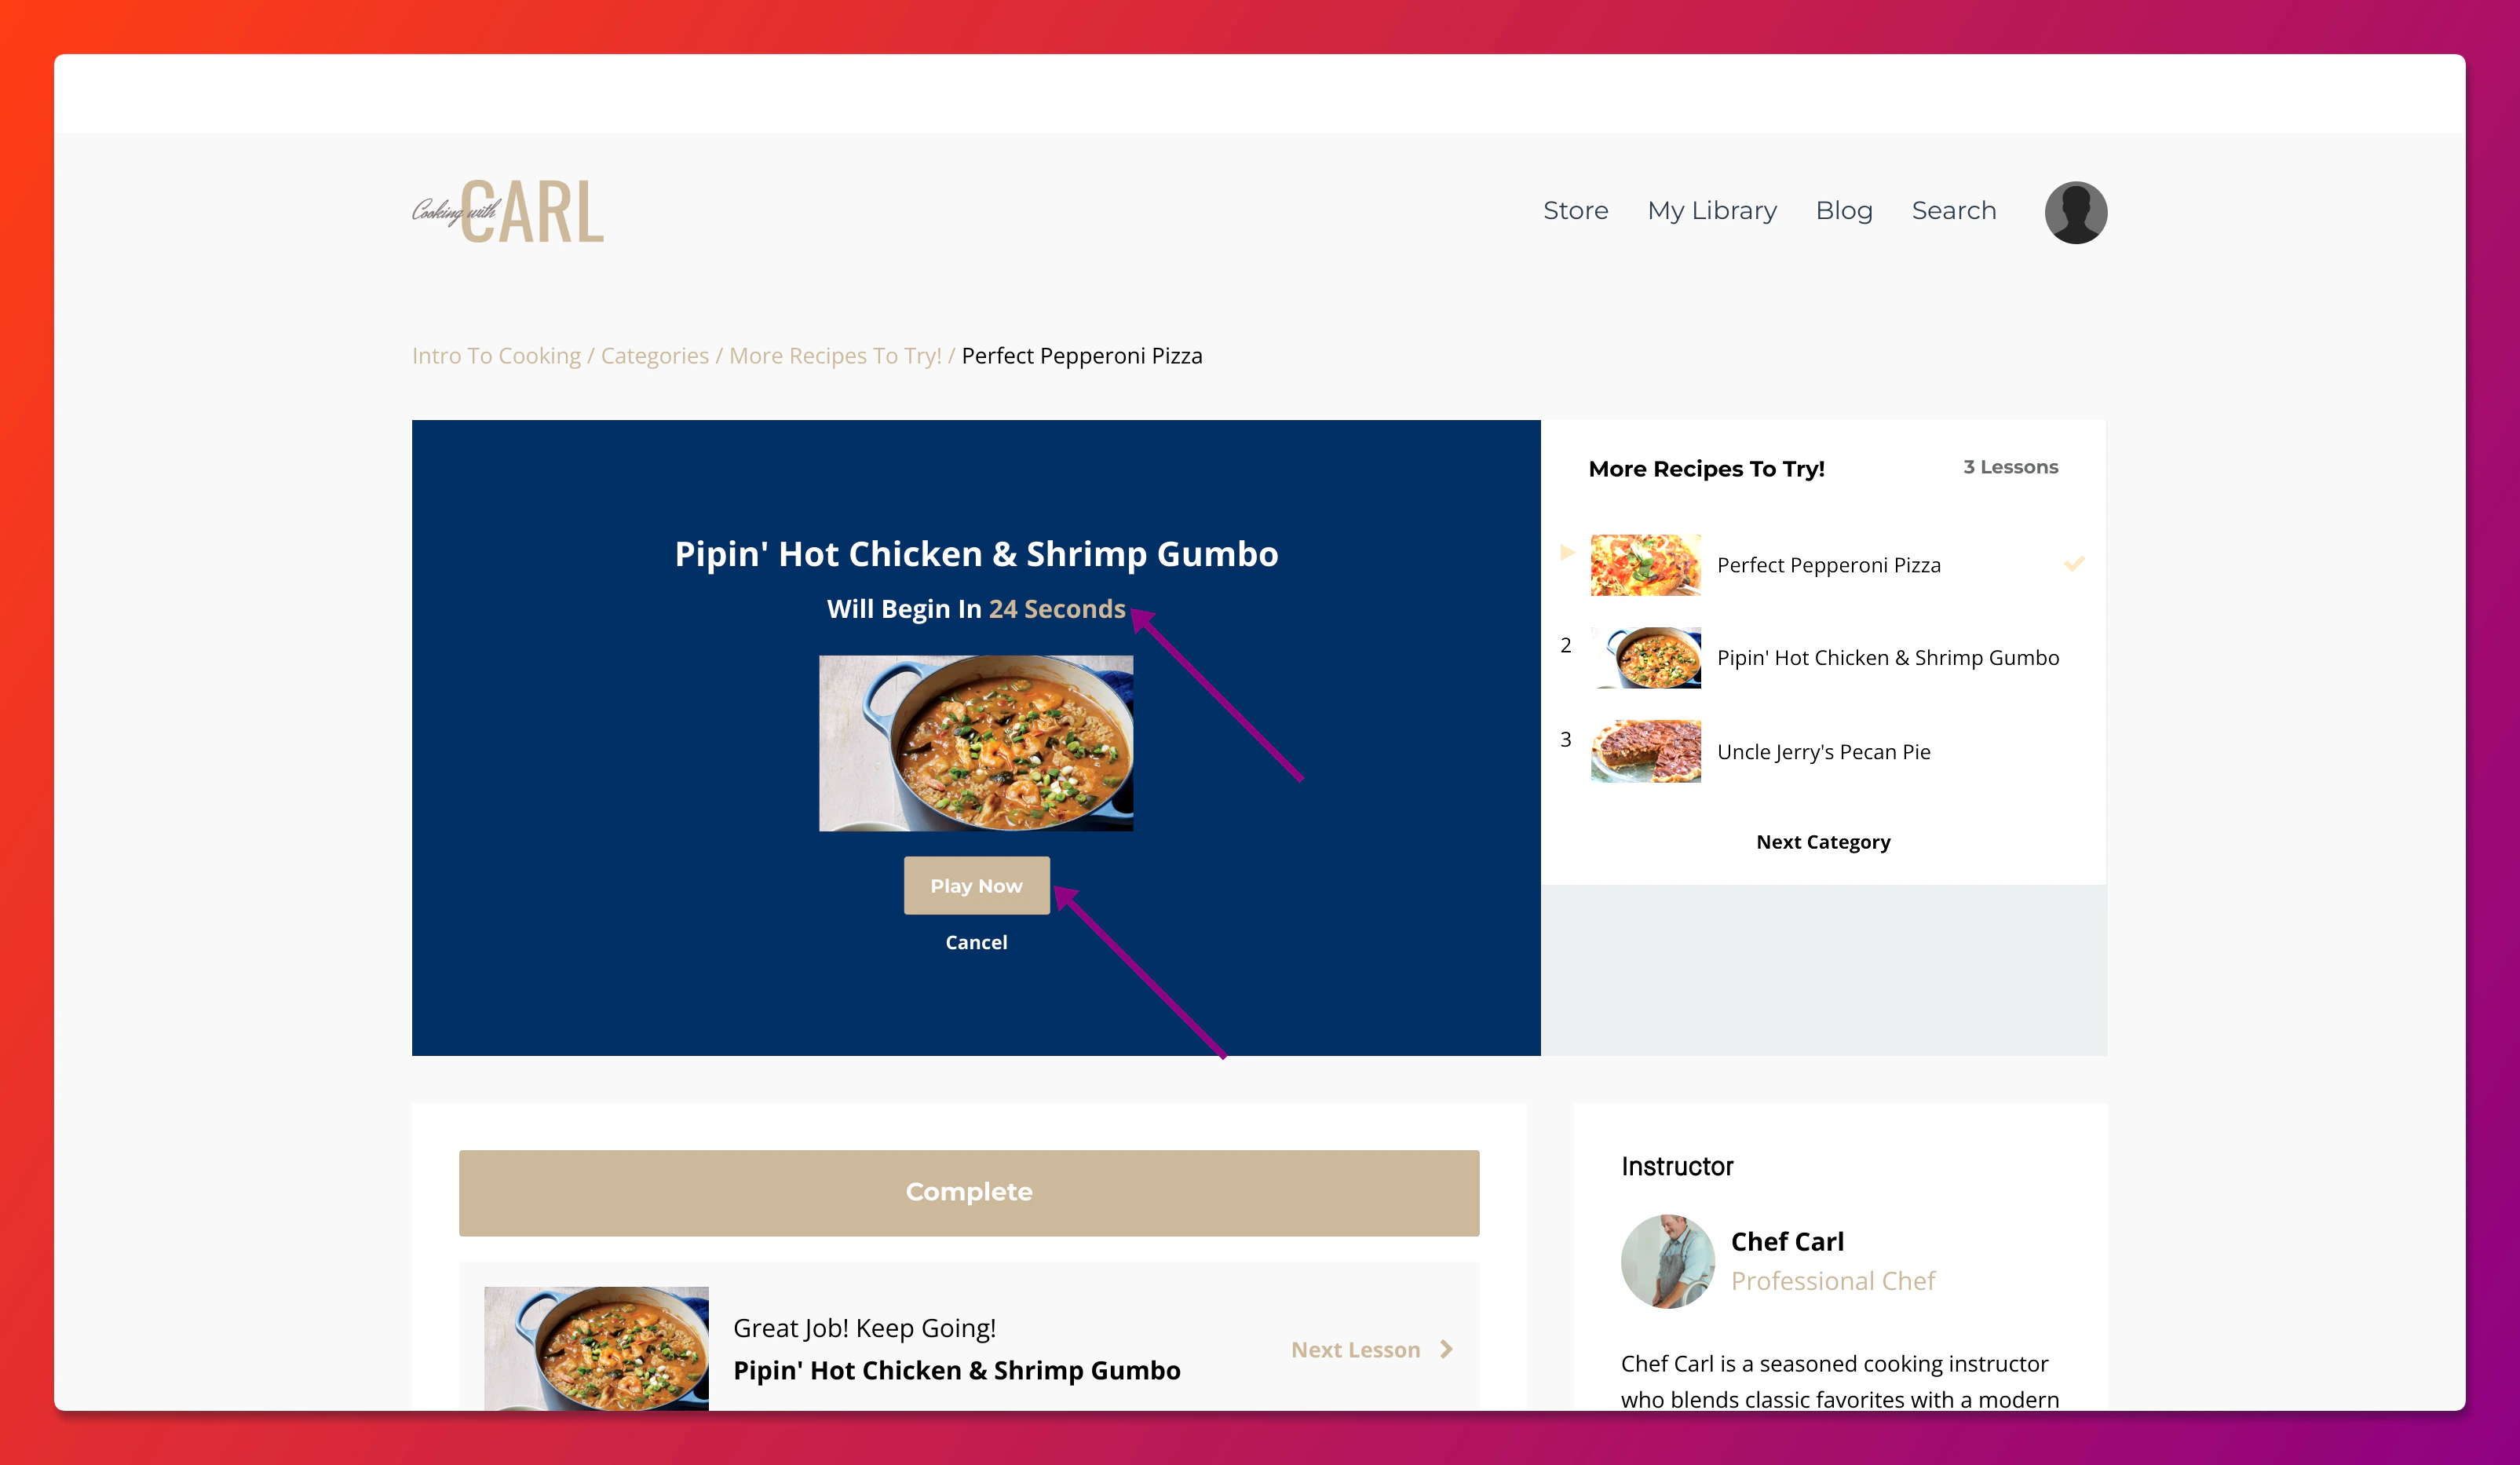
Language
Customize the language of your Auto Advance messaging: