

Wistia
When you choose a file to upload, whether from Google Drive, Dropbox, or your local hard drive, our video partner Wistia will need to encode the video in various formats so that it can be delivered to all kinds of devices with varying internet speeds (don’t worry, this is automatically going on in the background during your upload). Wistia will usually run a quick pass on one format of your video so that you can view it immediately. However, in the background, Wistia is encoding higher-quality versions. This is why you’ll see the “Converting” and “Storing” messages just after uploading a video file. Give your video about 15-30 minutes after uploading and it should be viewable at a higher quality! Remember: Upload speed is dependent on your internet connection and device processing power.My Device
Use My Device to upload your videos directly from your local hard drive:- Open the Products tab from your Dashboard.
- Select the Product you wish to edit.
- Within the Product Outline, click the title of the Lesson you want to add a video to.
- In the media selection at the top of the Lesson Editor, click Video.
- Click Select Video in the dropdown menu.
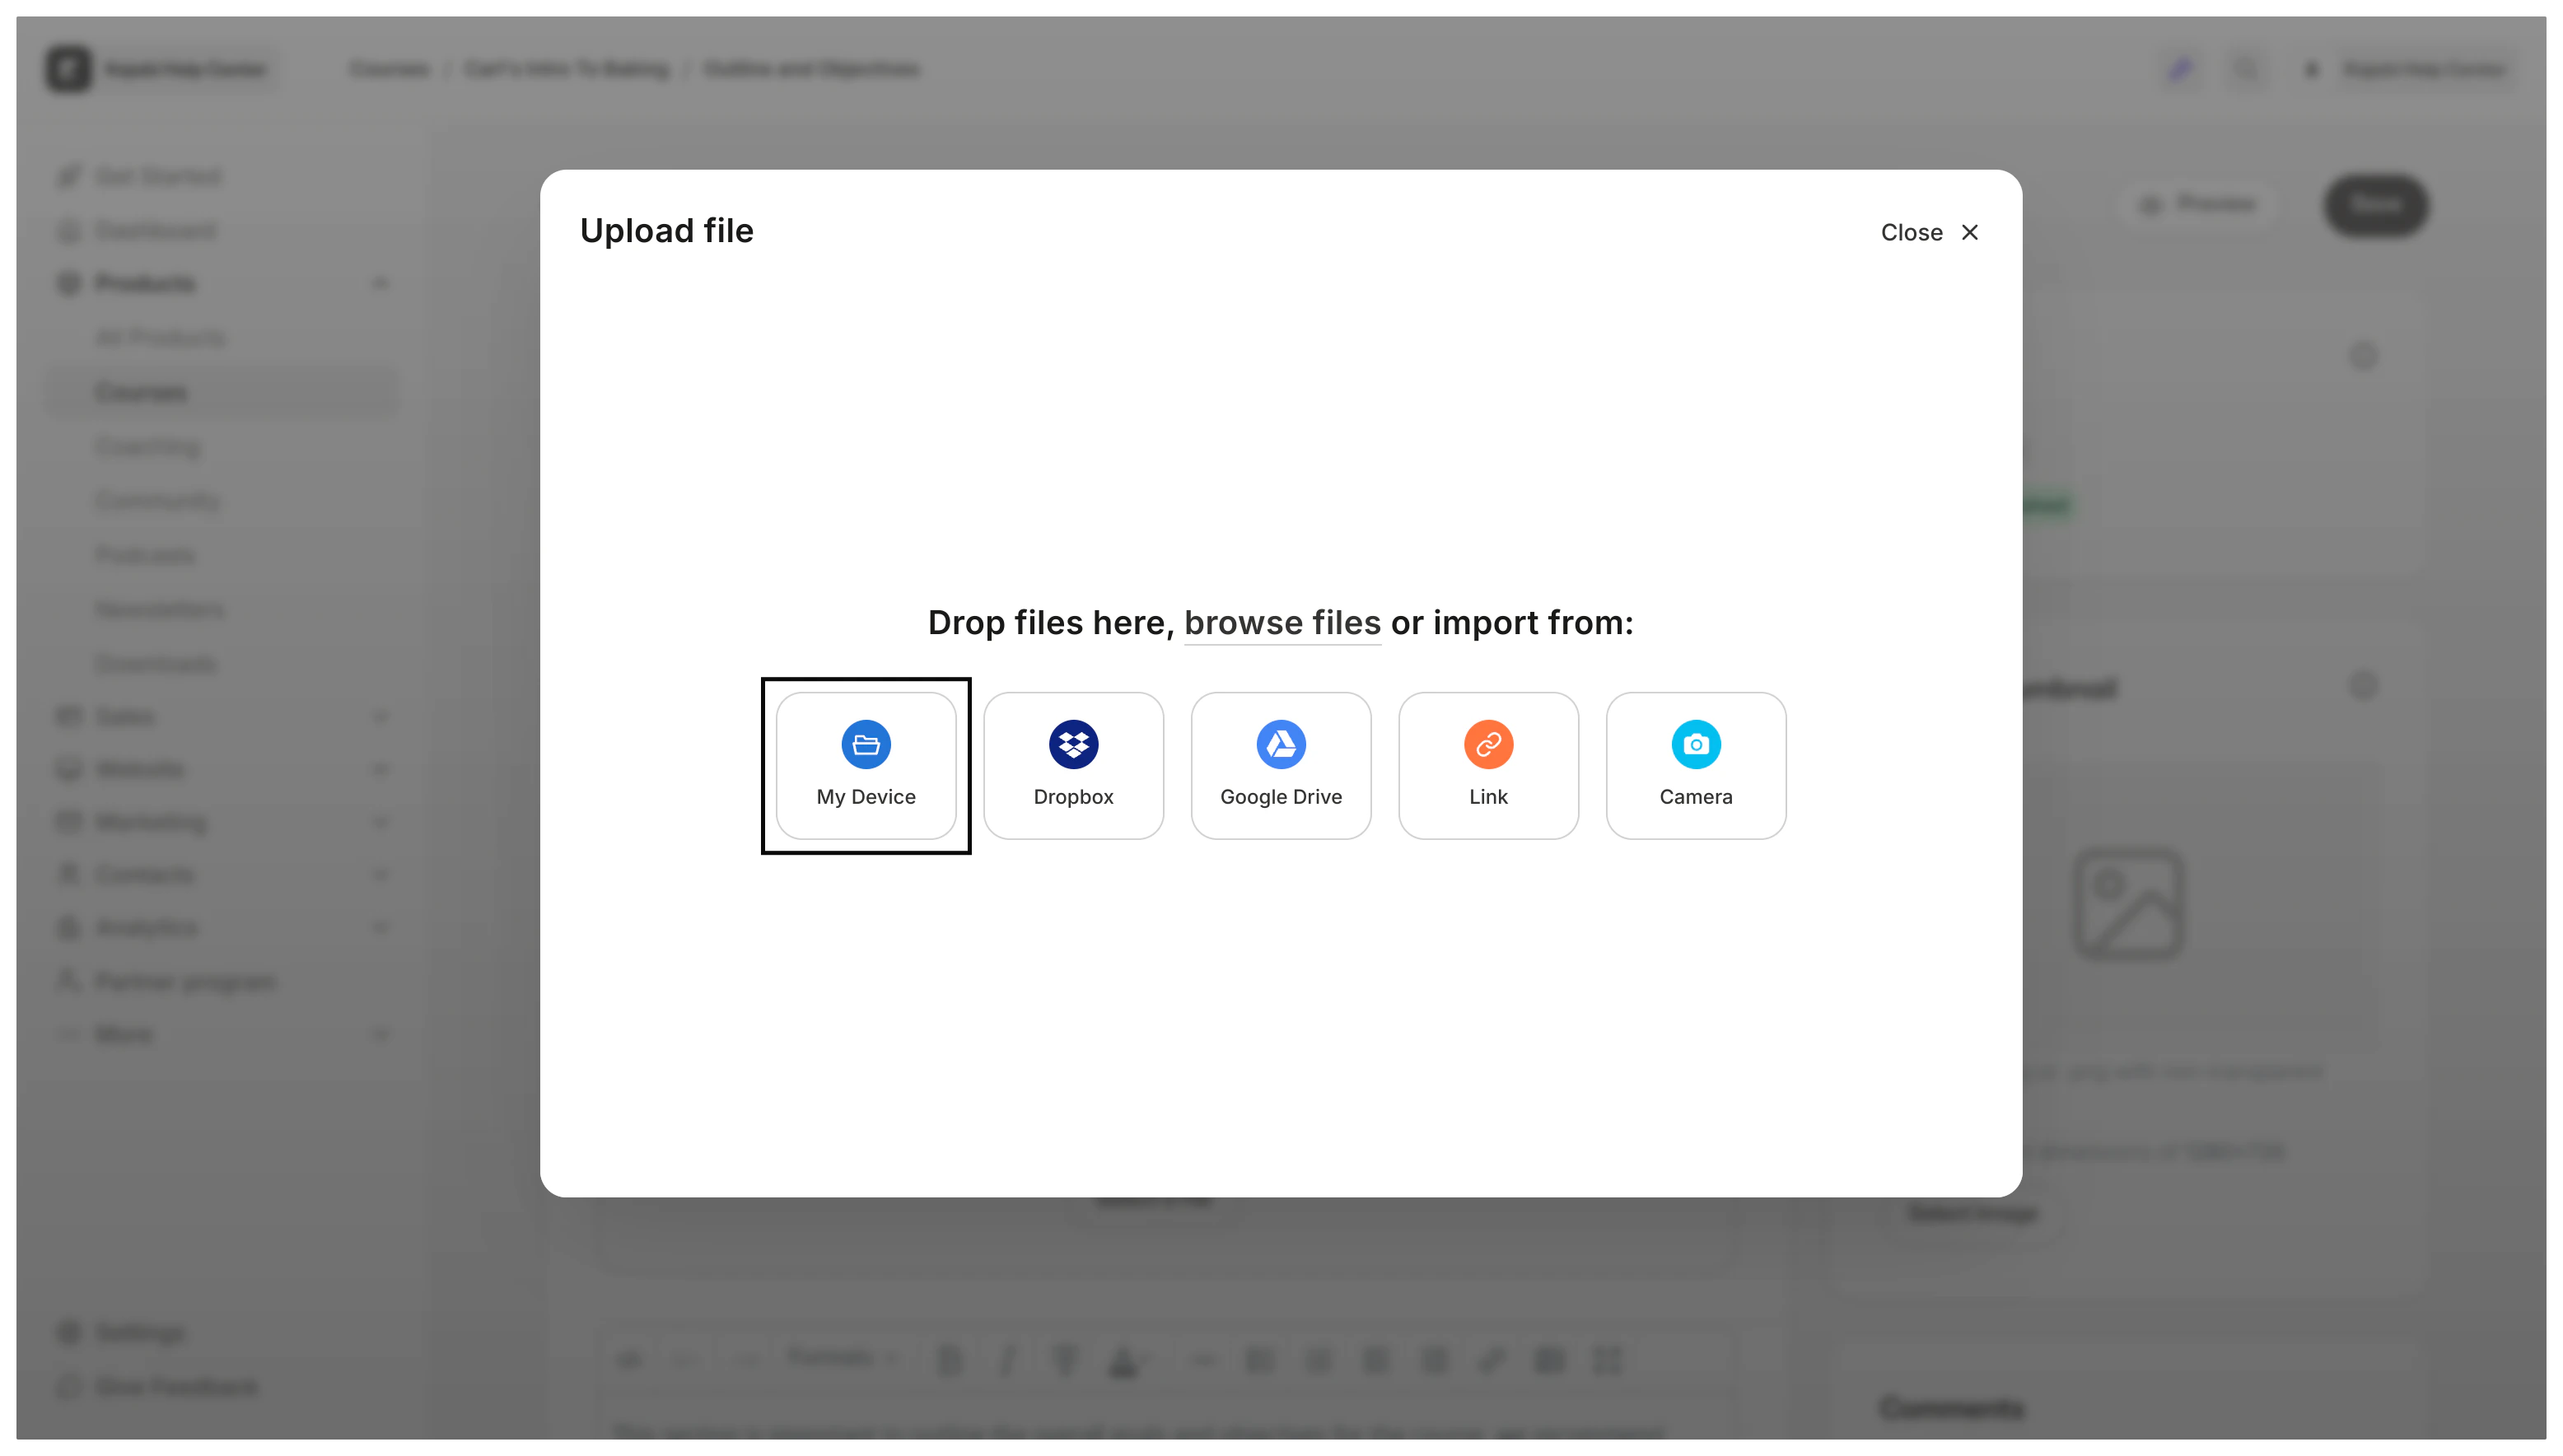
- Select your video file by dragging and dropping or clicking Choose File:
Dropbox
Use the Dropbox integration to upload video files directly from your Dropbox account:- Open the Products tab from your Dashboard.
- Select the Product you wish to edit.
- Within the Product Outline, click the title of the Lesson you want to add a video to.
- In the media selection at the top of the Lesson Editor, click Video.
- Select the Dropbox option in the File Uploader.
- Connect to Dropbox.
- Choose a video to upload:
Google Drive
Use the Google Drive integration to upload video files directly from your Google Drive account:- Open the Products tab from your Dashboard.
- Select the Product you wish to edit.
- Within the Product Outline, click the title of the Lesson you want to add a video to.
- In the media selection at the top of the Lesson Editor, click Video.
- Select Google Drive in the File Uploader.
- Connect to Google Drive.
- Choose a video to upload:
Link (URL)
- Open the Products tab from your Dashboard.
- Select the Product you wish to edit.
- Within the Product Outline, click the title of the Lesson you want to add a video to.
- In the media selection at the top of the Lesson Editor, click Video.
- Click Link in the File Uploader.
- Copy and paste your video file URL in the field to upload the video file directly through the URL:
Note:
This field will not accept links to a video hosted on a site like Youtube or Vimeo. The uploader will be looking for the file type in the URL link. For instance,
https://www.youtube.com/watch?v=9C_HReR_McQ
would not be accepted, however,
http://techslides.com/demos/sample-videos/small.mp4
would be an acceptable file link because of the .mp4. Learn to add your video content from YouTube or Vimeo to the Body of a Course lesson.Choose a thumbnail
After the video has been uploaded and saved, you will have the option to choose a thumbnail. Select your thumbnail from a specific frame of your video or by uploading an image to the Lesson Thumbnail image.To select a specific frame
- Click in the player to a frame you would like to use as the Thumbnail.
- Click Use Current Frame as Thumbnail: