

Troubleshoot email sending
If you’re having trouble sending and receiving emails from your webmail address after connecting your custom domain to Kajabi, you may need to manually add your MX records from your email service provider (e.g. Google Workspace, etc.) to your DNS Settings on Kajabi. Before we dive into troubleshooting, let’s talk about when this issue can occur.Note:
If you didn’t have a webmail provider (i.e. Google Workspace, Office 365) before going through the setup on Kajabi, this issue will not apply to you because Kajabi’s built-in custom email domain feature only lets you send Kajabi marketing emails.
What are MX records?
An MX record specifies which mail server is responsible for receiving emails at a given domain. When the MX records are missing in the Domain Name System (DNS) settings, emails can no longer find the correct destination. If you’re experiencing issues sending and/or receiving emails after connecting your custom domain to Kajabi, you may need to retrieve your MX records from your Email Service Provider (ESP).Note:
Propagation can take up to 48 hours for MX records.
Add MX records to Kajabi
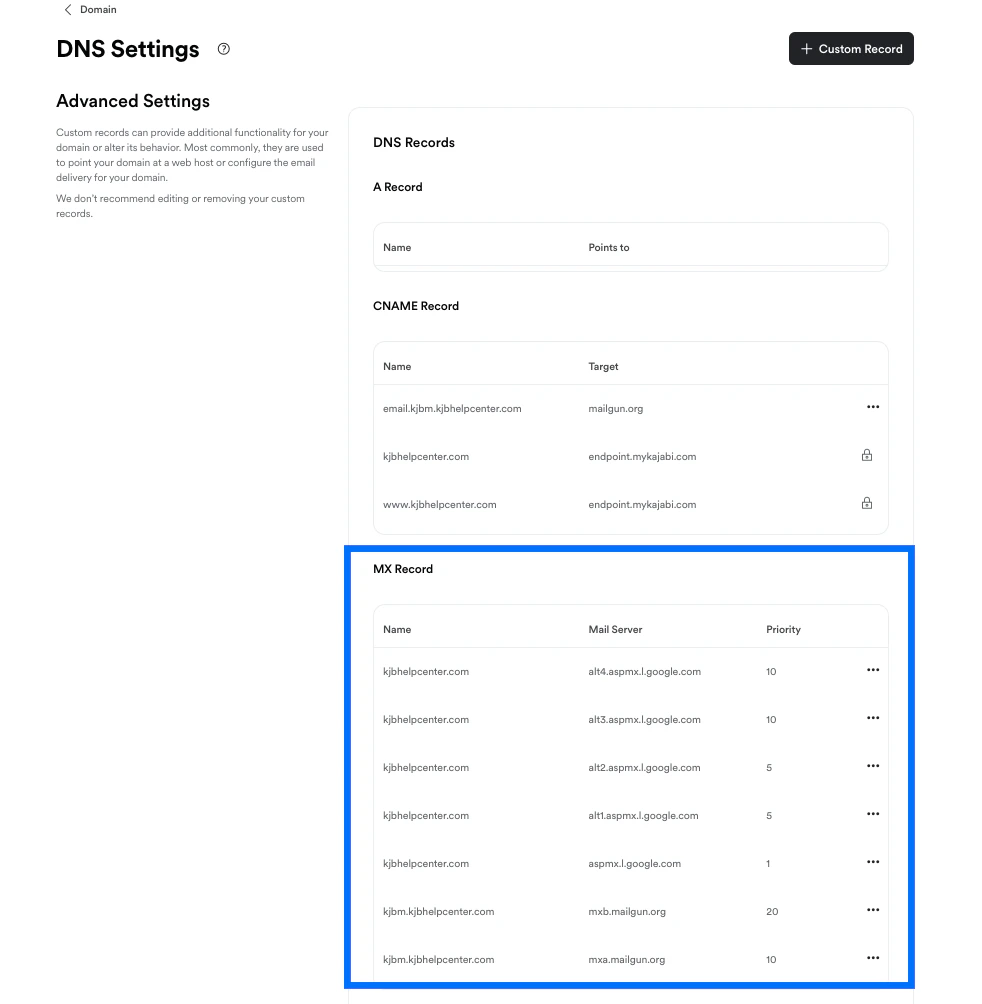
When adding your webmail MX records to your DNS Settings on Kajabi, you’ll need the following three items:- Name
- Mail Server
- Priority
| Name | Mail Server | Priority |
|---|---|---|
| @ | aspmx.l.google.com | 1 |
| @ | alt1.aspmx.l.google.com | 5 |
| @ | alt2.aspmx.l.google.com | 5 |
| @ | alt3.aspmx.l.google.com | 10 |
| @ | alt4.aspmx.l.google.com | 10 |
Add MX records to DNS Settings on Kajabi
- Click the DNS Settings link in the upper left corner of your Domain Settings page.
- In your DNS Settings, click the + Custom Record button in the upper right corner of the page.
- Select MX Record.
- Add your values for the Name, Mail Server, and Priority.