Overview
The Checkout Page Editor has evolved with several enhancements to improve customization options and customer experience. This reference covers past updates including custom CTA text, mobile layout improvements, login requirements, and pay-what-you-want pricing. These features have been released and are available in your checkout settings.Custom CTA text
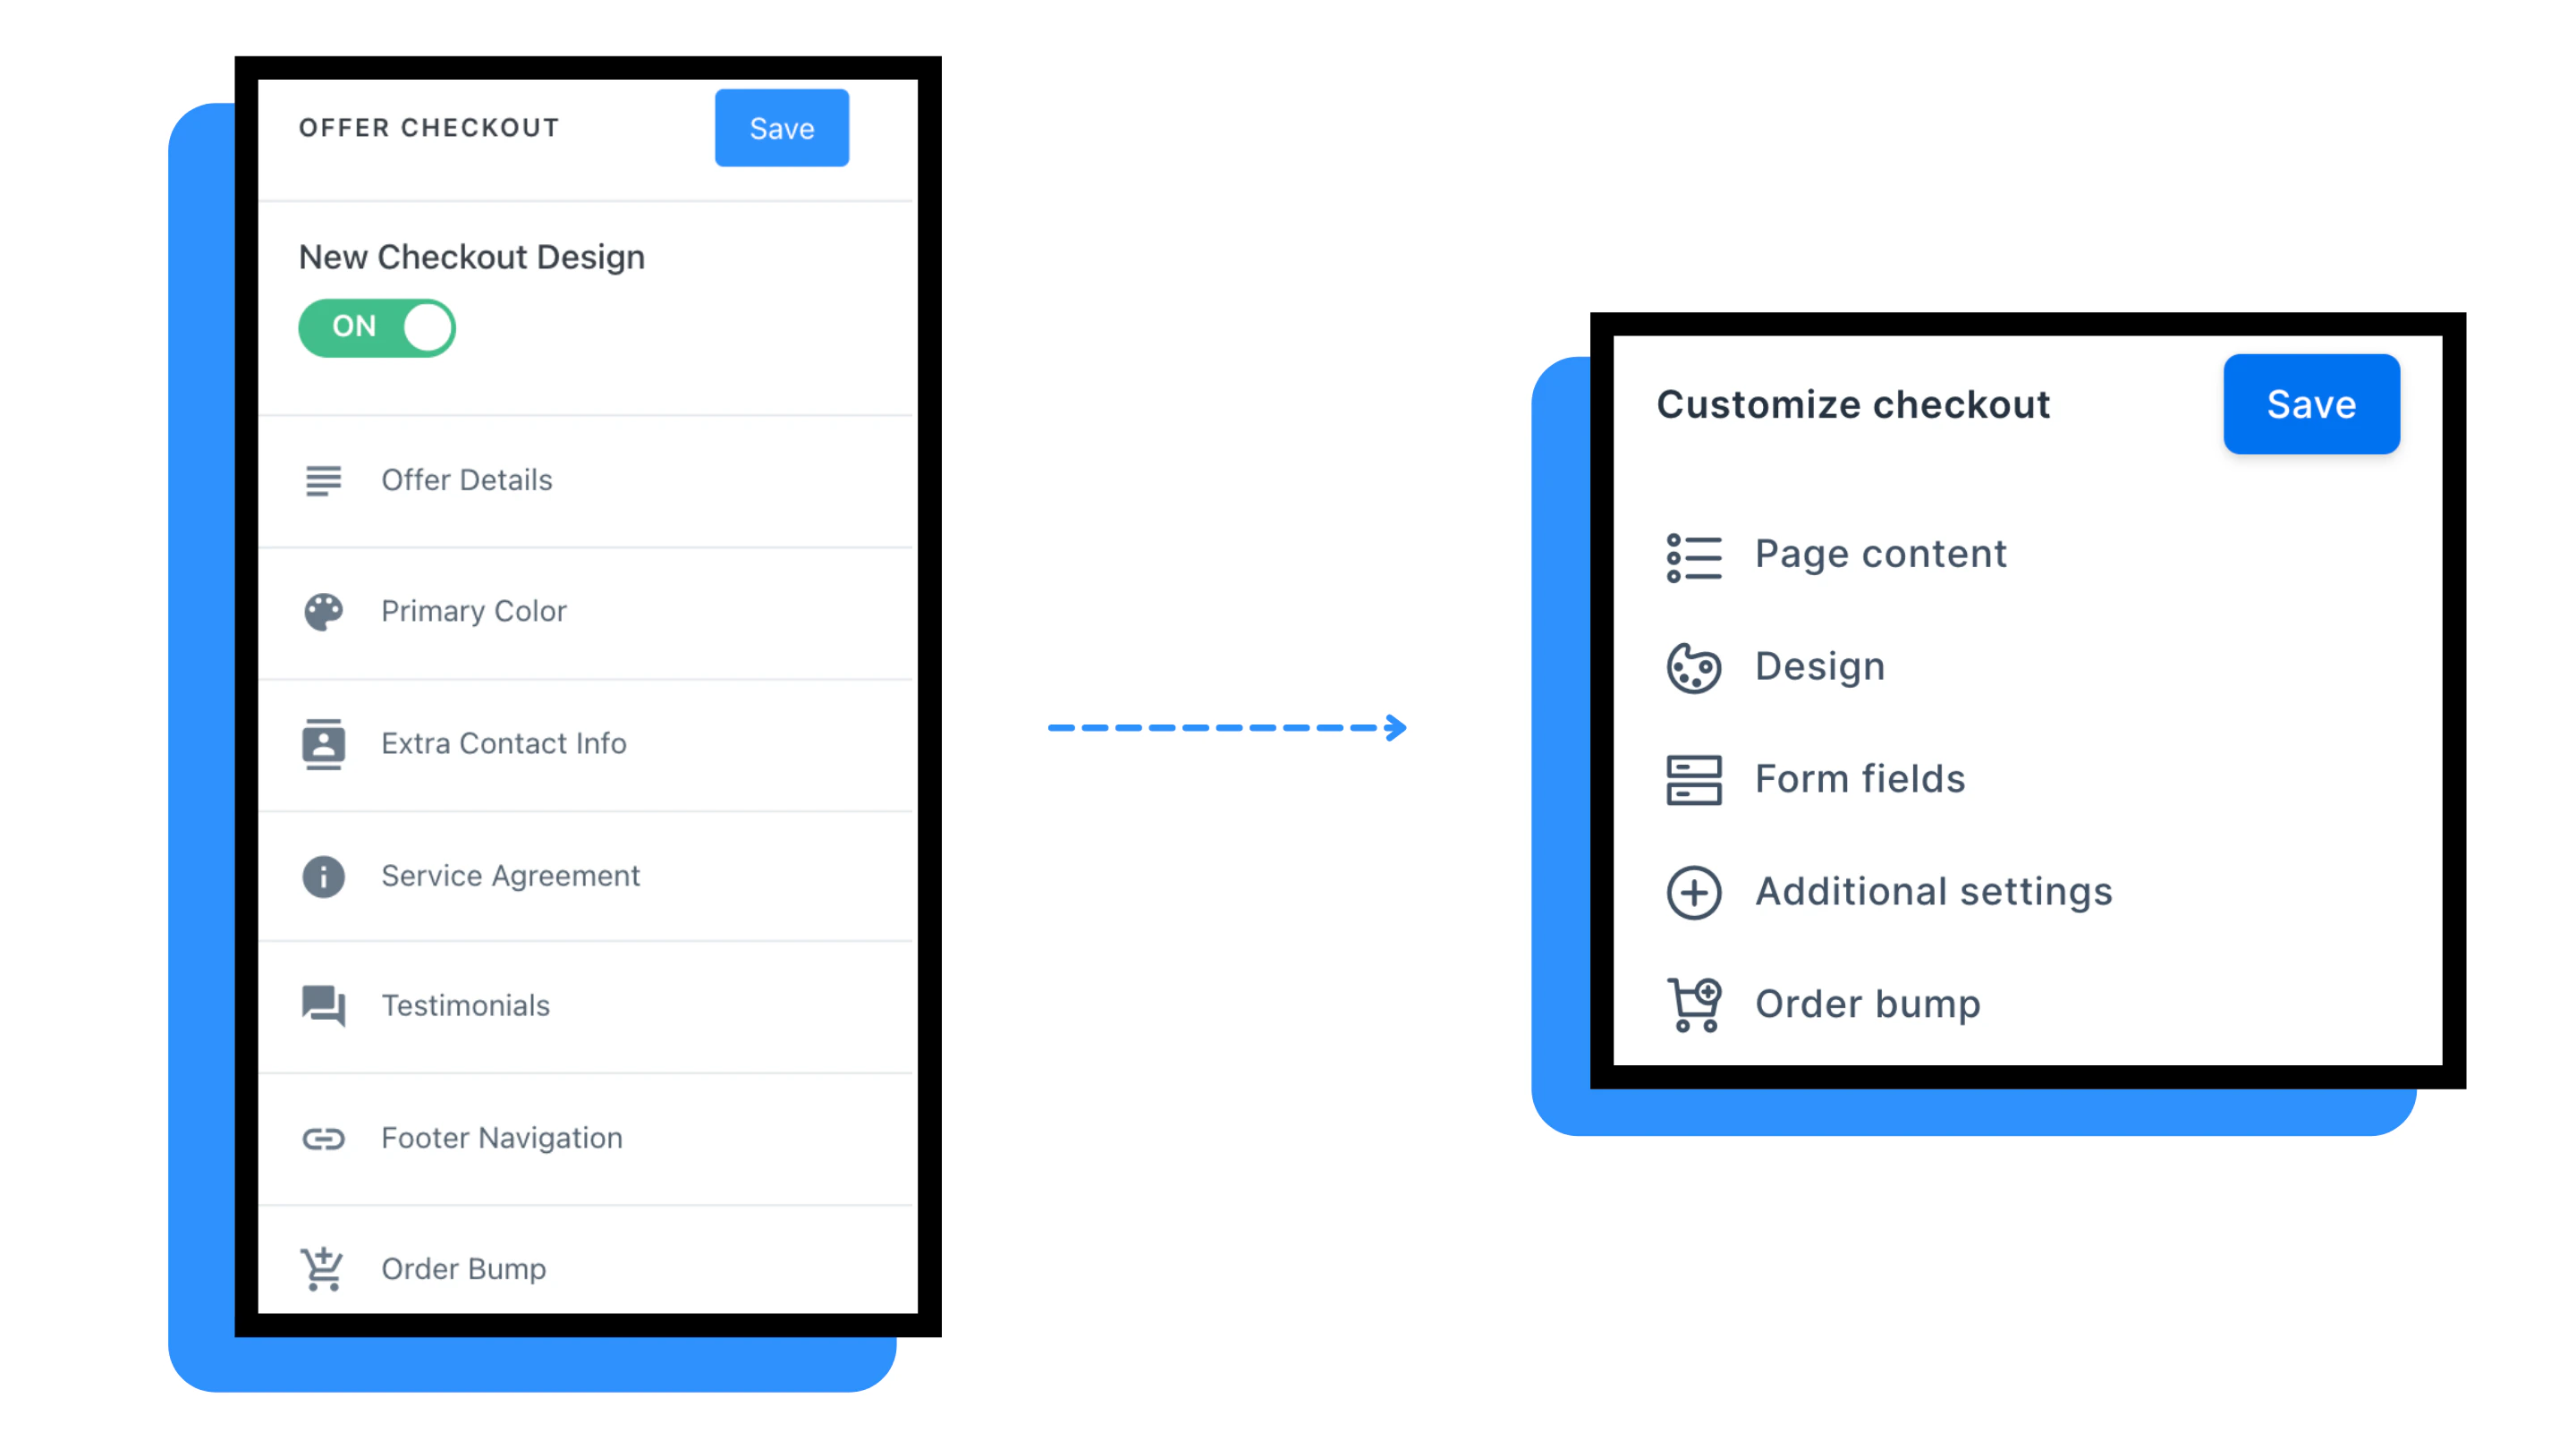
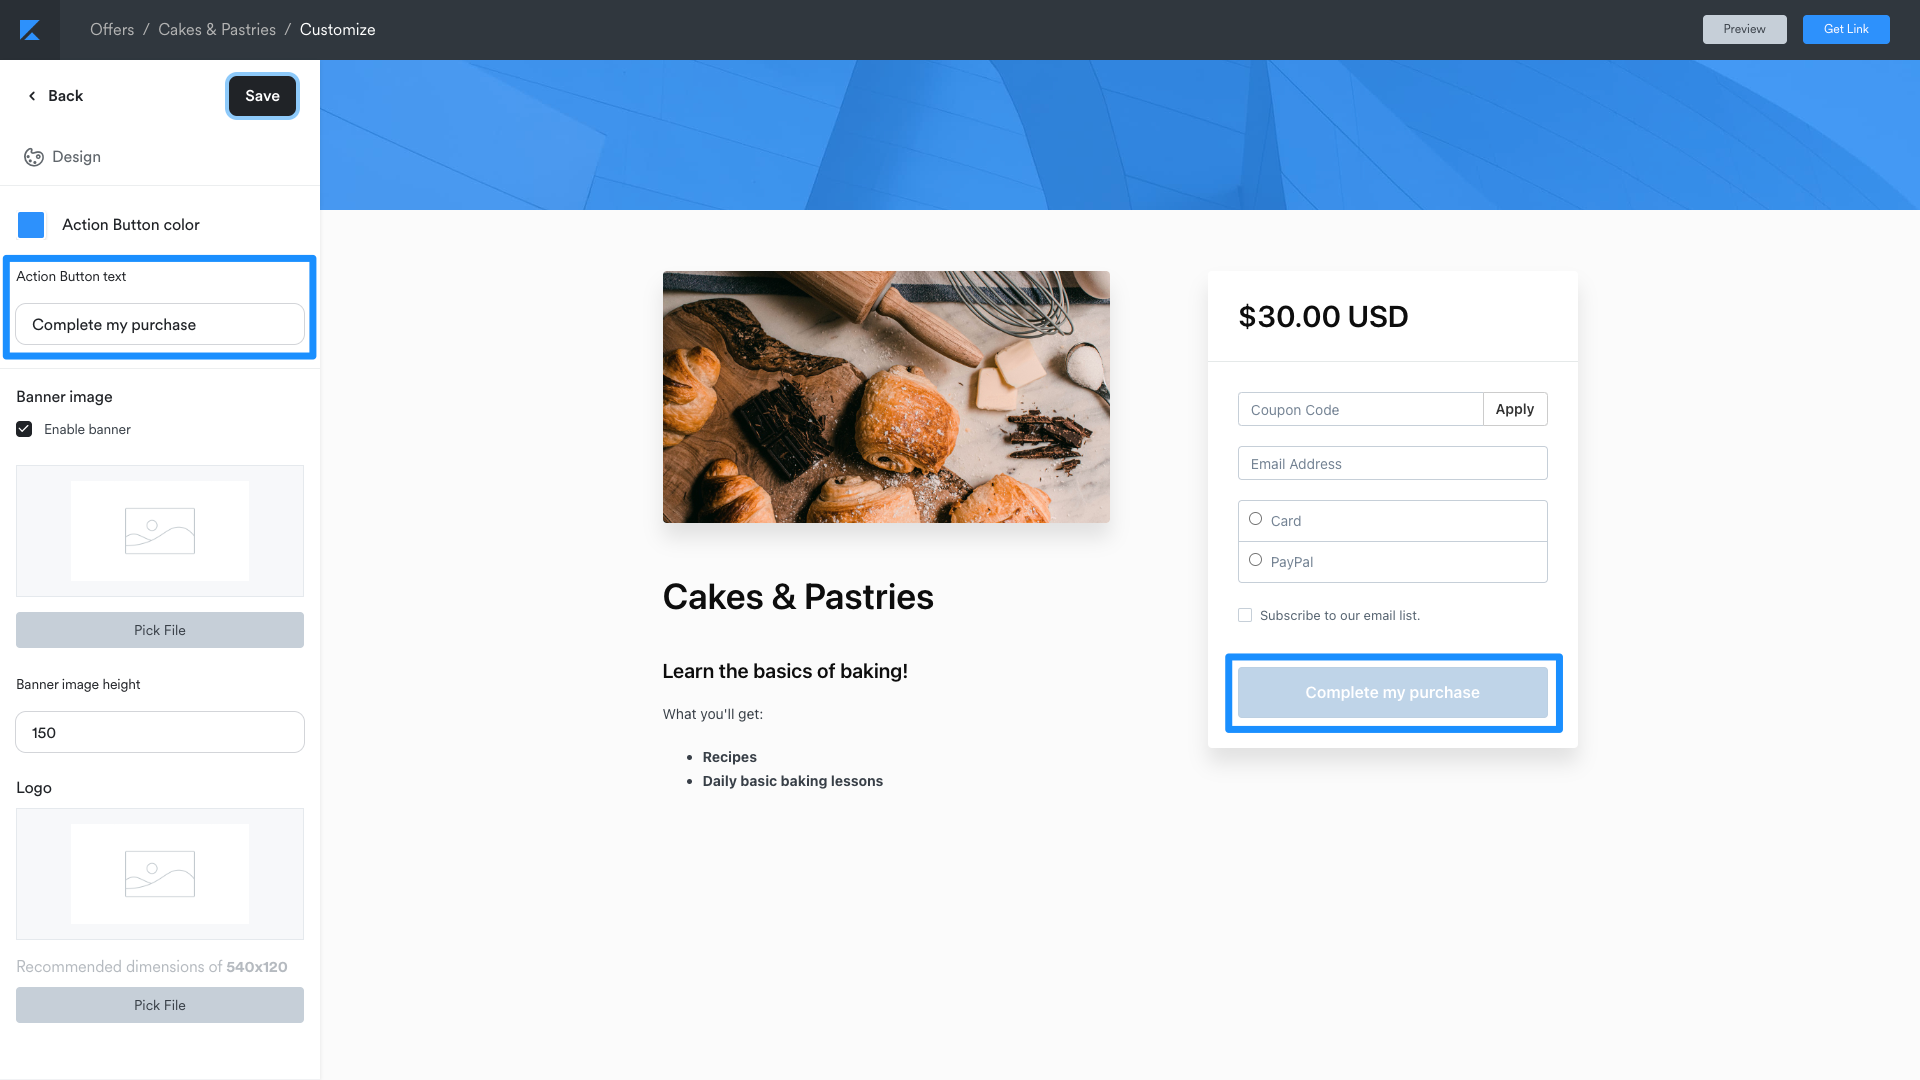
You can customize the call-to-action button text on your checkout pages to better match your offer and brand voice.Configure CTA text
- Navigate to your offer’s checkout settings
- Open the Checkout Editor
- Locate the CTA Button section
- Enter your custom button text
- Click Save to apply changes
CTA text best practices
- Use action-oriented language (e.g., “Get Instant Access” or “Start Learning Today”)
- Keep button text concise—aim for 2-4 words
- Test different variations to see what resonates with your audience
- Align CTA text with your offer’s value proposition
Mobile layout improvements
The checkout editor includes optimizations for mobile devices to ensure a seamless purchasing experience on smartphones and tablets.Mobile-specific features
- Responsive design: Checkout pages automatically adapt to screen size
- Touch-friendly inputs: Form fields are optimized for mobile interaction
- Streamlined layout: Content stacks vertically for easy scrolling
- Fast loading: Optimized assets for mobile network conditions
Note: Preview your checkout page on multiple devices to ensure the experience meets your expectations across all screen sizes.
Login requirement settings
Control whether customers must log in or create an account to complete their purchase.Available options
- Guest checkout: Allow customers to purchase without creating an account
- Required login: Require customers to log in or register before checkout
- Optional login: Give customers the choice to log in or proceed as guest
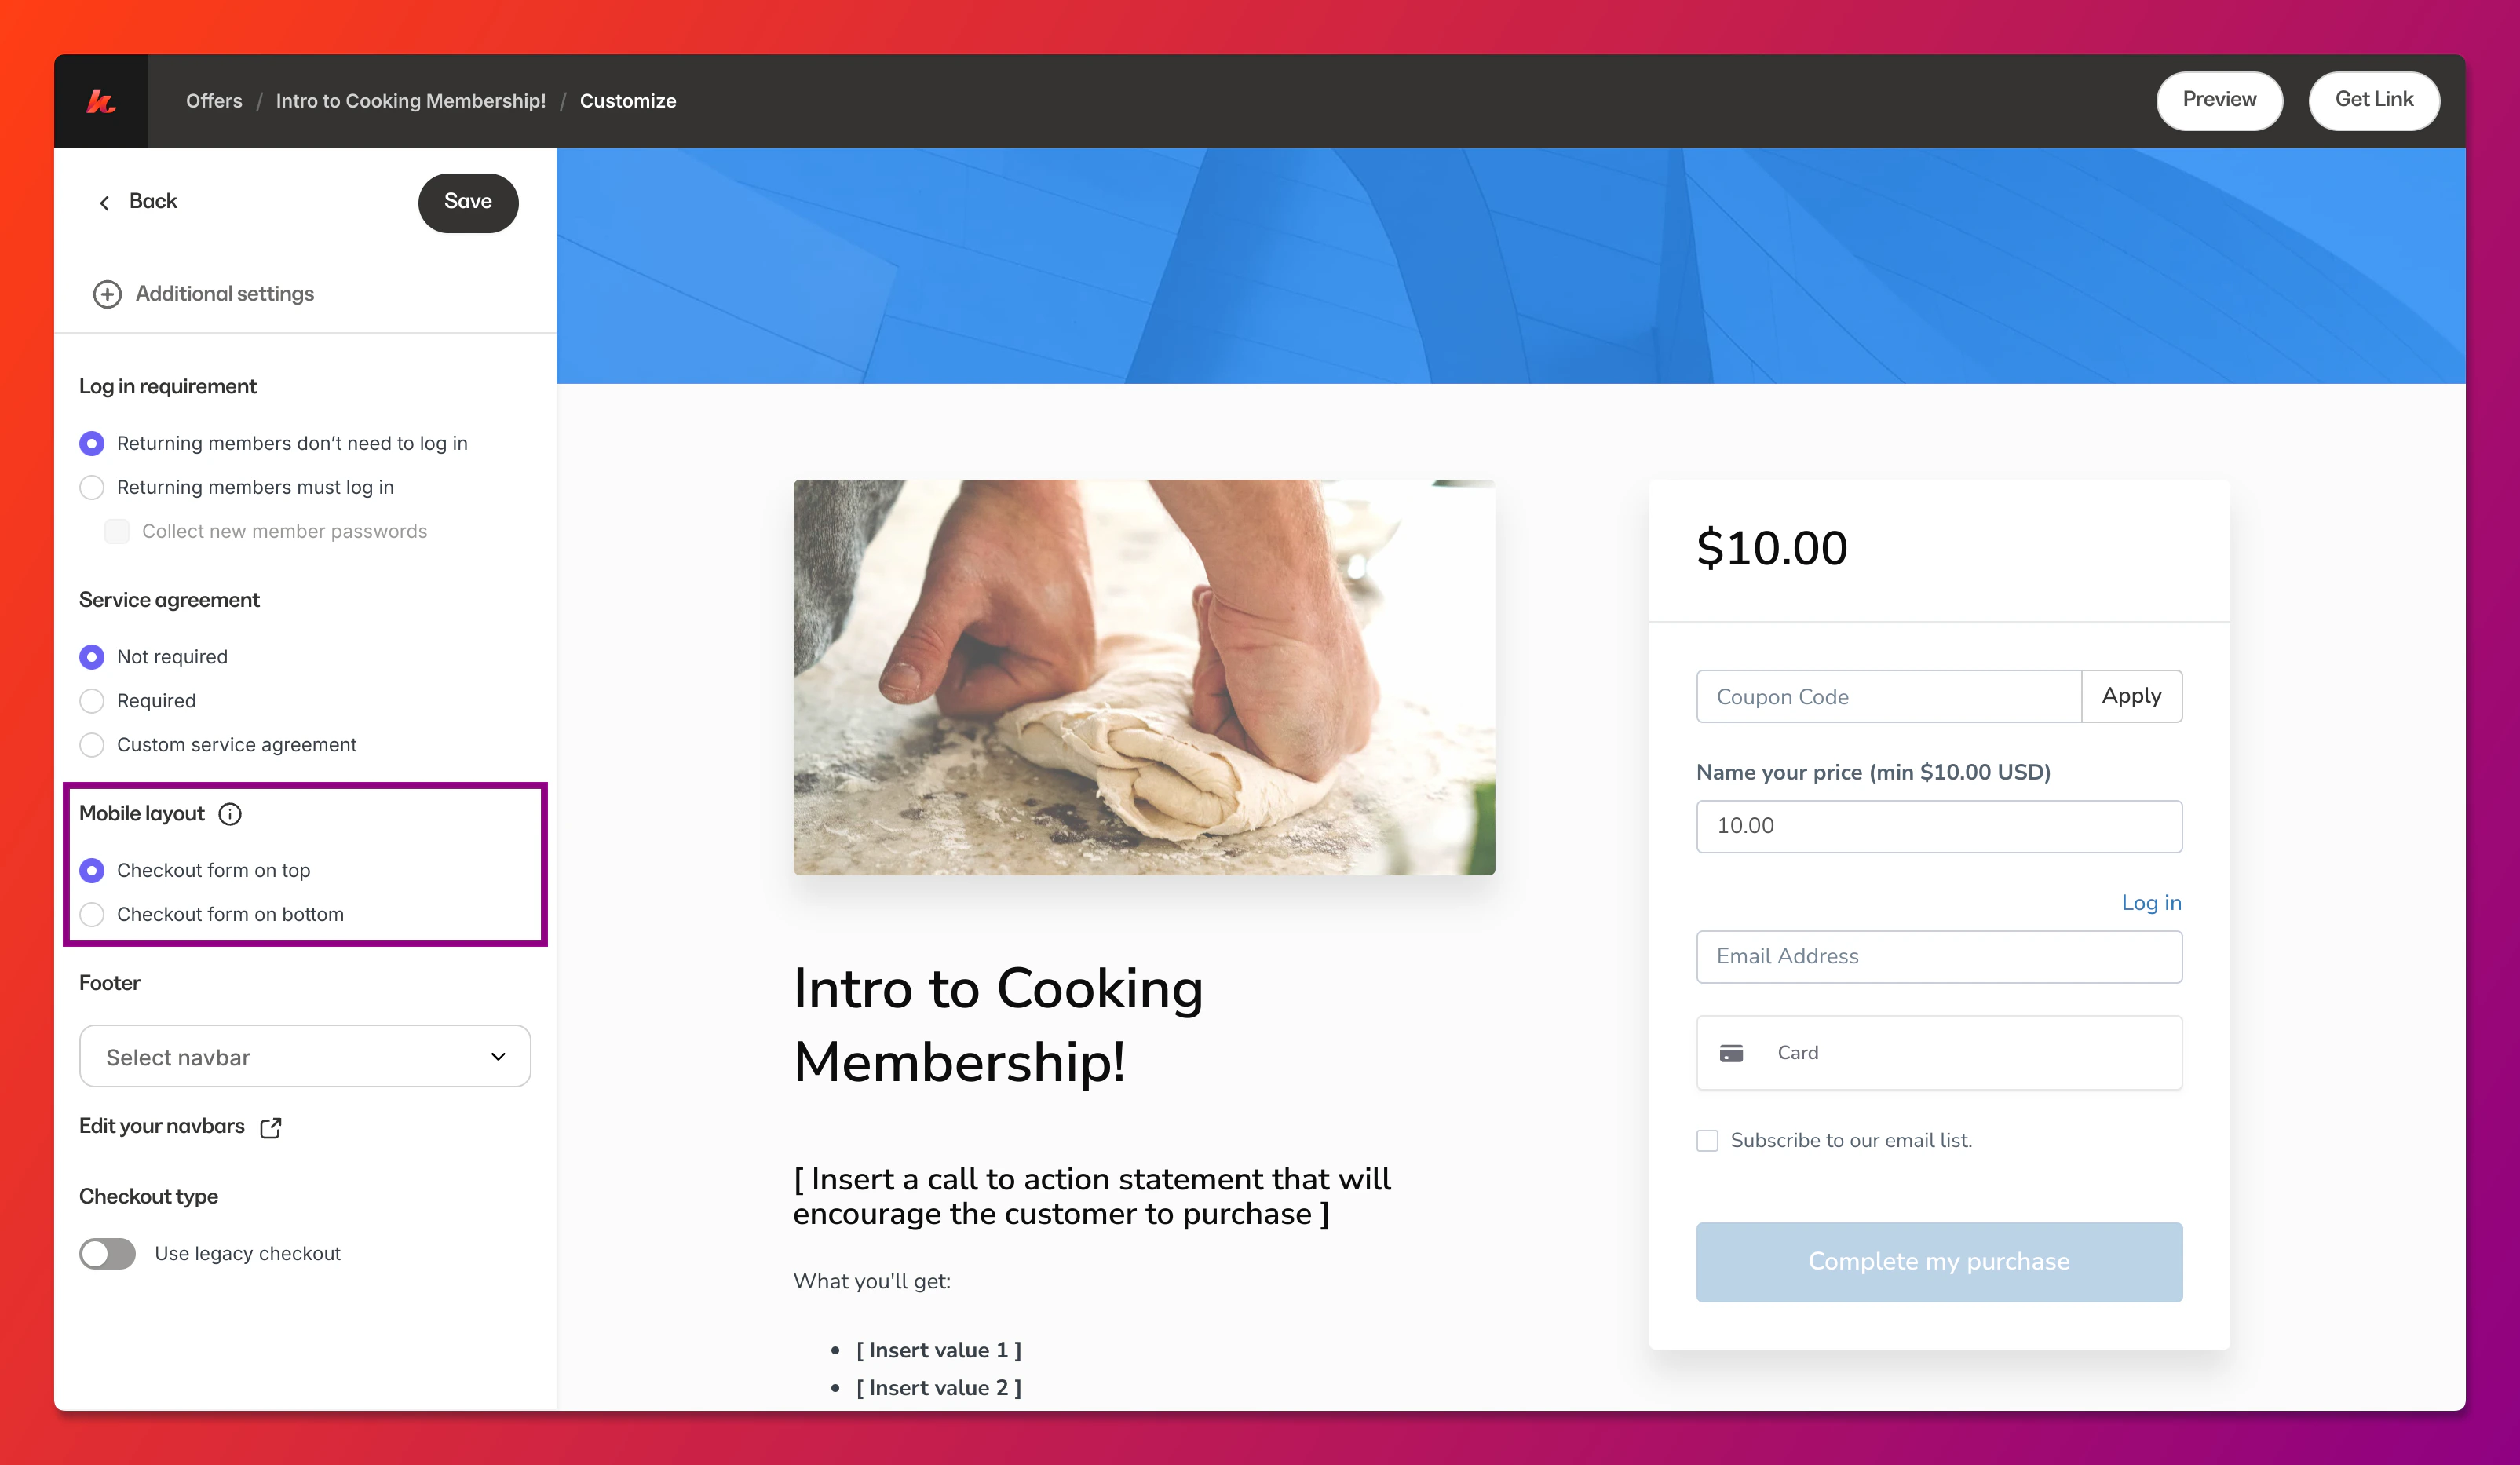
Configure login settings
- Access your offer’s checkout settings
- Navigate to the Form Fields section
- Locate the login requirement option
- Select your preferred setting
- Save your changes
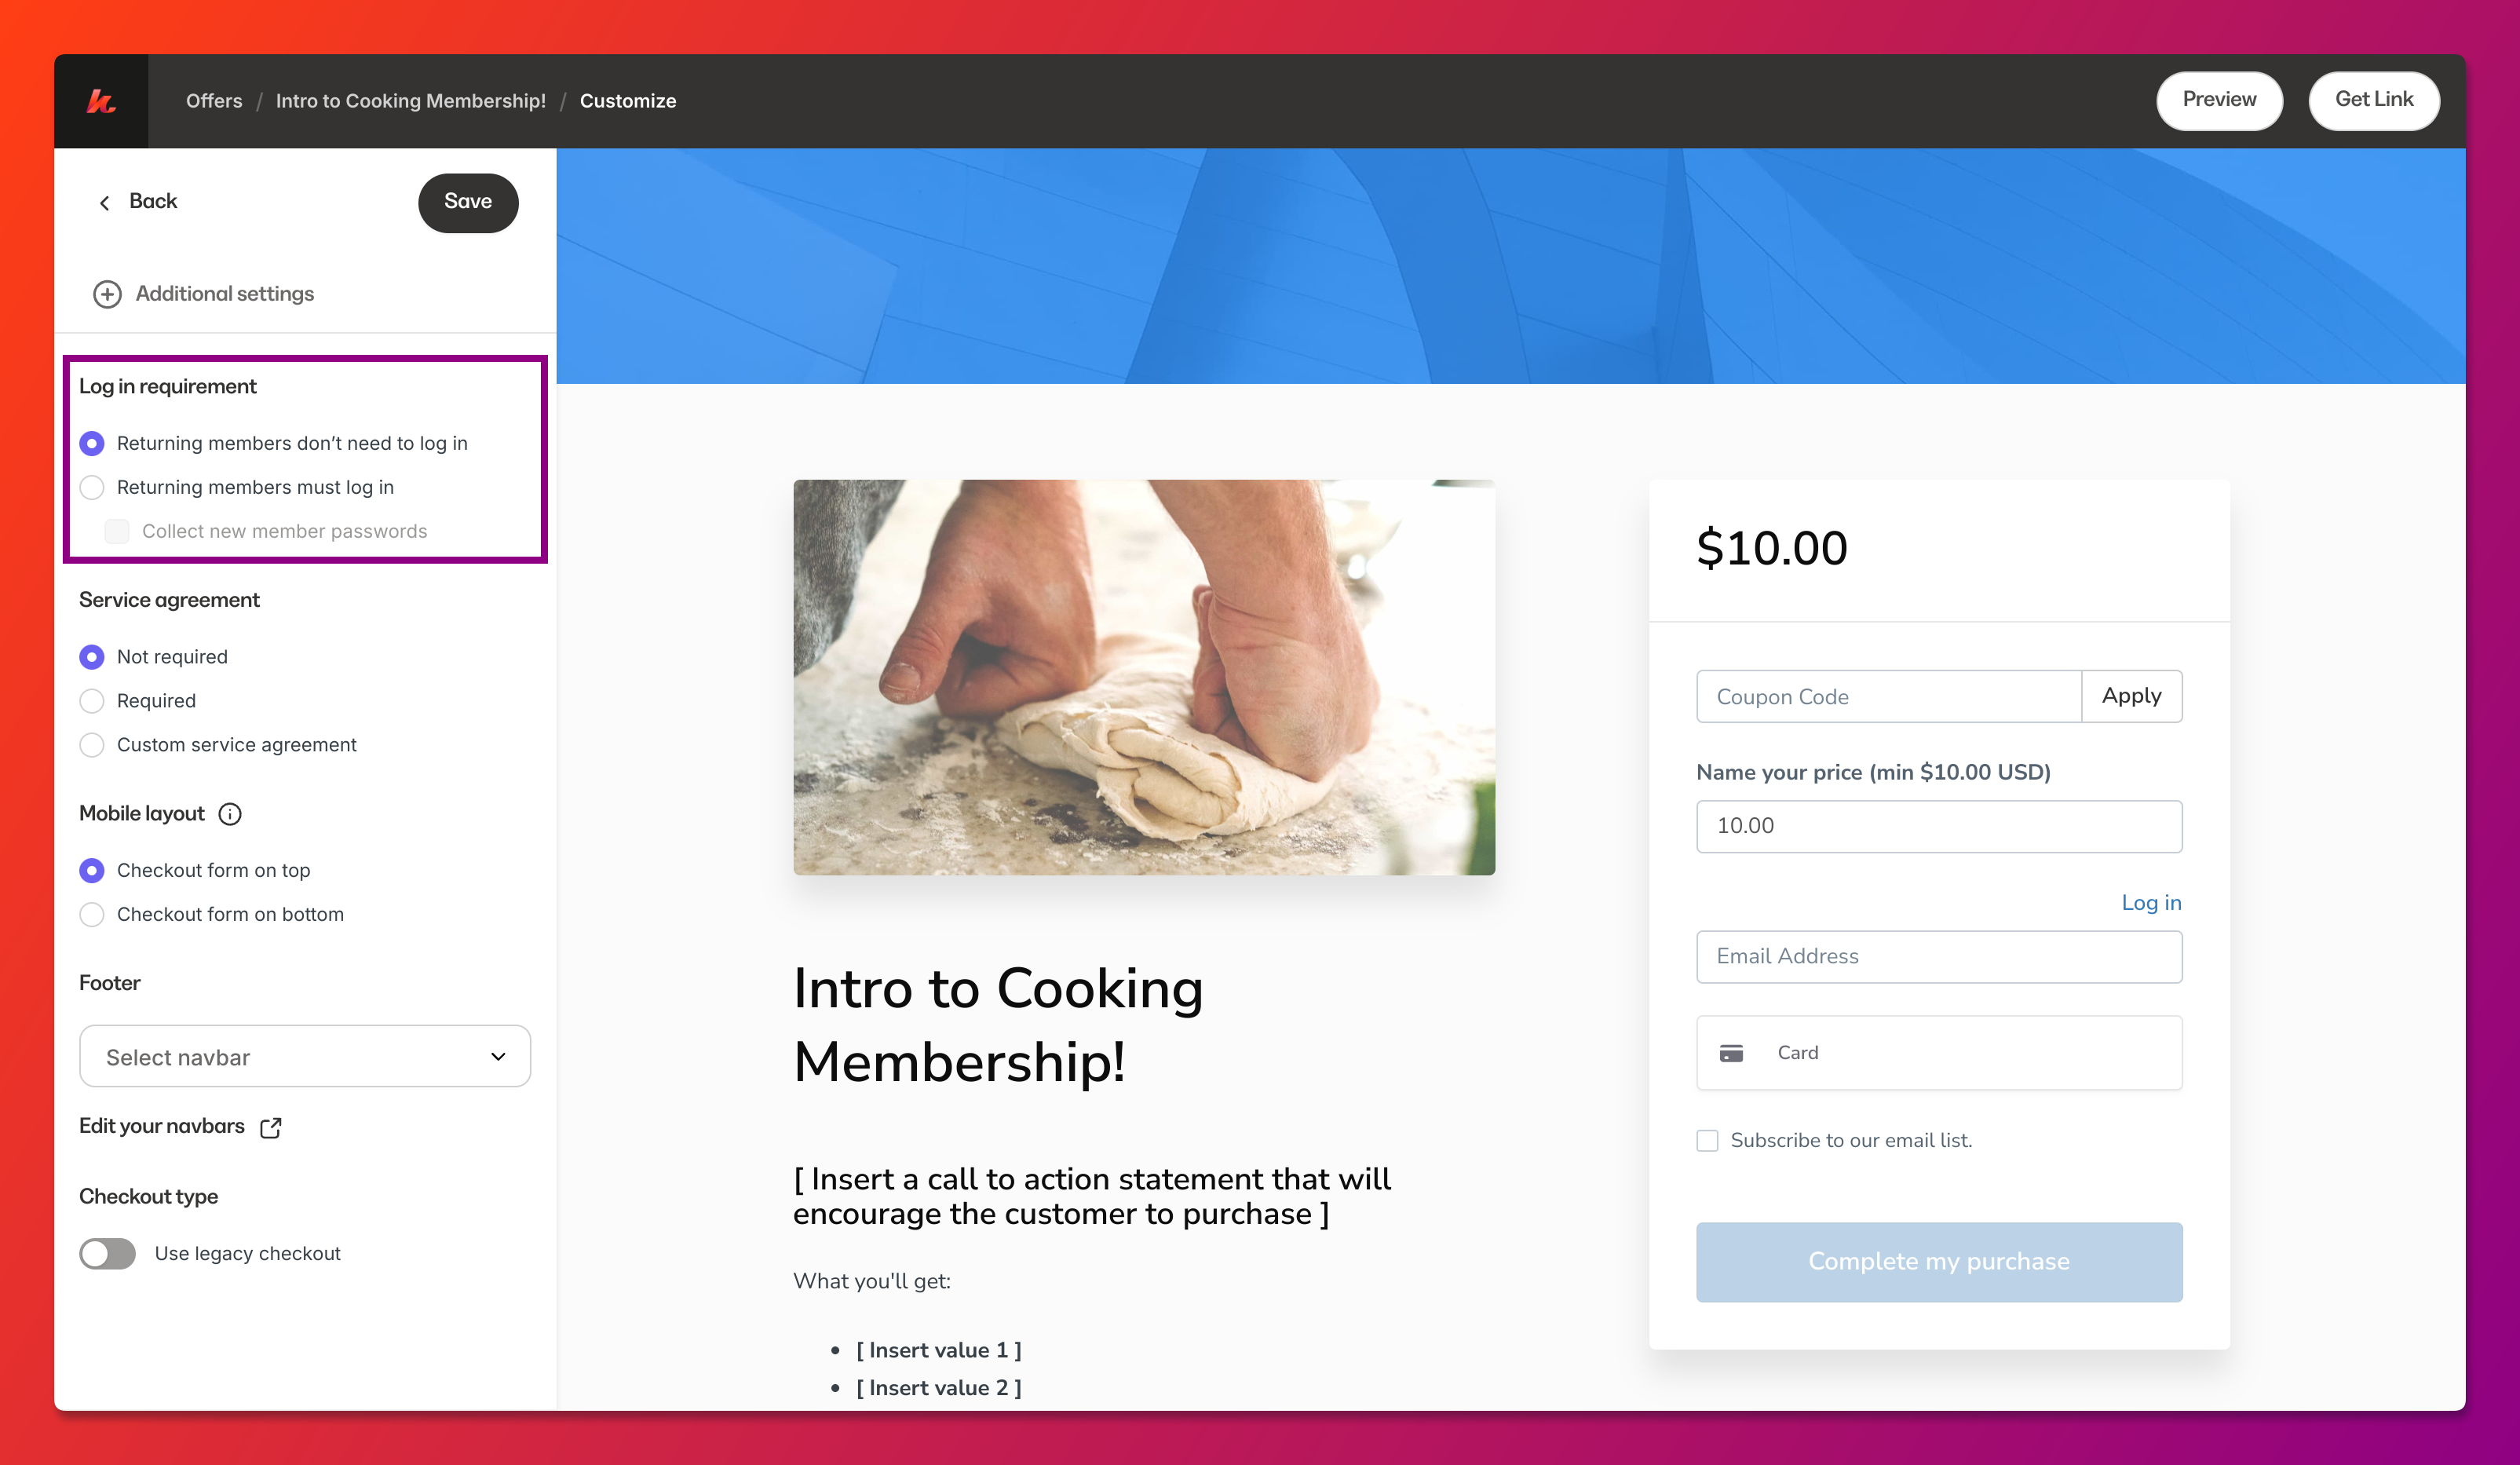
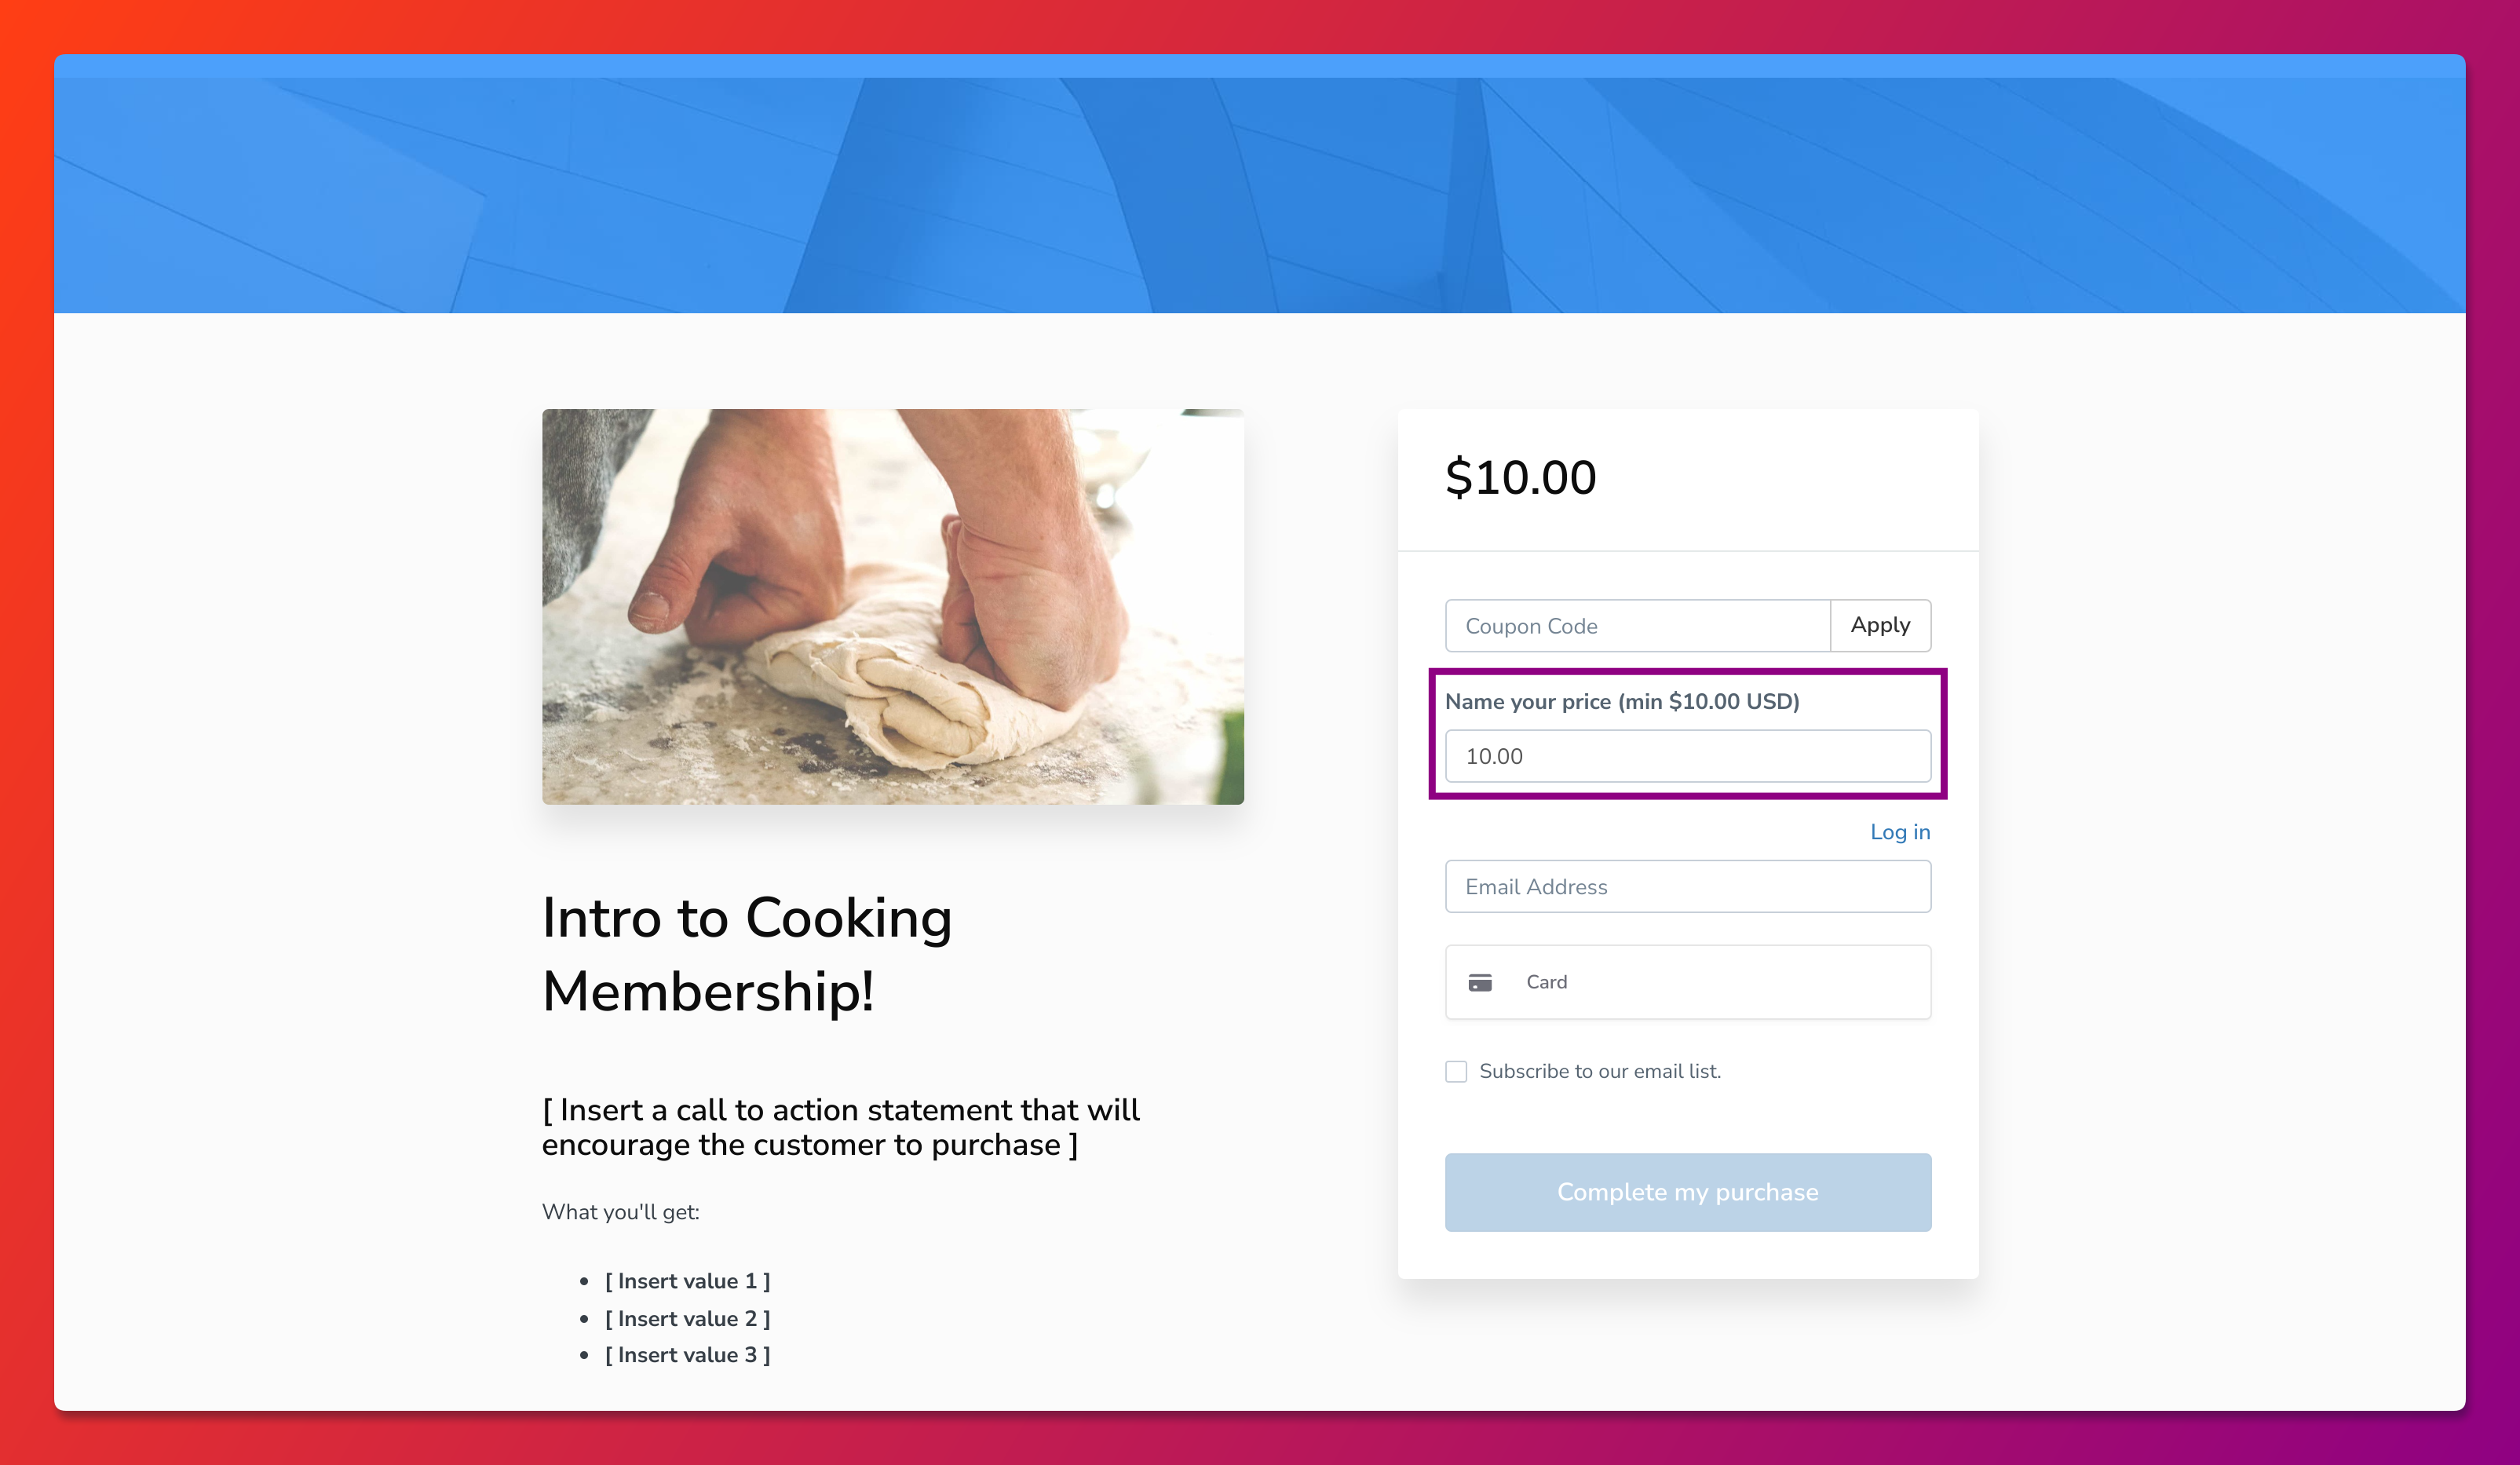
Pay what you want pricing
The pay-what-you-want feature allows customers to choose their own price, within parameters you define.Enable pay what you want
- Navigate to your offer’s pricing settings
- Select Pay What You Want as the pricing type
- Set a minimum price (optional but recommended)
- Set a suggested price to guide customers
- Save your pricing configuration
Best practices
- Set a minimum price: Ensure you cover your costs and receive fair compensation
- Provide a suggested price: Help customers understand the value of your offer
- Explain the model: Let customers know why you’re offering flexible pricing
- Show value clearly: Customers pay more when they understand what they’re getting