A Form in Kajabi is a versatile tool that can be used for many actions such as: subscribing someone to an email sequence, granting them an offer, registering them to an event, and more.
Looking to customize the Subscribe button and heading caption for your Form?
Learn how to customize the look and feel of your Form in a Page built with Kajabi, or learn how to design your Kajabi Form for an external location.
- Open the Marketing tab from your Dashboard.
- Click Forms.
- Select + Add New Form.
- Give your Form a title.
- Click Save to create your Form:
Tip: Change the title of your Form at a later date by selecting your Form and updating the Title field in the Form editor.
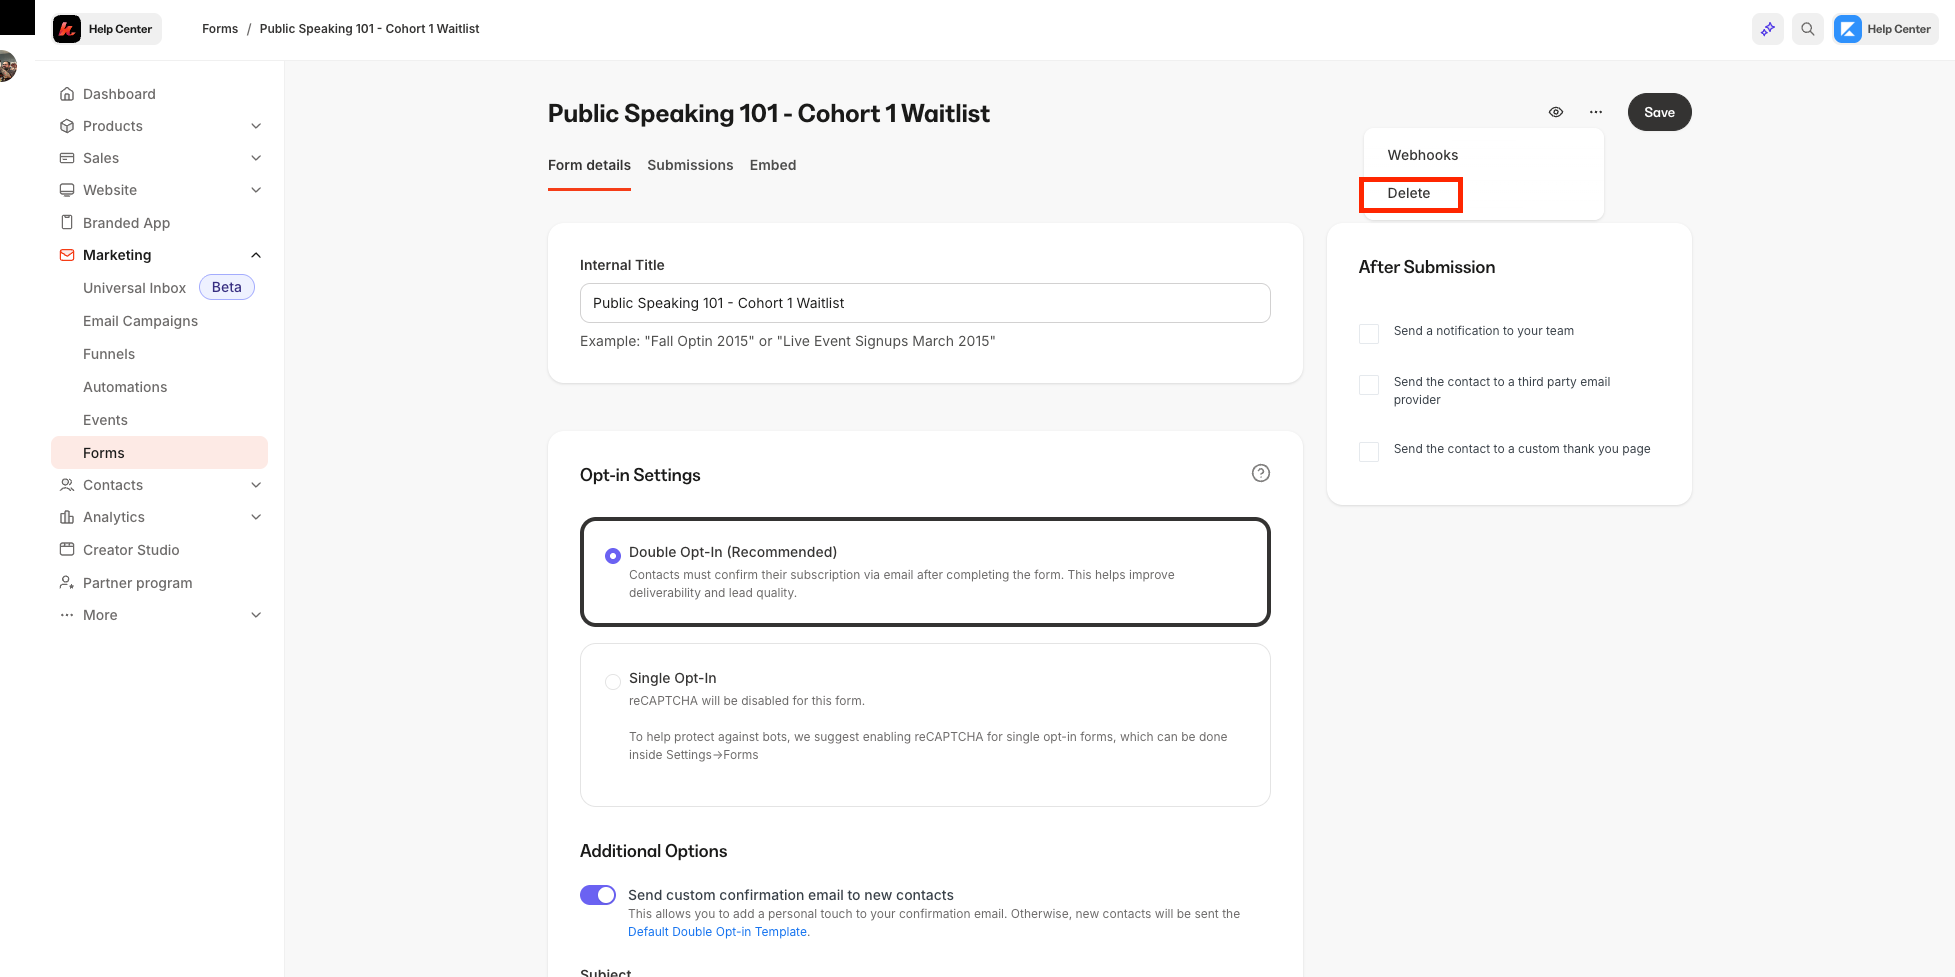
- Choose the Form you wish to delete.
- Use the … dropdown menu and click Delete:
 This article shows you how to customize your Form’s functionality. Learn how to design your Form in a Page built with Kajabi, or learn how to design your Form for an external location.
Double opt-in
Using Double Opt-In requires your subscribers to confirm their subscriptions via email. This is the recommended setting.
Learn more: Set up a Form with double opt-in
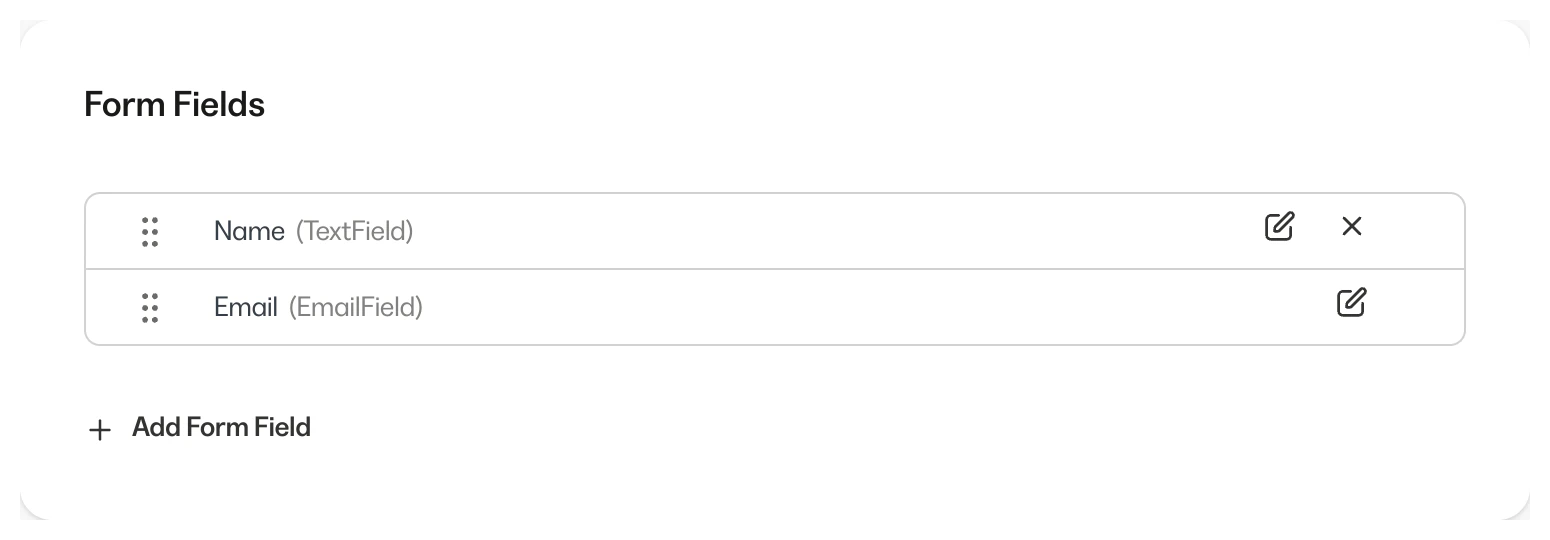
 Form Fields can gather specific and unique information about your leads and customers.
Learn more: Add and edit fields on a Form
Form Fields can gather specific and unique information about your leads and customers.
Learn more: Add and edit fields on a Form
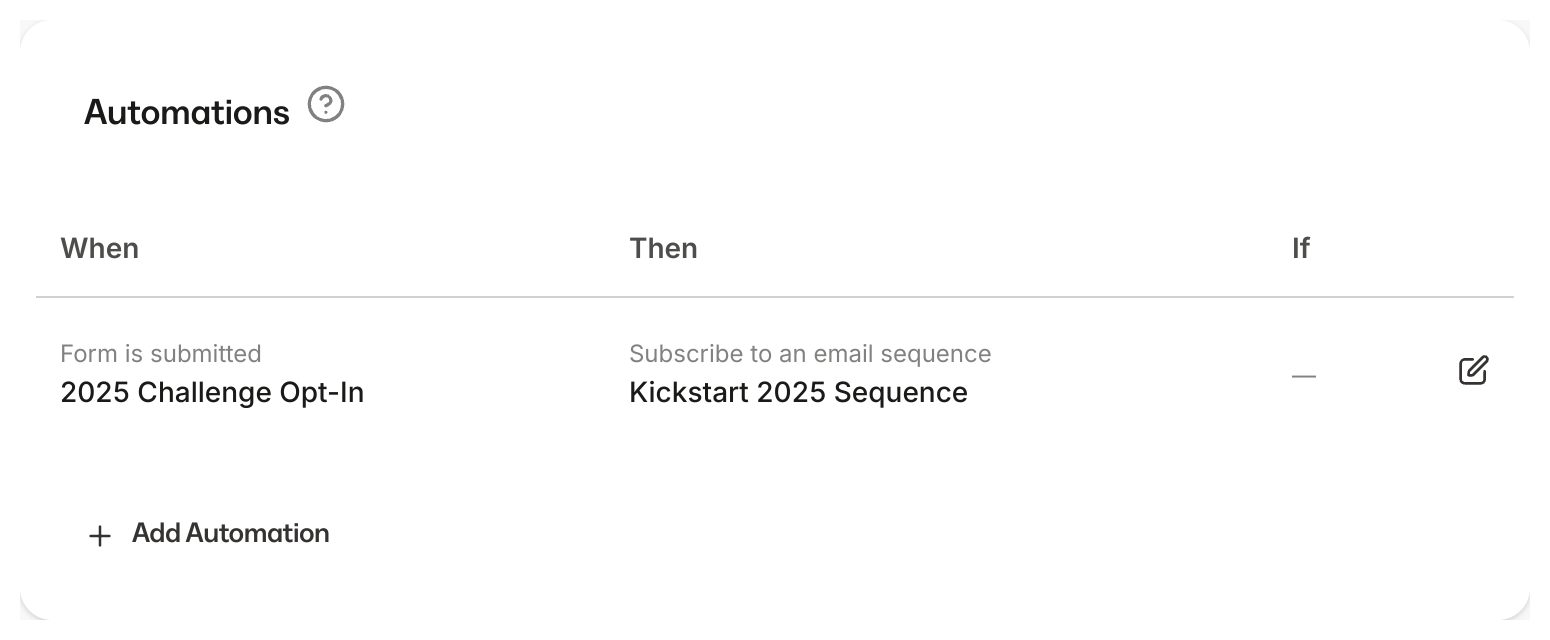
Automations
Set up Automations in opt-in Forms to automatically generate Offers, Email Sequences, Events, Tags, Transactional Emails, and Coupons.
Learn more: Use Automations in Forms
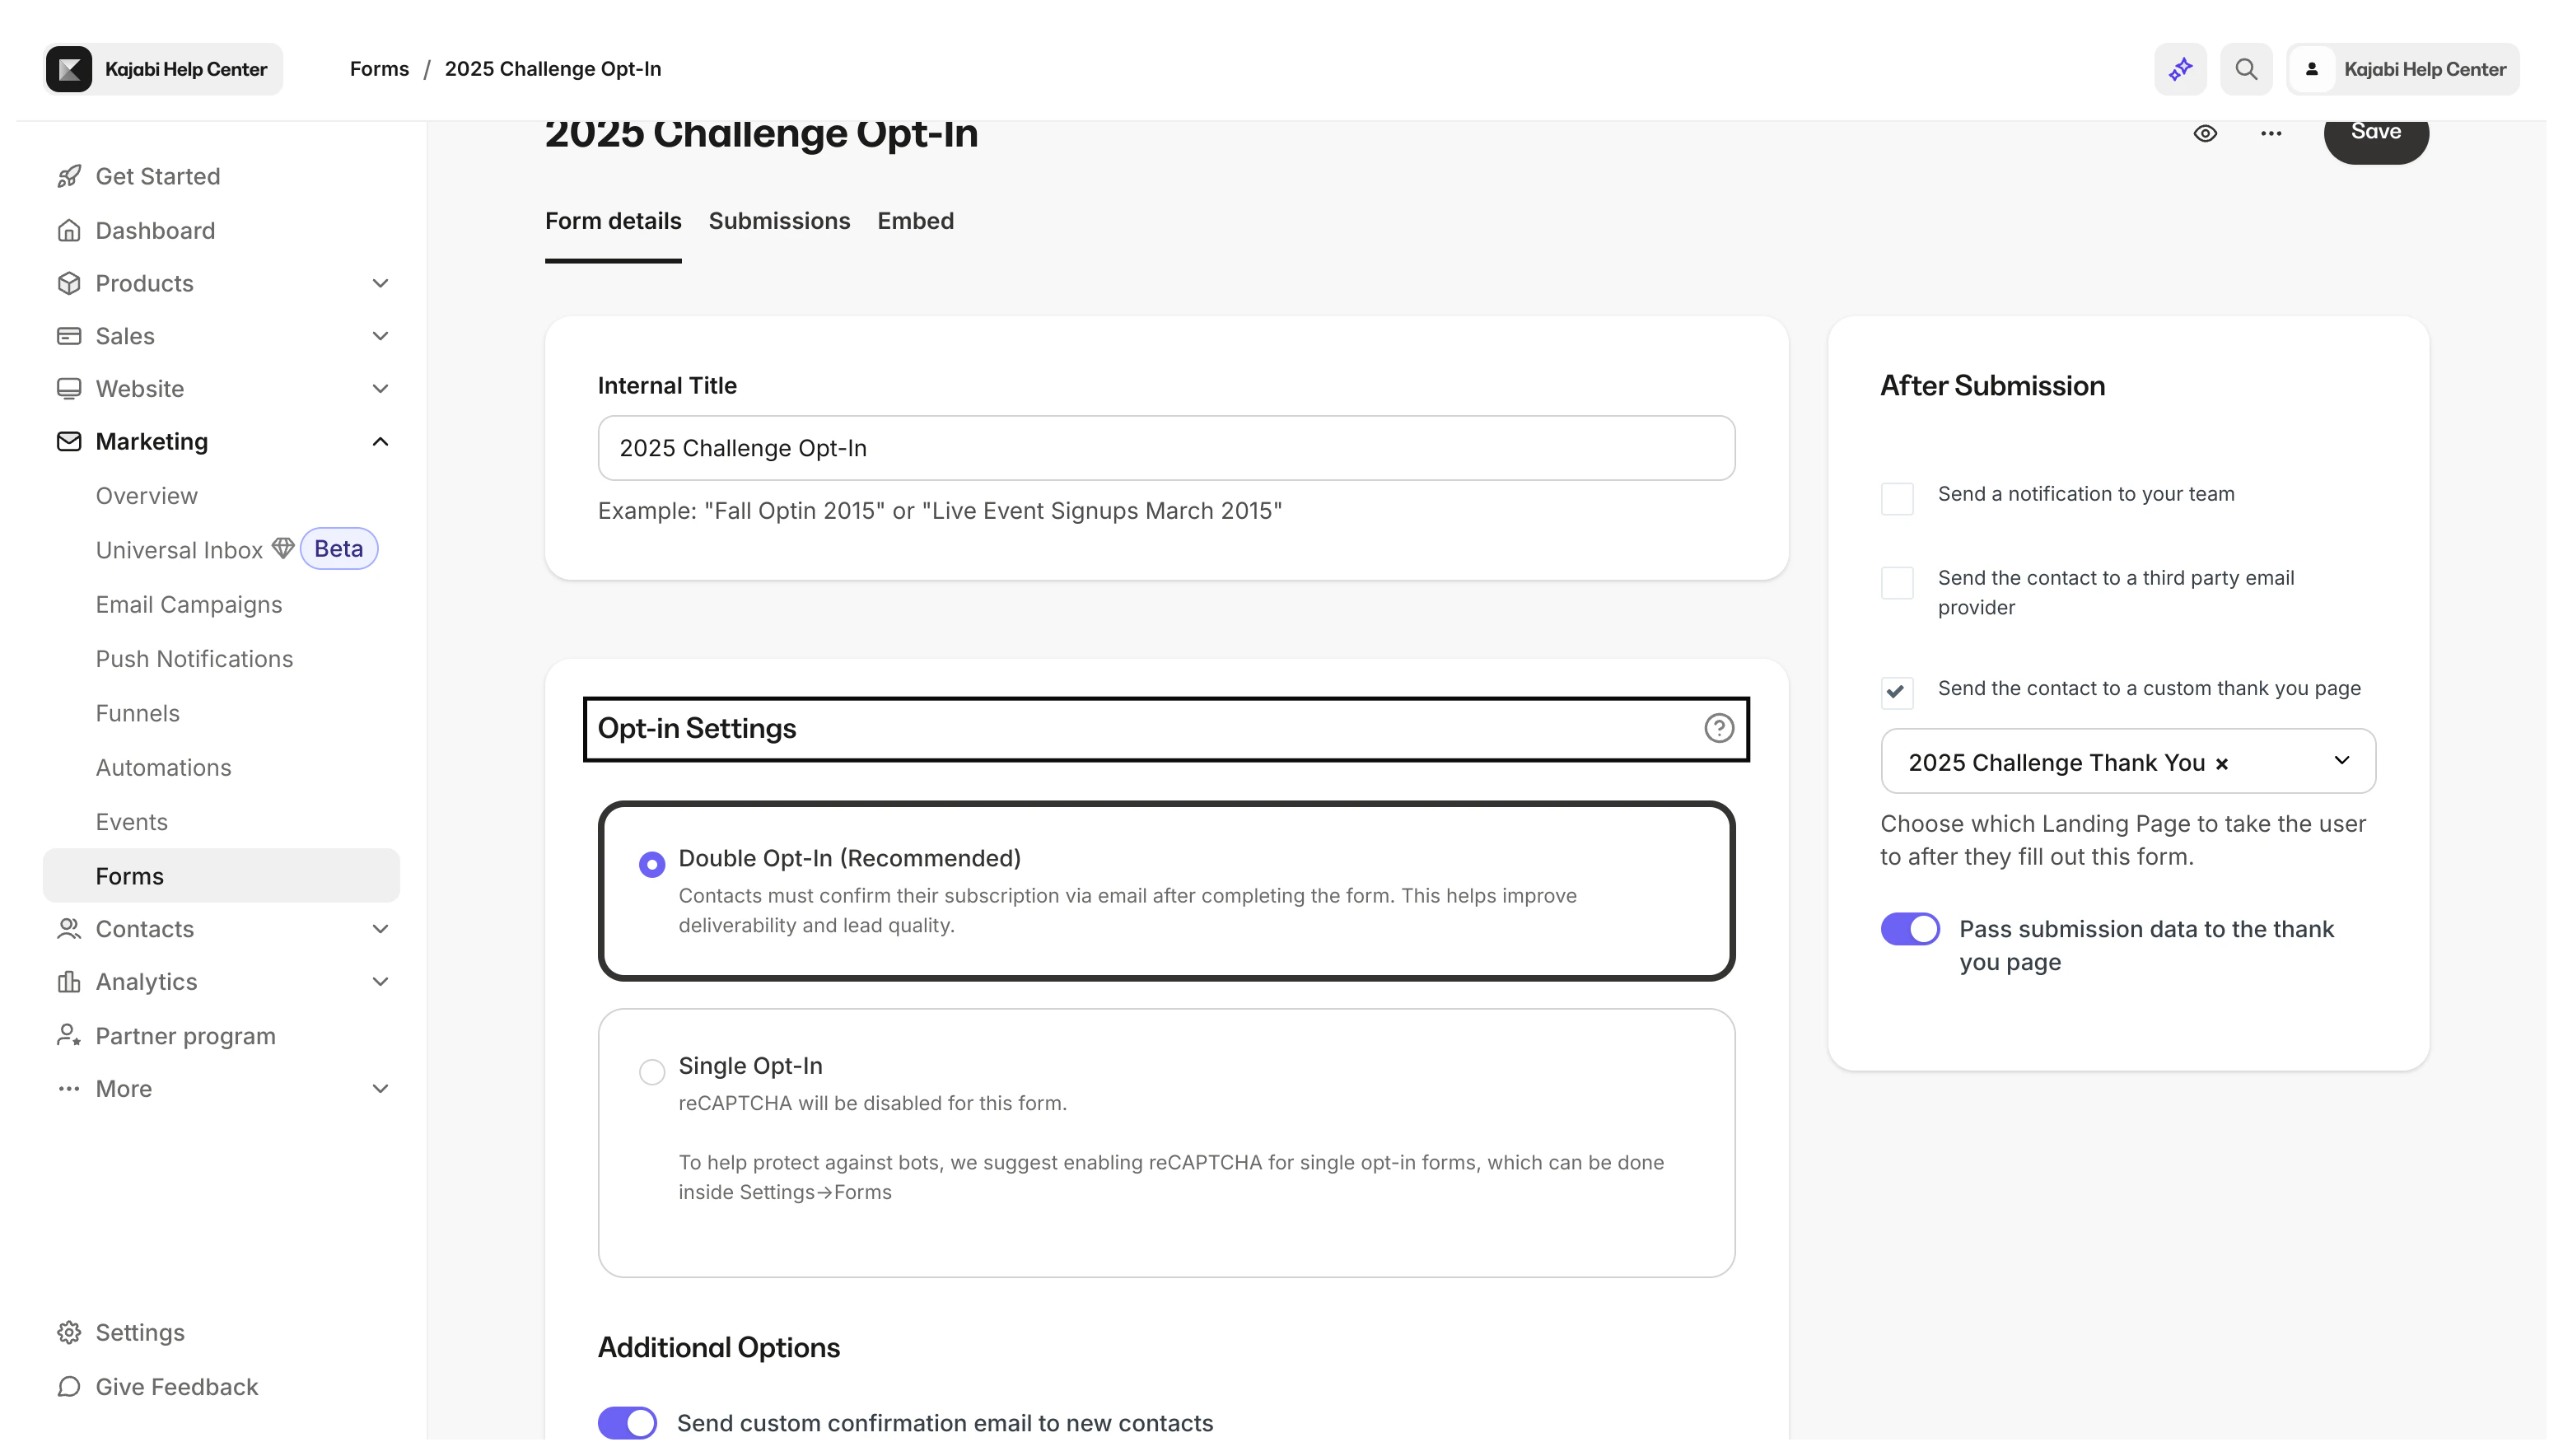
After Submission settings
You can enable certain actions after your Form is submitted, including sending a notification to your team, sending the contact to a third-party email provider, or sending the contact to a custom thank you page.
Learn more: Use After Submission settings in Forms
Add your Form to your Landing Pages to share it with your audience.
Learn how to customize and design text, colors, and messaging for your Form.
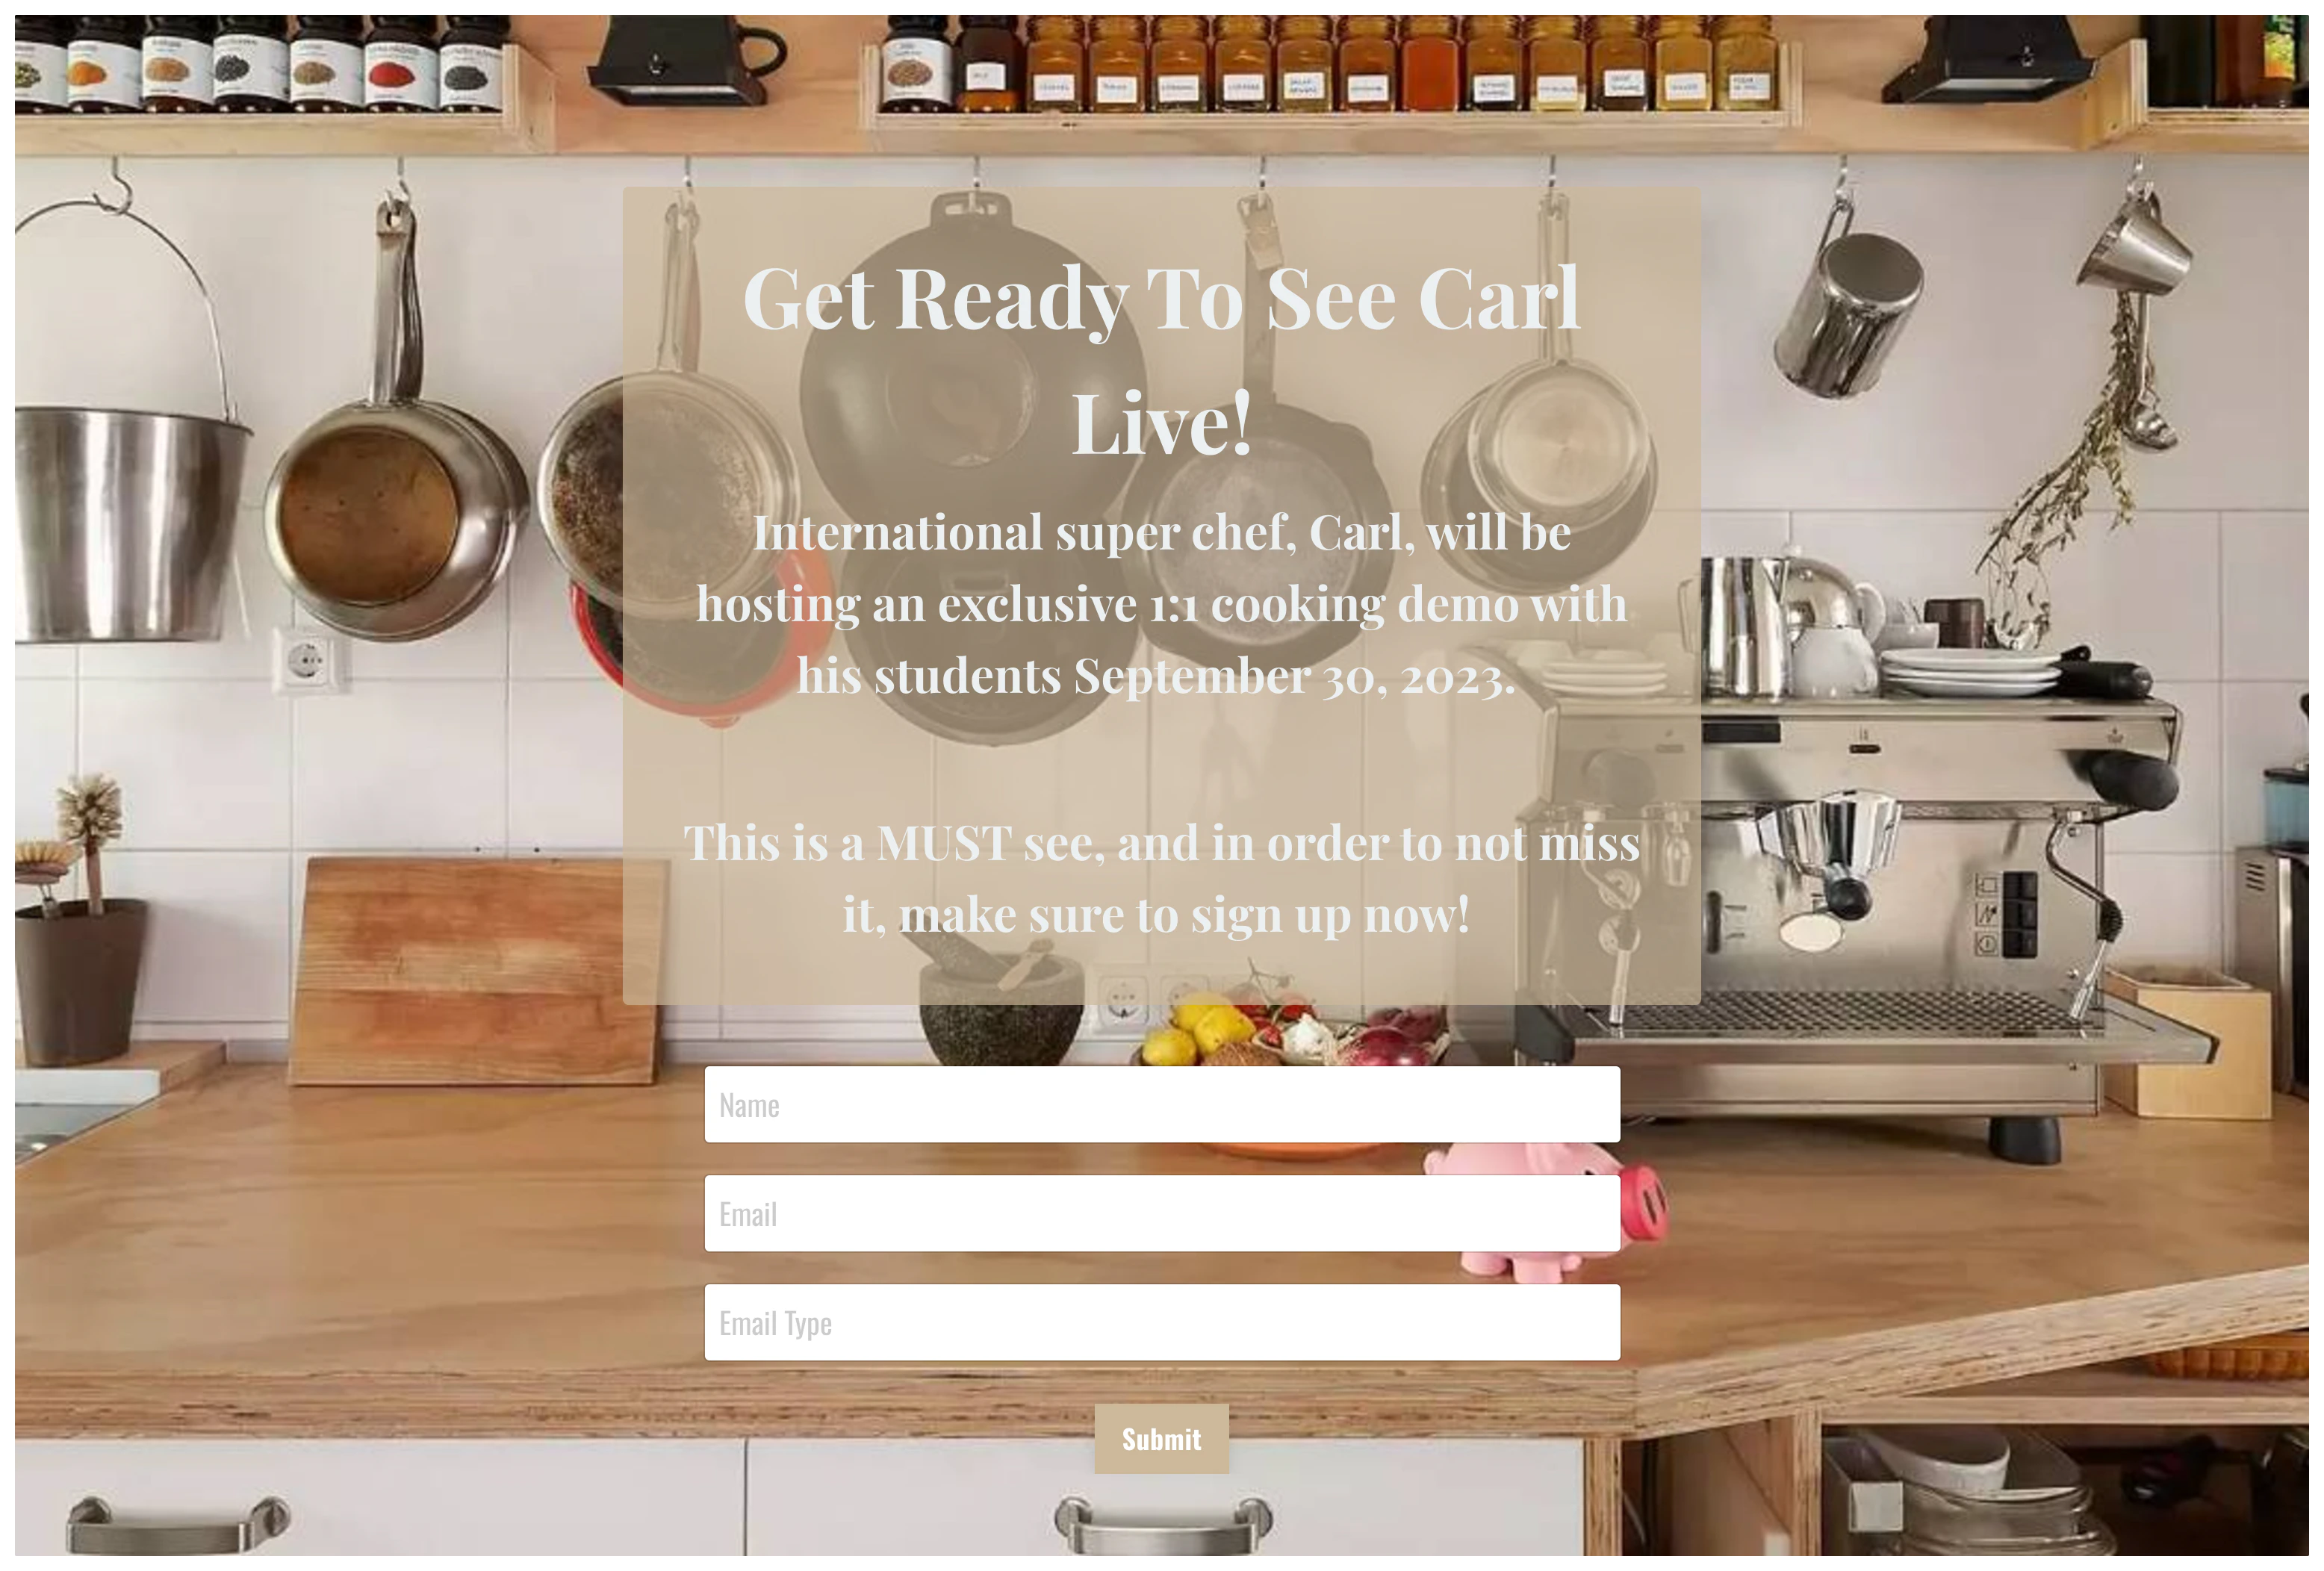
Sample Landing Page:
 After adding your Form to a Page, copy the page link to share on your social platforms, in email campaigns, in Products, and more.
Embed a Form onto an external webpage
To embed a Form on a separate site:
- Choose the Marketing tab.
- Select Forms.
- Select the Form you would like to embed.
- On the top menu under the form title, choose Embed.
- Then, click the copy icon next to Embed your form with one line of javascript.
- Paste the embed code into the source code of your external web page.
Embed Settings and Style
Customize the design and copy of your embedded Form. You can replace the default Title (i.e., “Join the Newsletter”) and Subtitle for your form when embedding it on an external page:
- Edit the Form Title, Subtitle, and Button Text.
- Choose the color for the button, background, and text.
- Save your changes before copying the embed code.
After customizing the form Settings, you can select the form Style.
Style determines how the embedded form will display on the web page:
- Inline embeds display within the web page.
- Pop-up forms display as a pop-up on the page.

