

Note:
Sending an Assessment to Google Sheets with Zapier does not require a paid Google or Zapier account.
Test an Assessment
Note:
Be sure to enable automatic grading for your Assessment to generate results.
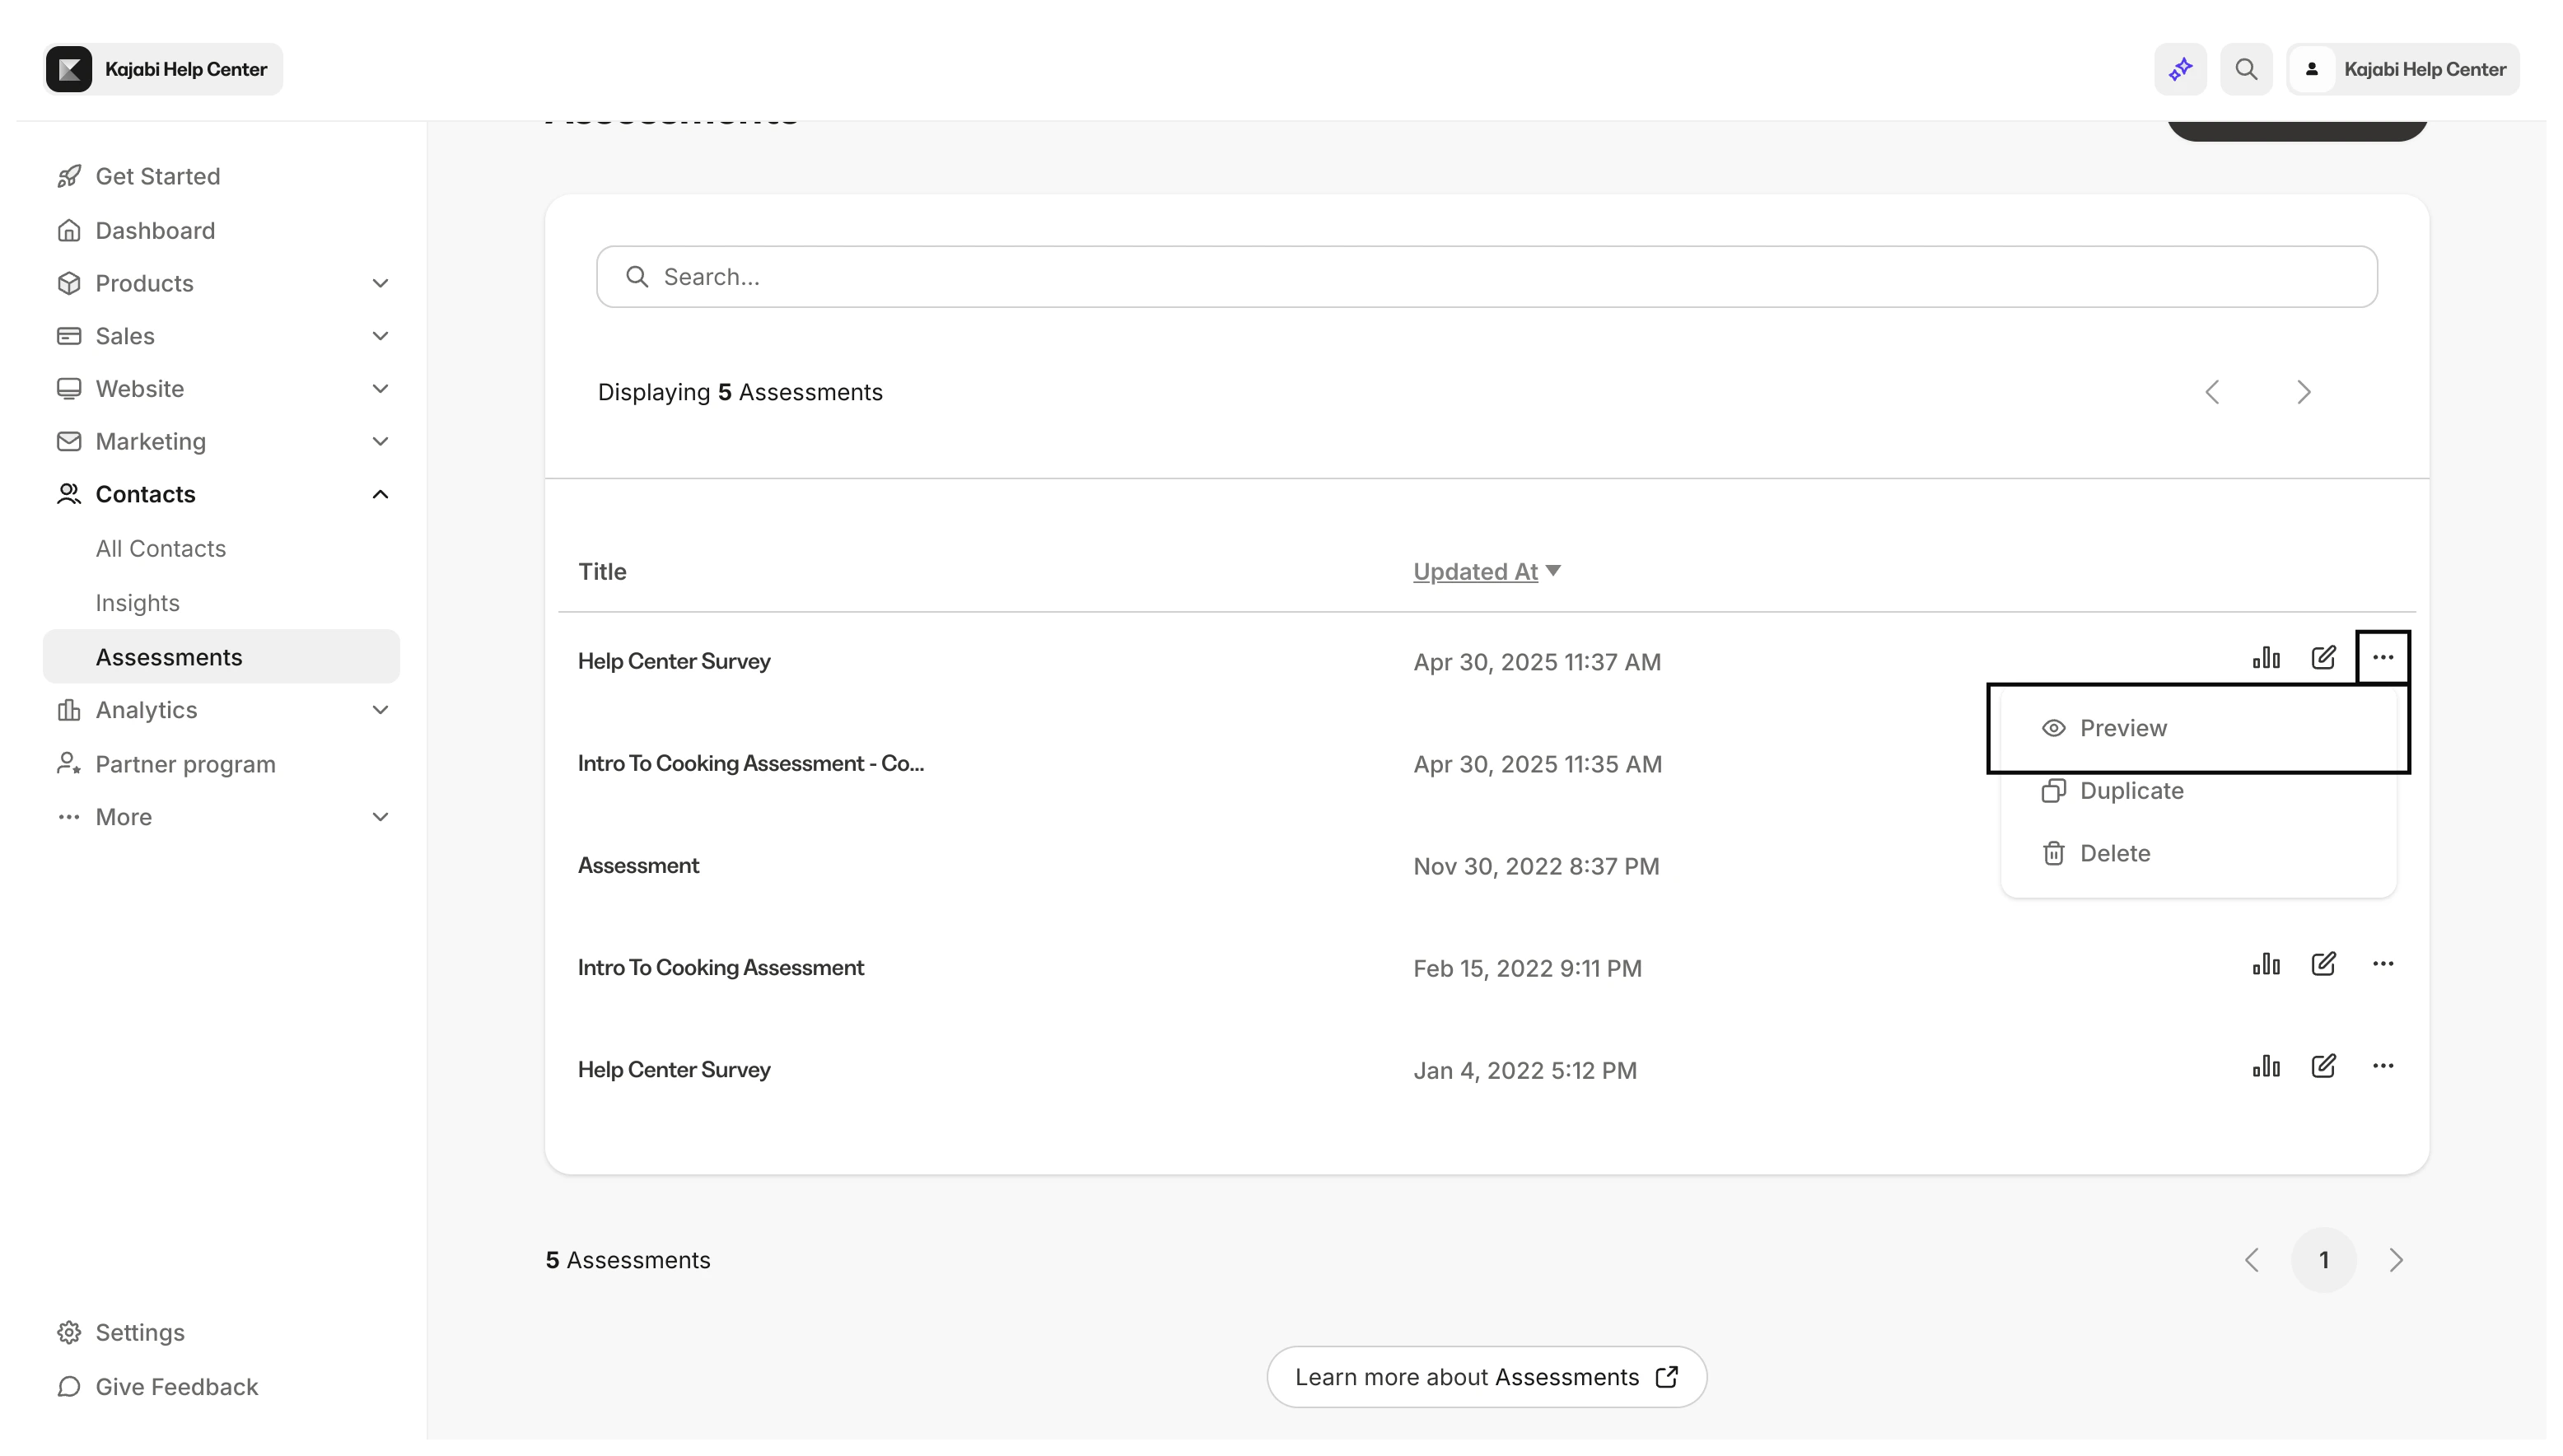
- Open the Contacts tab from the Dashboard.
- Select Assessments.
- Click the ellipsis … to the right of the Assessment you wish to test.
- Select the Preview icon.
- In Preview mode, complete and submit your Assessment. Your completed Assessment will create results for Zapier to collect when creating your Zap.
Create a Zap
Now that you have created test data, create your Zap using Zapier.Create the Trigger
- In your Zapier account, click Make a Zap.
- Choose Kajabi as your trigger app.
- Select Assessment Completed as your Trigger.
- Click Continue.
- Then, select your Kajabi account.

- After connecting your Account, click Continue.
- Select your Site Name and Assessment Title.
- Click Continue.
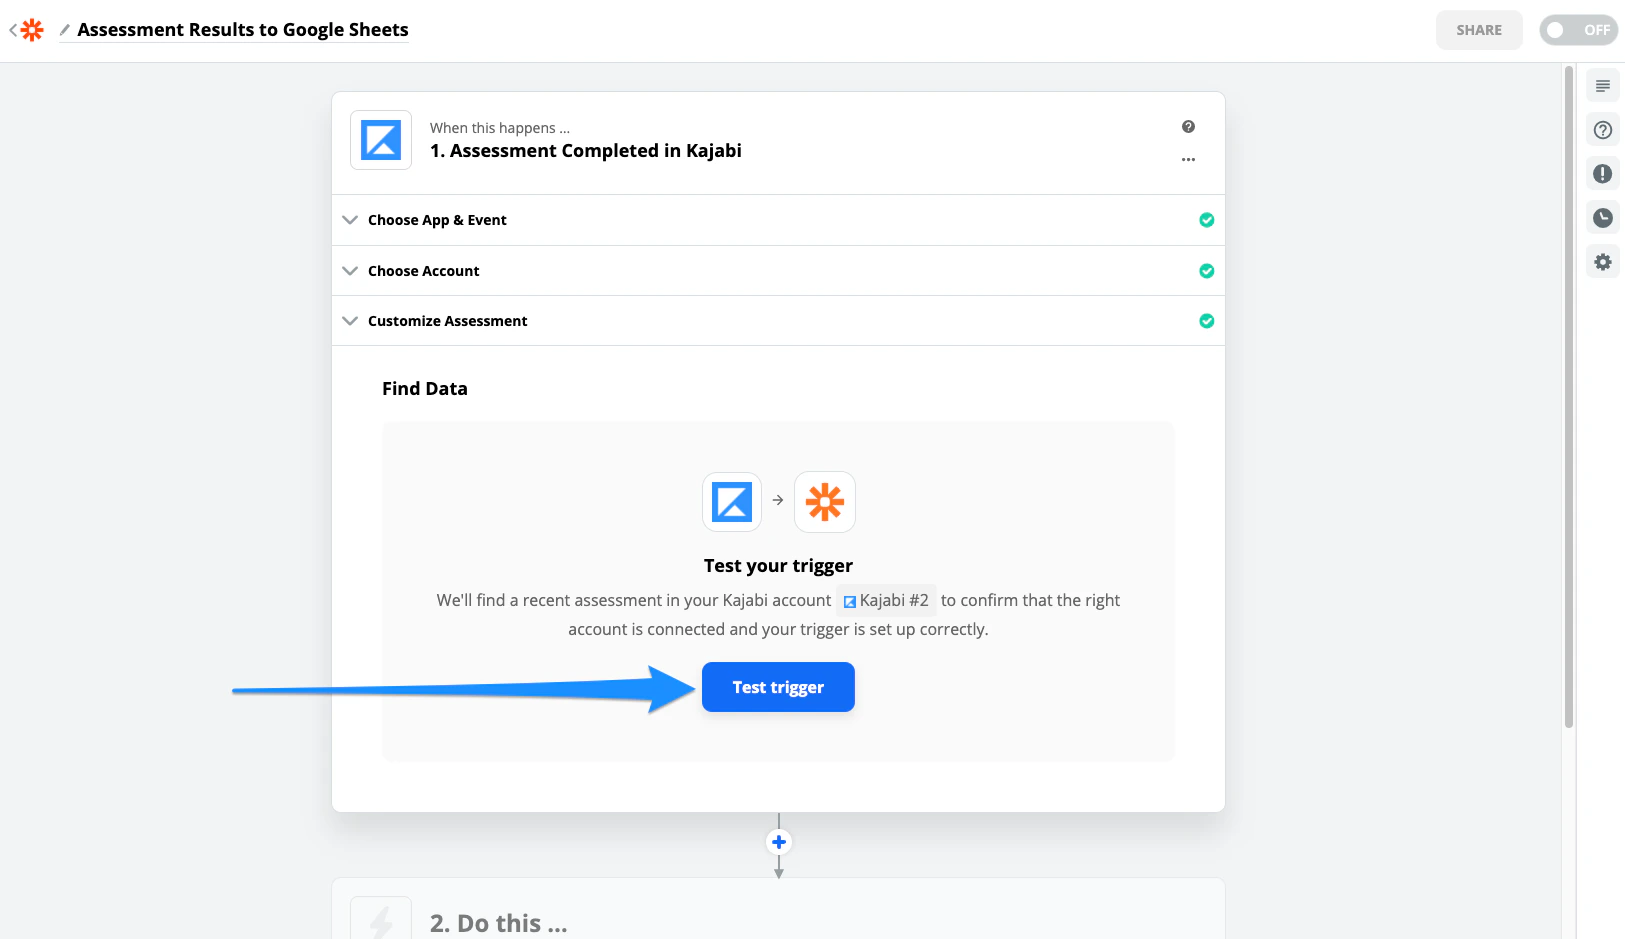
- Then, click Test trigger to find data:
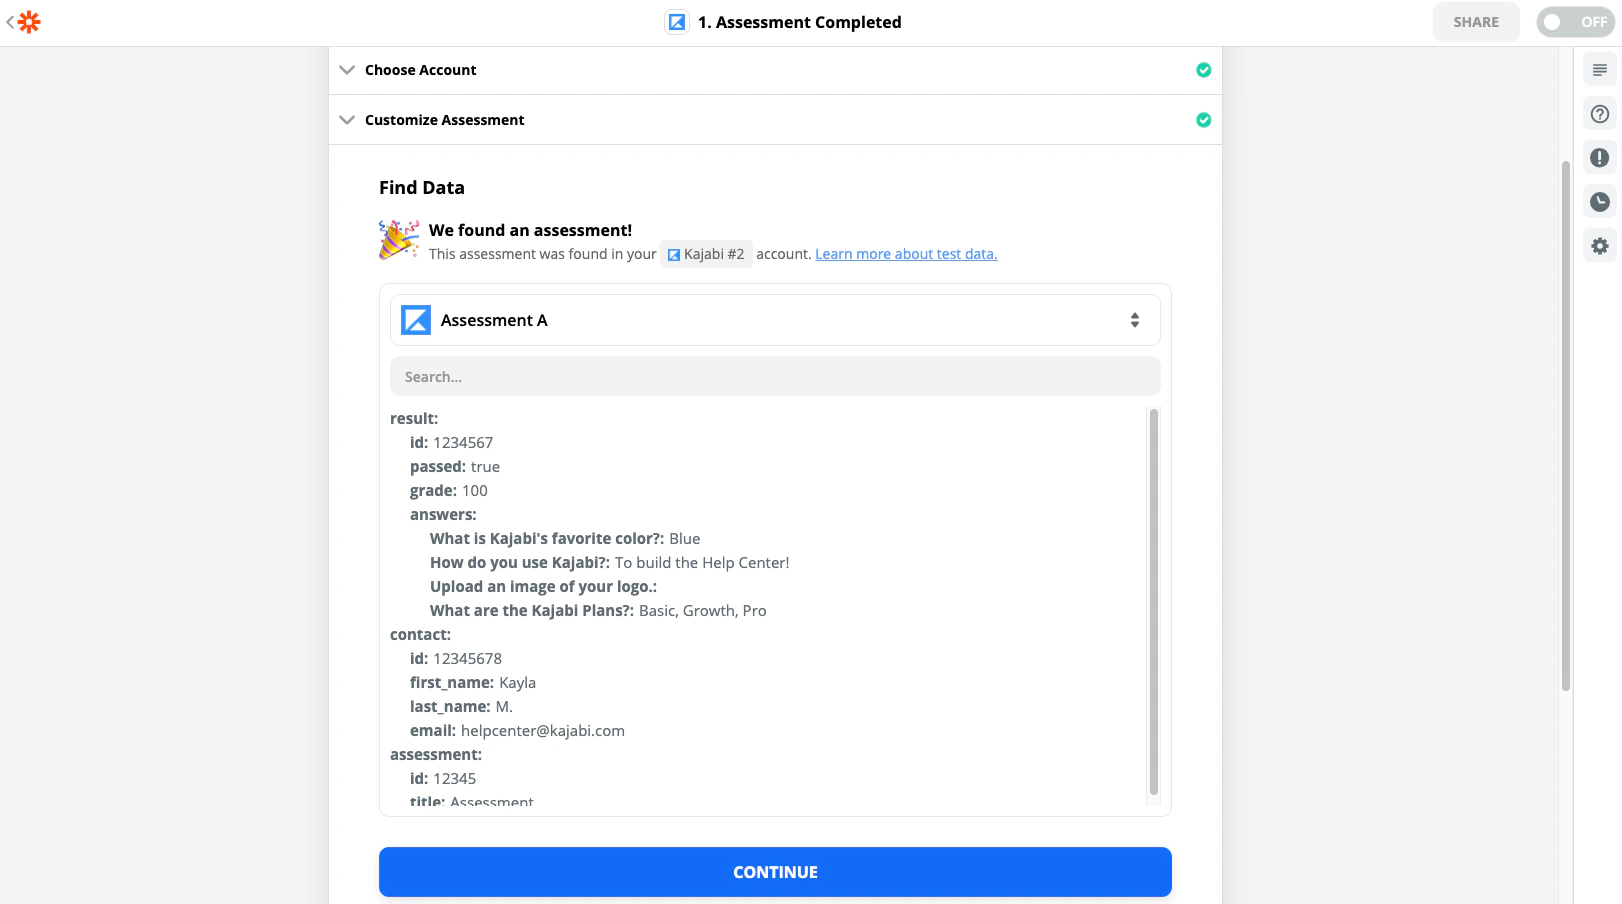
- Click Continue after Zapier locates data from your Assessment test:
Set up the Action
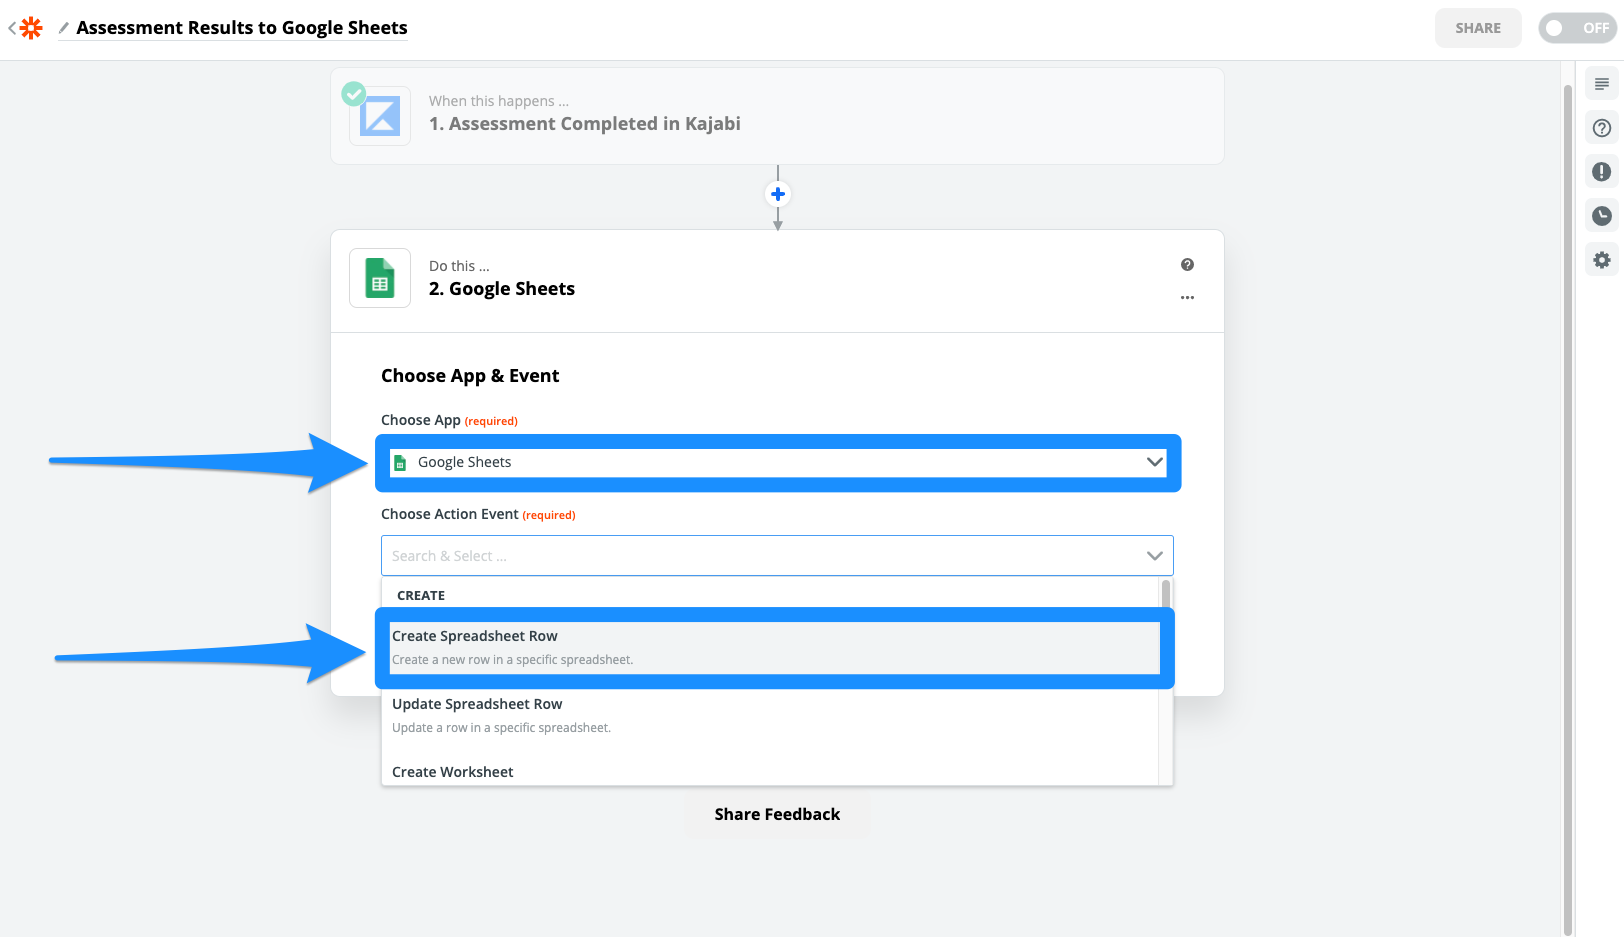
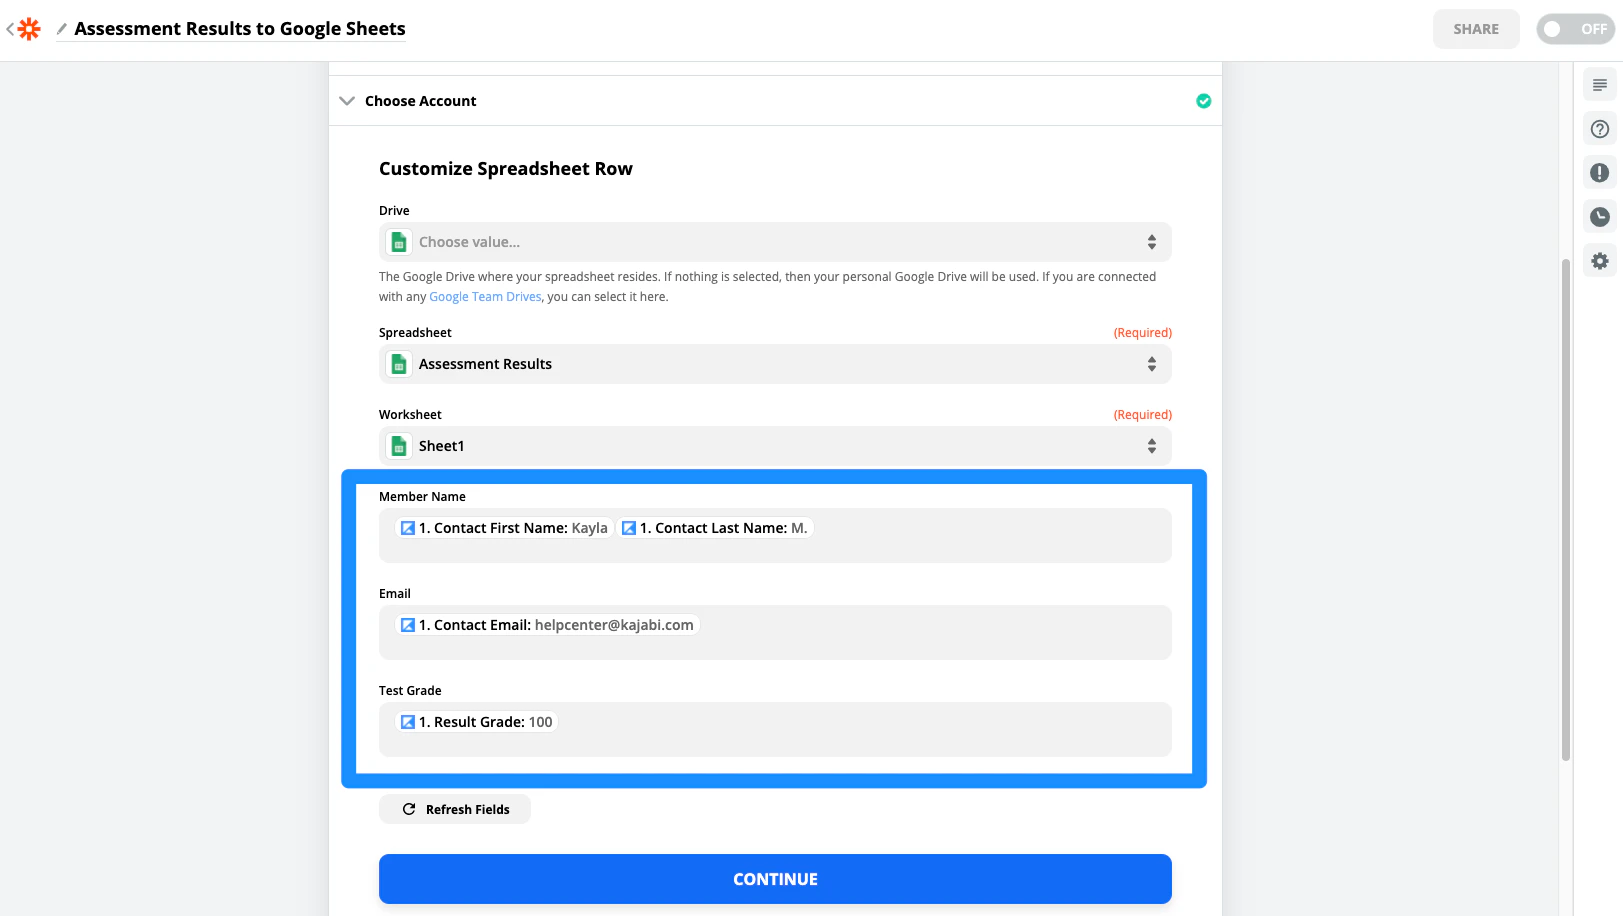
Before setting up the Action, create your Google Sheet. Learn how to work with Google Sheets in Zapier. In this example, we’ll send the Customer Name, Email, and Test Grade to a Google Sheet document named Assessment Results.- Choose Google Sheets as your Action App.
- Select Create Spreadsheet Row.
- Then, click Continue:
- Connect your Google Account and click Continue.
- Skip the Drive field.
- Select the Google Sheet title in the Spreadsheet field.
- Select the Worksheet from the dropdown. If you have not changed the worksheet name in your Google Sheet, it will be Sheet1.
- After selecting the Spreadsheet and Worksheet, Zapier will pull the header titles you created in your Google Sheet. Proceed by matching each header title to the appropriate Kajabi data:
- Click Continue.
- Test your Zap by clicking Test & Continue.
- Testing your Zap will send the sample data to your Google Sheet. Check your Google Sheet to ensure your Zap has been set up correctly.
Turn on the Zap
After checking your Google Sheet, give your Zap a name and turn it on to begin sending Assessment results to your Google Sheet.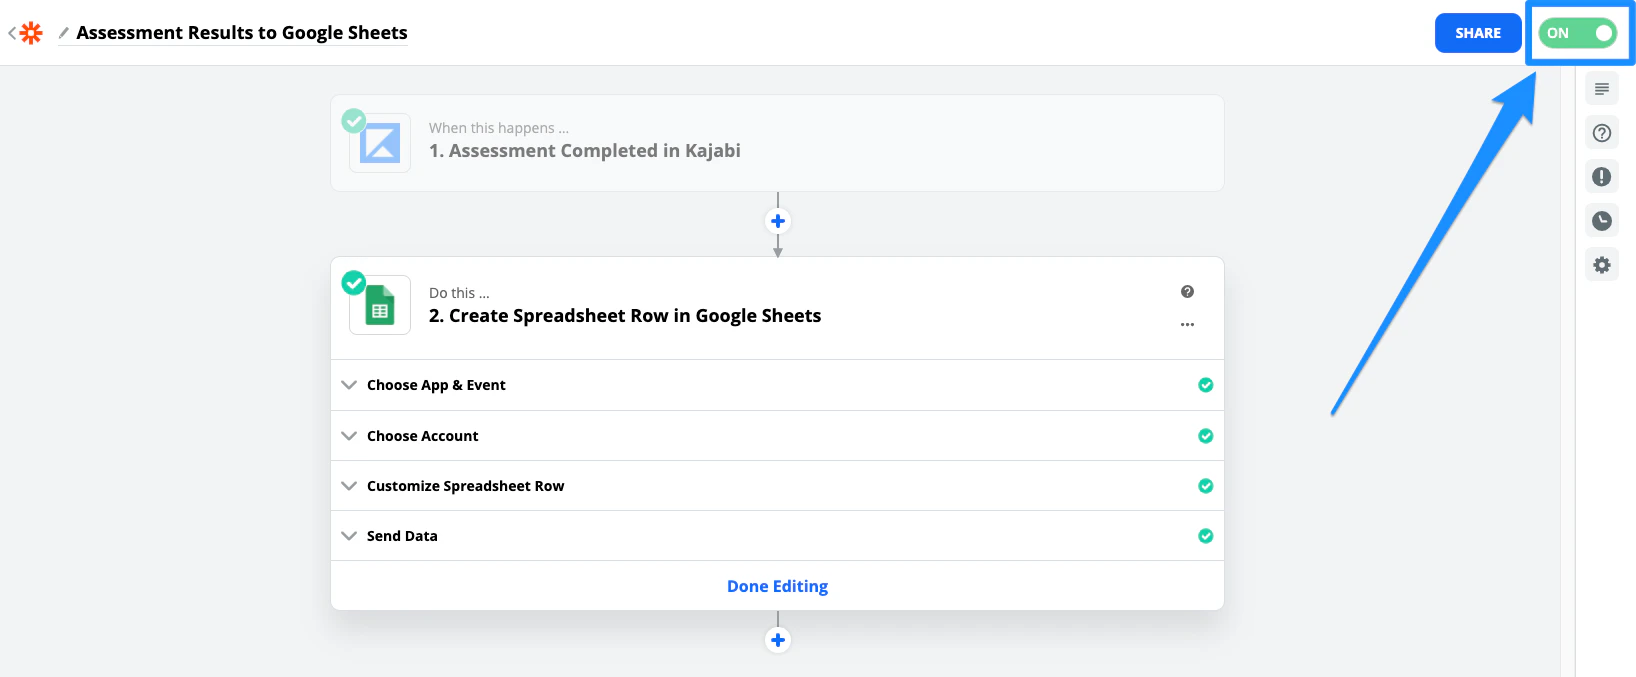
Note:
Assessments inside of Courses have been sunset. This feature may still appear in older accounts. Quizzes are available inside of Courses and Offers’ advanced functionality. Assessments can still be added to Web Pages.