Note:
Affiliates are only available with the Growth and Pro Plans. See kajabi.com/pricing for more details.
Key benefits
- Manage affiliate registrations and accounts
- Track conversions and form submissions
- Automatically calculate earnings
- Create detailed reports
Determine payout method
- Automatic Payouts reduce manual work by scheduling payments directly through PayPal.
- Manual Payouts give you full control over when and how affiliates are paid. Kajabi helps you track and batch Due commissions, but you send the money outside Kajabi (for example, PayPal, Wise, or cash).
Set up a payout schedule
- Go to Transactions > Payouts to determine your preferred method of paying out your affiliates
- Create a payout schedule to keep transactions organized and set reminders to pay commissions
Enable commissions
- Enable Affiliate Commission for your Offers
Create Share Links or Affiliate Coupons
- Create Share Links to track referrals from affiliate traffic
- Create Affiliate Coupons to credit affiliates when their personalized code is used
Affiliate Dashboard
The Affiliate Dashboard shows an overview of how your affiliates are performing.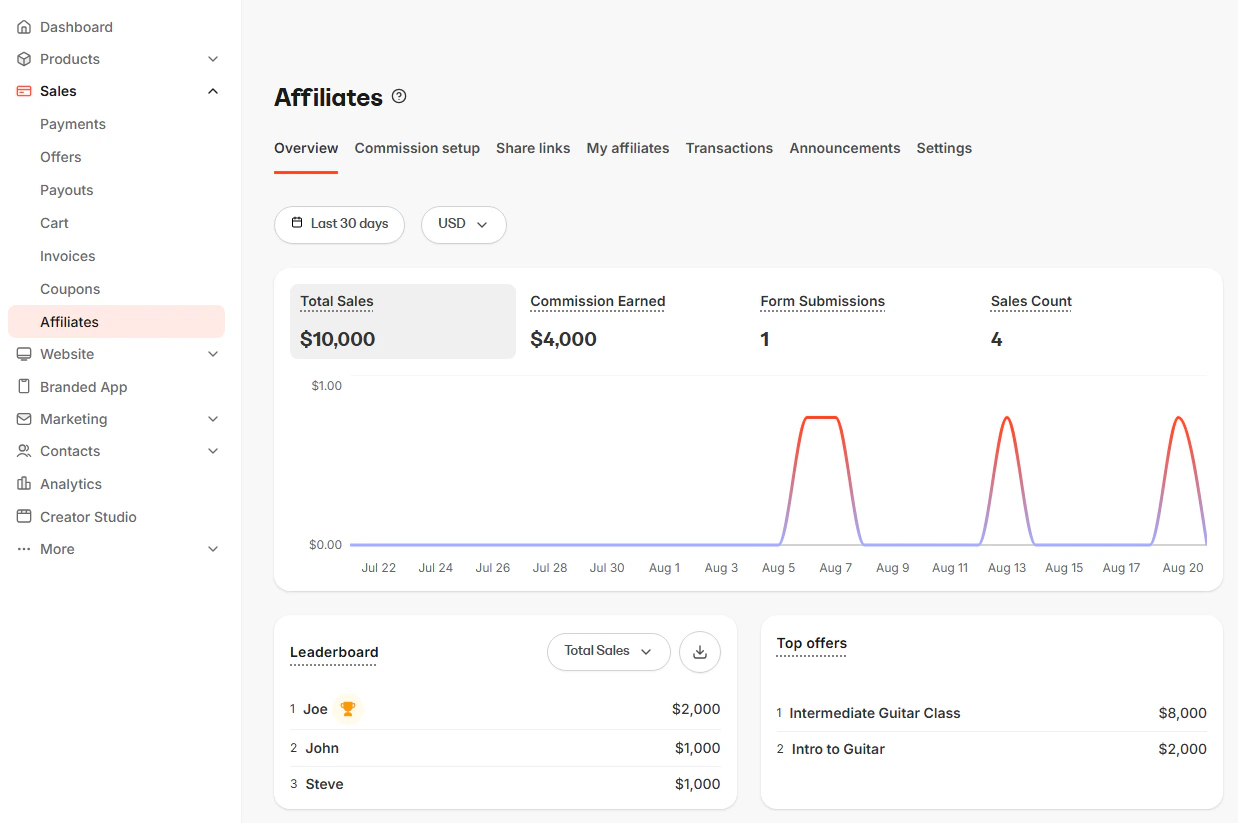
- Total Sales: The total value of sales attributed to your affiliates, excluding refunds.
- Commission Earned: The total amount of commissions earned by your affiliates, excluding refunds.
- Form Submissions: The count of form submissions attributed to your affiliates.
- Sales Count: The count of both free and paid sales attributed to your affiliate.
- Leaderboard: A ranked list of your top affiliates.
- Top offers: A ranked list of your top-selling affiliate-related Offers
Commission setup
Set up your affiliate’s commission percentage or amount for each Offer when it is purchased with their unique Share Link or personalized Coupon Code. Learn how to activate Affiliate Commission.Share Links and Affiliate Coupons
Share Links
A Share Link is simply a URL that can lead to any site or page (even a site outside Kajabi). When a user clicks on a Share Link a cookie is placed in their browser based upon the referral conversion window you have set in your Affiliate settings. This cookie will attribute the visitor’s form submissions and purchases to the appropriate Affiliate. Create Share Links that lead to any URL, Landing Page, or Checkout Page. As long as the user completes a purchase of an Offer on Kajabi using the same browser where they originally clicked the Share Link, the sale will be credited to the Affiliate User.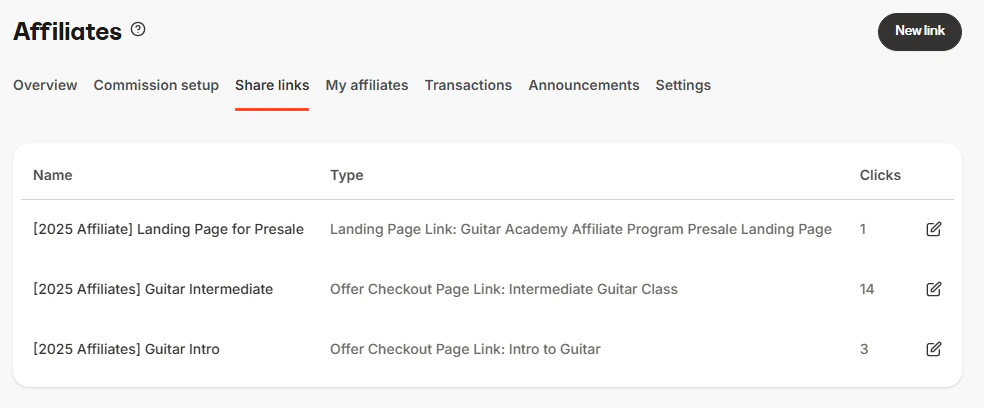
Affiliate Coupons
Unlike Share Links, when an Affiliate Coupon code is used to purchase an Offer from your site, the affiliate is credited with the transaction without needing to click a Share Link first. As an administrator, you can create Discounts that generate personalized coupon codes for each affiliate.Affiliate Users
Create and manage your Affiliate Users in the Users section of your Affiliate Dashboard. Click on an Affiliate User’s Name to:- Review their individual affiliate statistics.
- Override their Affiliate Percentage.
- View which Share Links are available to each affiliate.
- View and update your affiliates’ personalized Coupon Code.
- Manually add an affiliate transaction.
- Export their form submissions, which contain the following:
- Form Title
- Form ID
- Submission Date
- Customer Name
- Customer ID
- Customer Email
- Affiliate ID
- Affiliate Name
- Affiliate Email
Transactions
View all transactions credited to your Affiliate Users in Transactions.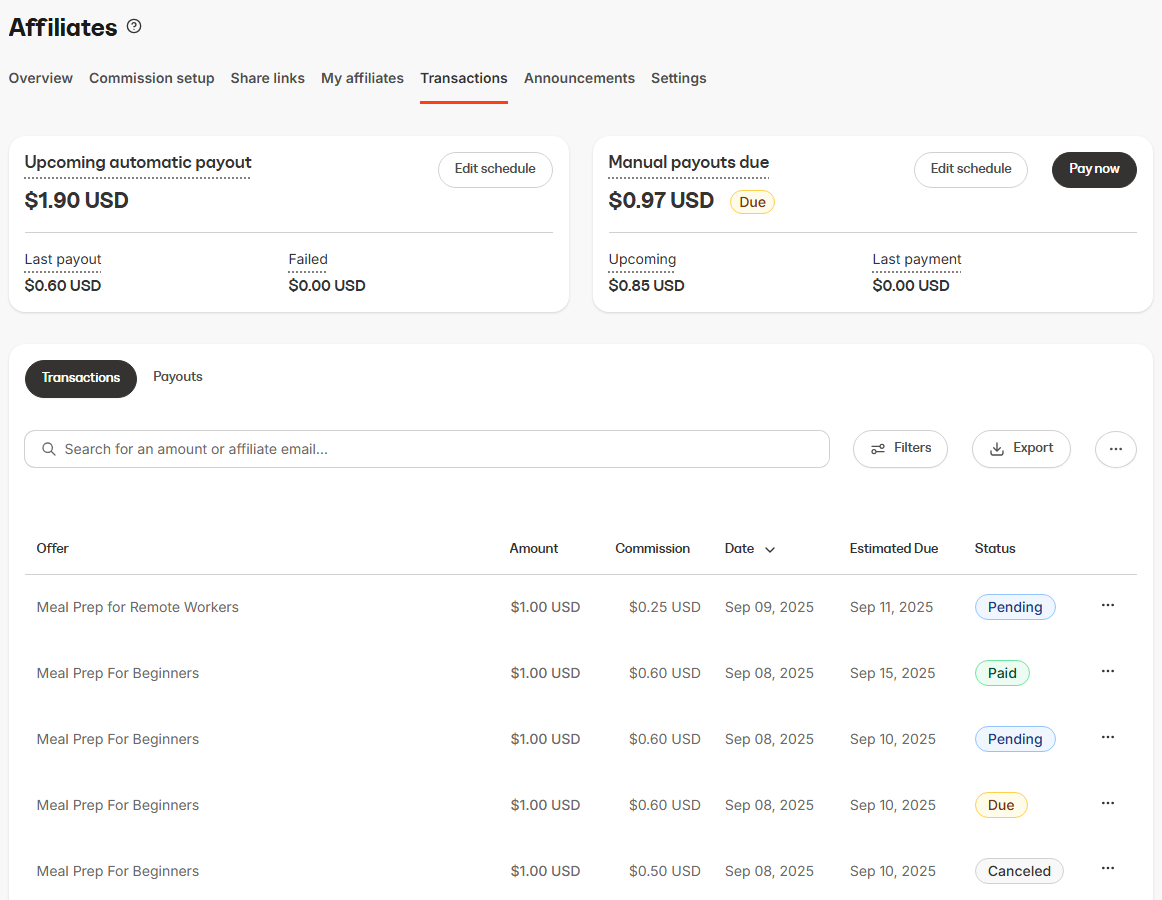
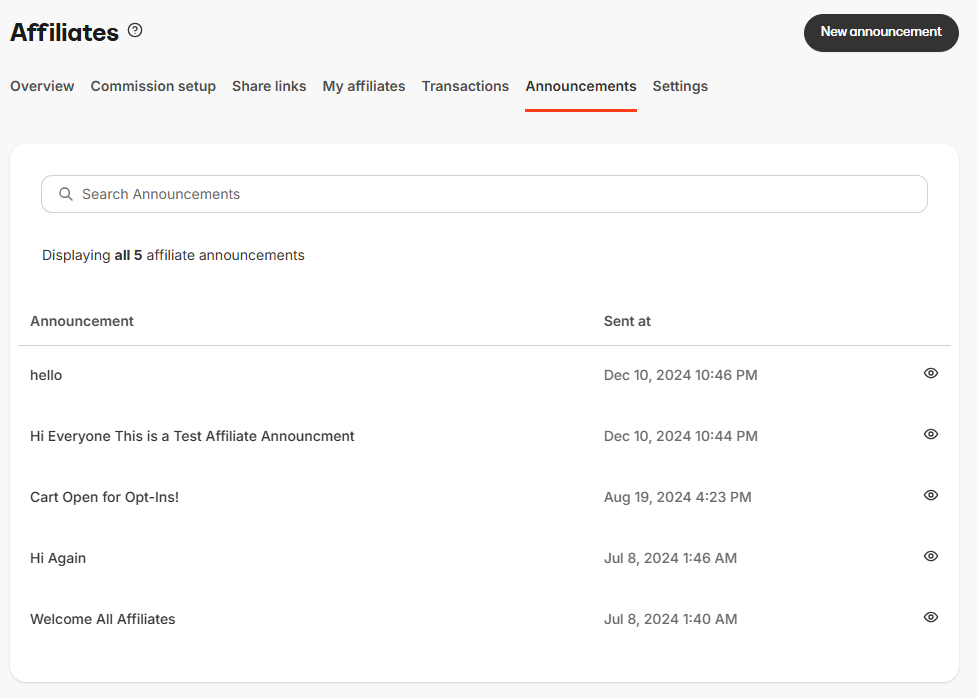
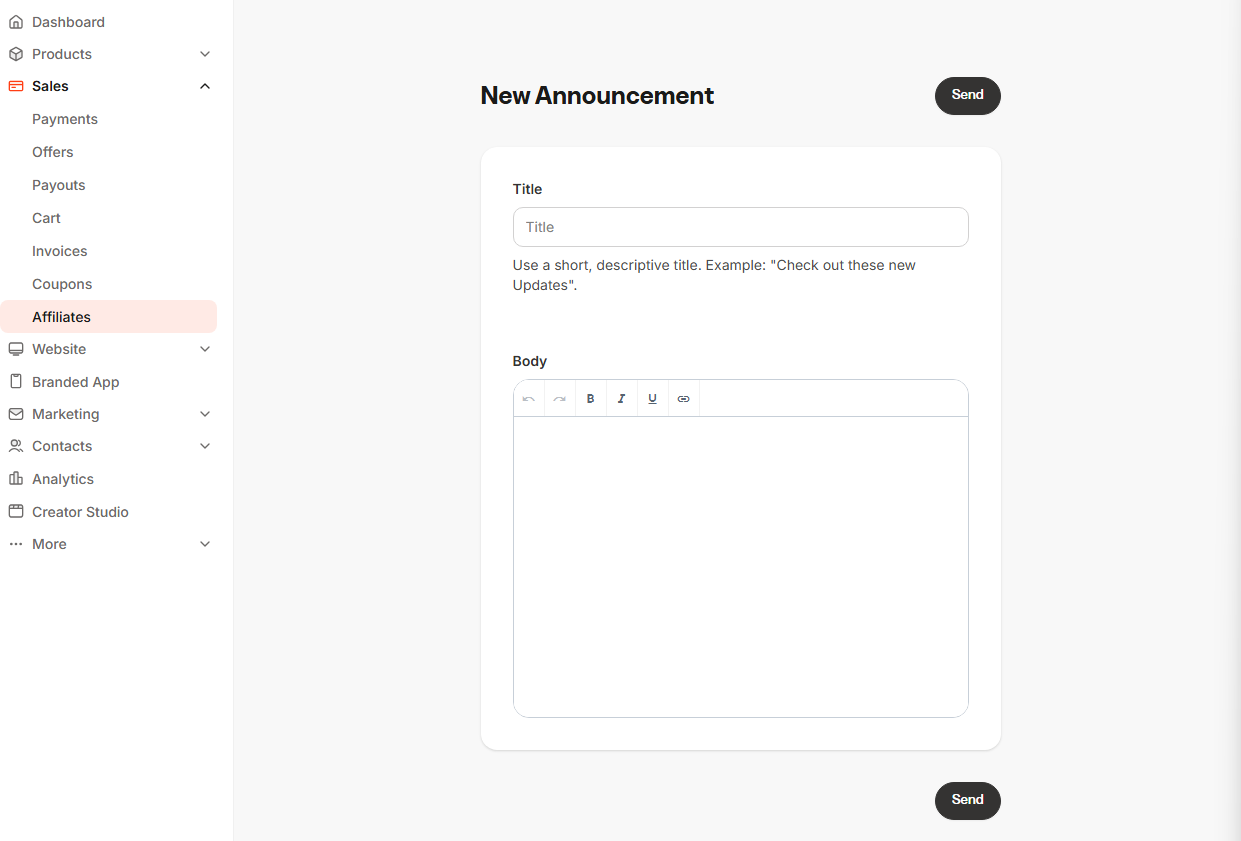
Announcements
Settings
Affiliate Settings in the top menu of your Affiliates page lets you customize the appearance of your Affiliate Dashboards and configure key elements of your affiliate program. Use Memos to convey useful information that your affiliates will see when they sign in. Use Resources to share files and links (e.g., promo creatives, swipe copy, calendars). A maximum of 10 resources can be added at any given time. Preview the dashboard to see the view your affiliates have when they log into their Portal.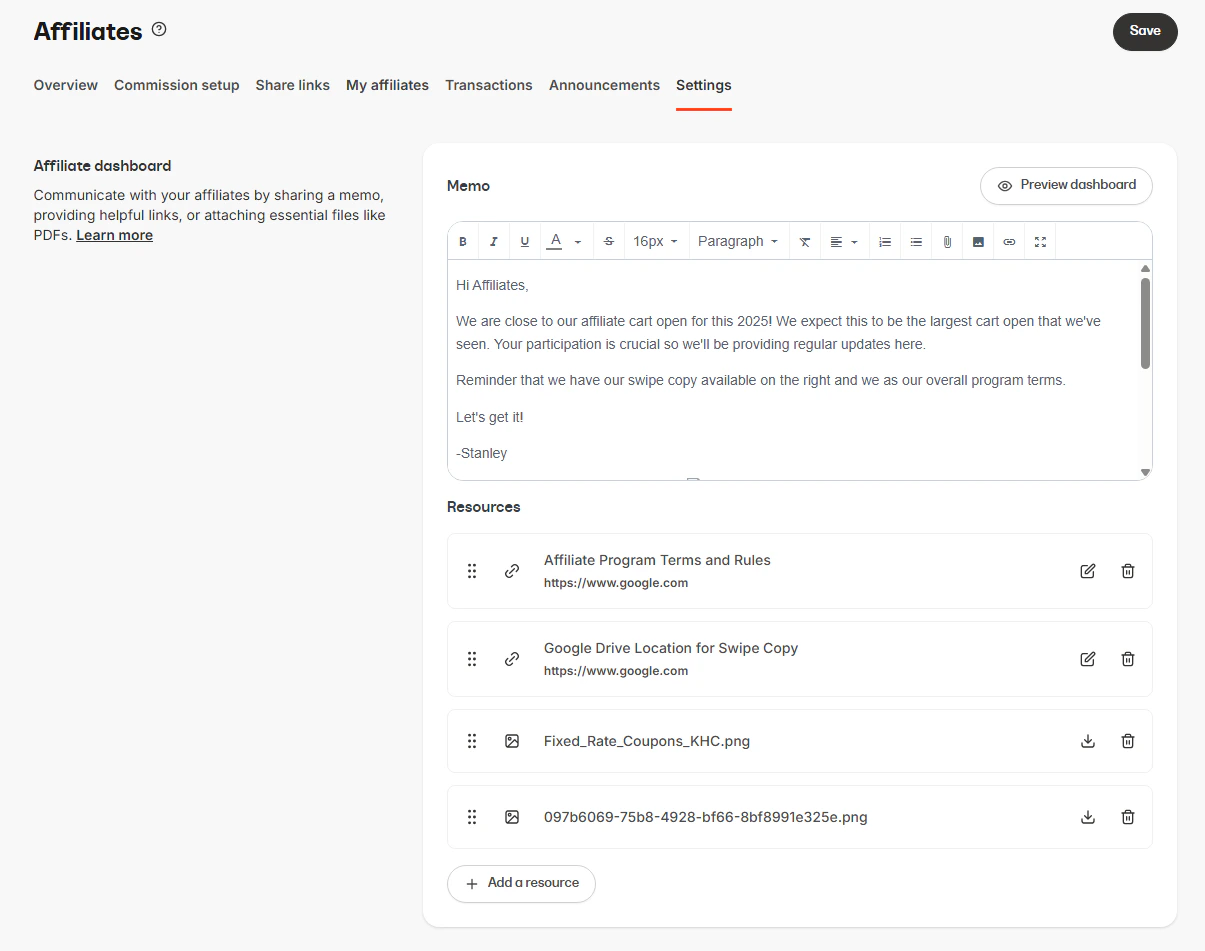
Note:
If Registrations are disabled, this page will prompt your prospective affiliate to send an email to the Support email listed in your Site Details.
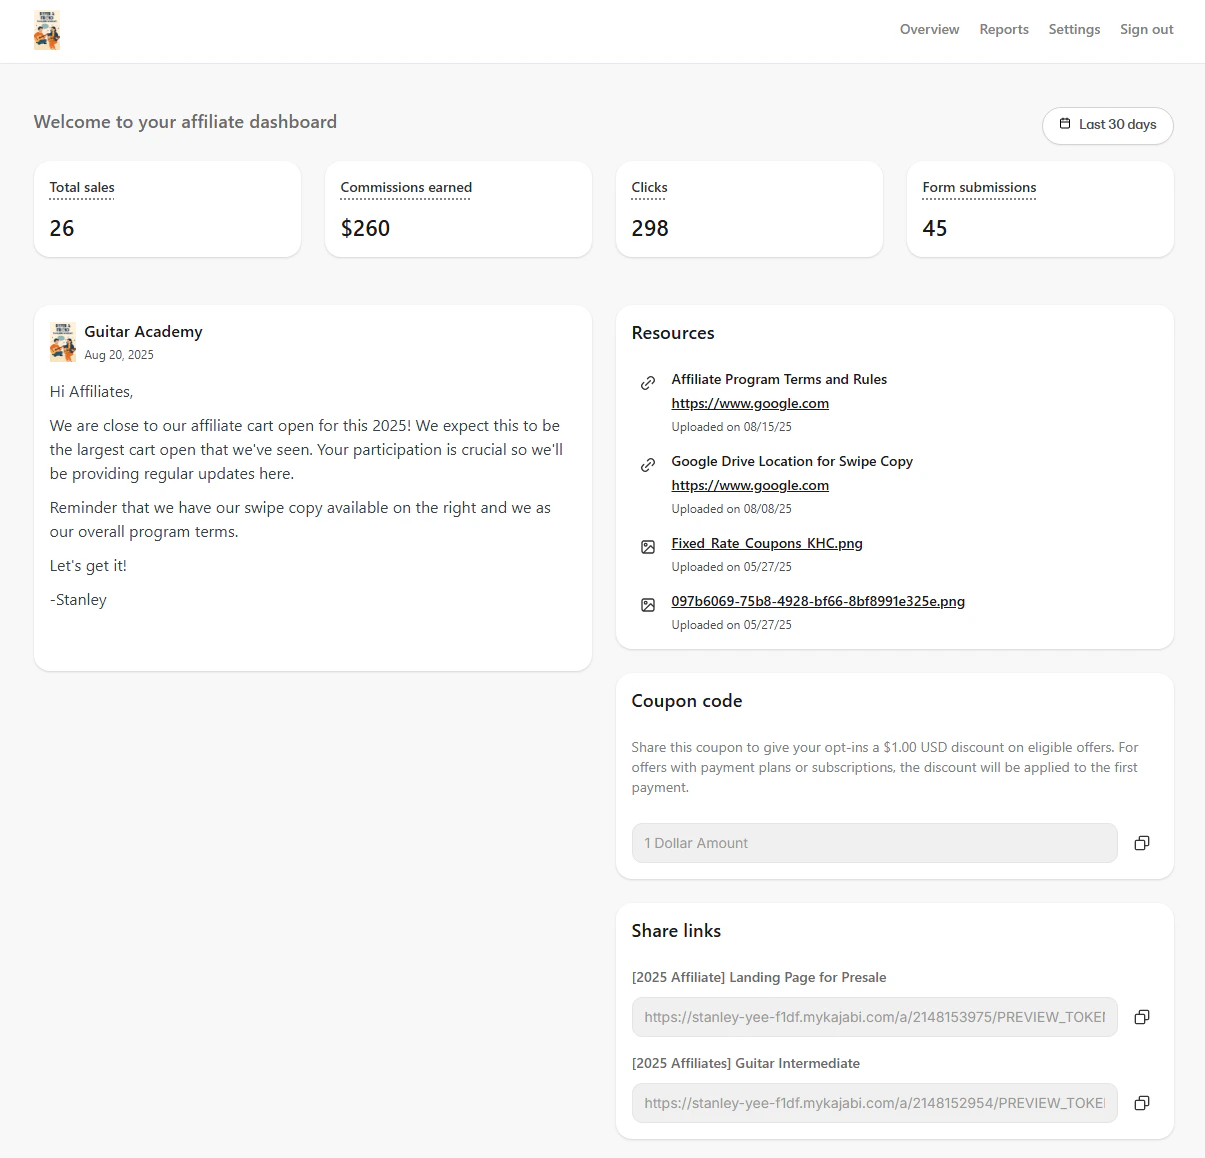
Affiliate Portal
After an affiliate is added to your site manually or through registration, they receive an Affiliate User welcome email containing a link to set up their affiliate account and instructions on how to access their Affiliate Portal.Affiliate Portal features
- View their Stats within a specified time range:
- Total Sales
- Commissions earned
- Clicks
- Form submissions
- View the latest updates of your affiliate program in the Memo.
- Download or access Resources you’ve uploaded in your Affiliate Settings.
- Access their Share Links or their Personalized Coupon Code.
- Export their Purchase Summary Report.
- Change their Settings to update their profile, email preferences, and change their password.